The short answer: a true 600W-class LED grow light covers a 4x4 foot canopy comfortably for flowering plants, and the best picks right now are built around Samsung LM301H or LM301B diodes with a Meanwell driver, drawing somewhere between 550 and 650 actual watts at the wall. Everything else on the spec sheet matters a lot less than those two things. If a light is marketed as '600W' but only draws 73W at the wall (like the Spider Farmer SF600, which lists a true draw of 73.79W ±5% at AC120V), it is not a 600W grow light in any meaningful sense. It is a 75W grow light with a misleading name. That distinction alone will save you from the most common and expensive mistake in this category.
Best 600 Watt LED Grow Light: Buyer Guide and Setup Tips

Marcus Rutherford
3 Apr 2026
How to choose the best 600W LED grow light
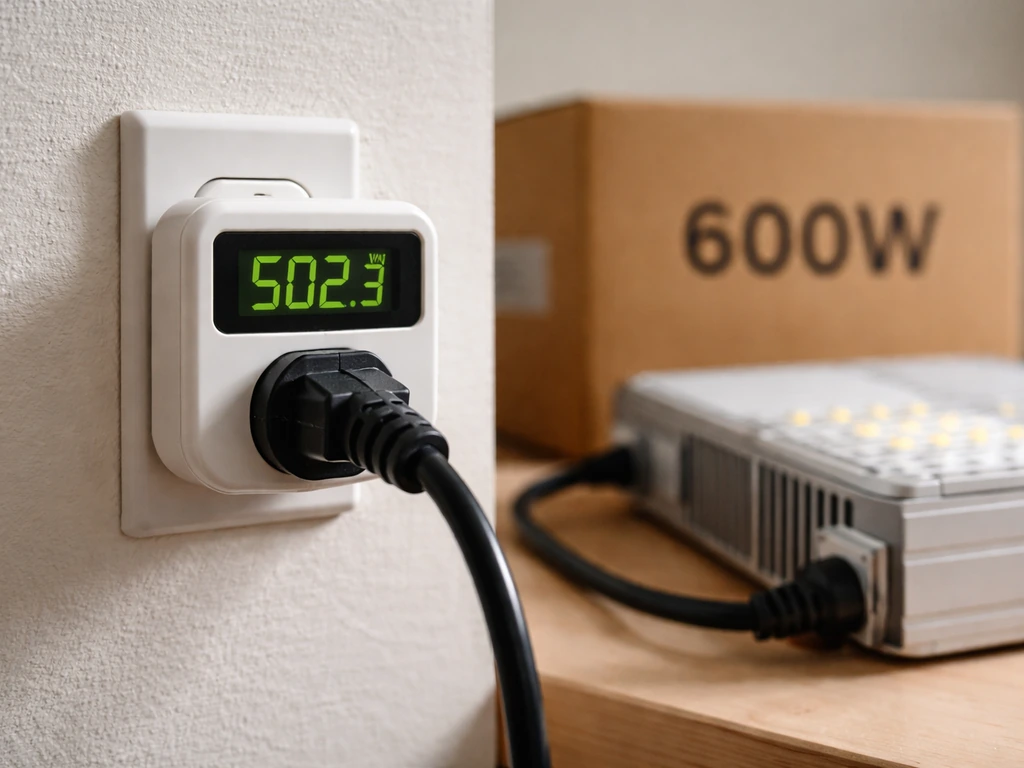
The single most important number is actual power draw, measured in watts at the wall, not the marketing wattage stamped on the box. A fixture labeled '600W' could realistically draw anywhere from 75W to 650W depending on the brand and how loosely they use the term. Before you compare anything else, find the spec sheet or product page and look for 'actual draw,' 'true wattage,' or 'input power.' If that number is not listed, treat it as a red flag.
Once you have the real wattage, the next things that matter in order are: photon efficacy (measured in µmol/J), coverage footprint at a usable PPFD level, spectrum quality (full-spectrum white vs narrowband purple-ish blurple vs bar-style), driver quality, dimming capability, and build quality. Heat management follows naturally from driver and board design, so it is not really a separate checklist item. Let me walk through each.
- True power draw: Look for a spec listed as 'actual draw' or 'input power' in watts. This is what your electricity bill reflects and what your plants actually receive light from.
- Photon efficacy: Anything above 2.5 µmol/J is competitive in 2026. Premium fixtures from HLG, Spider Farmer SE series, and Mars Hydro FC range hit 2.7 to 2.9 µmol/J.
- Coverage footprint: Verify the claimed coverage area is specified at a real PPFD threshold (like 600 µmol/m²/s for veg or 900+ for flower), not just 'max coverage.'
- Spectrum: Full-spectrum white-light LEDs outperform blurple for most crops. Look for a warm white and deep red blend rather than just blue and red bands.
- Driver: Meanwell drivers are the industry benchmark. Inventronics is also solid. Avoid lights with unnamed or generic drivers.
- Dimming: A 0-10V or knob dimmer lets you reduce intensity during seedling/clone stages and fine-tune DLI without raising the light.
- Warranty: 3 years is the minimum acceptable. Premium brands like HLG and Spider Farmer offer 5 years on select products.
Best 600W LED grow light picks by grow space and plant type
Rather than list every fixture on the market, I want to match specific scenarios to specific types of lights. If you are shopping in the UK, the best 600W LED grow light options available in the UK have their own availability and warranty nuances worth checking before you buy.
4x4 tent, flowering crops (cannabis, tomatoes, peppers)
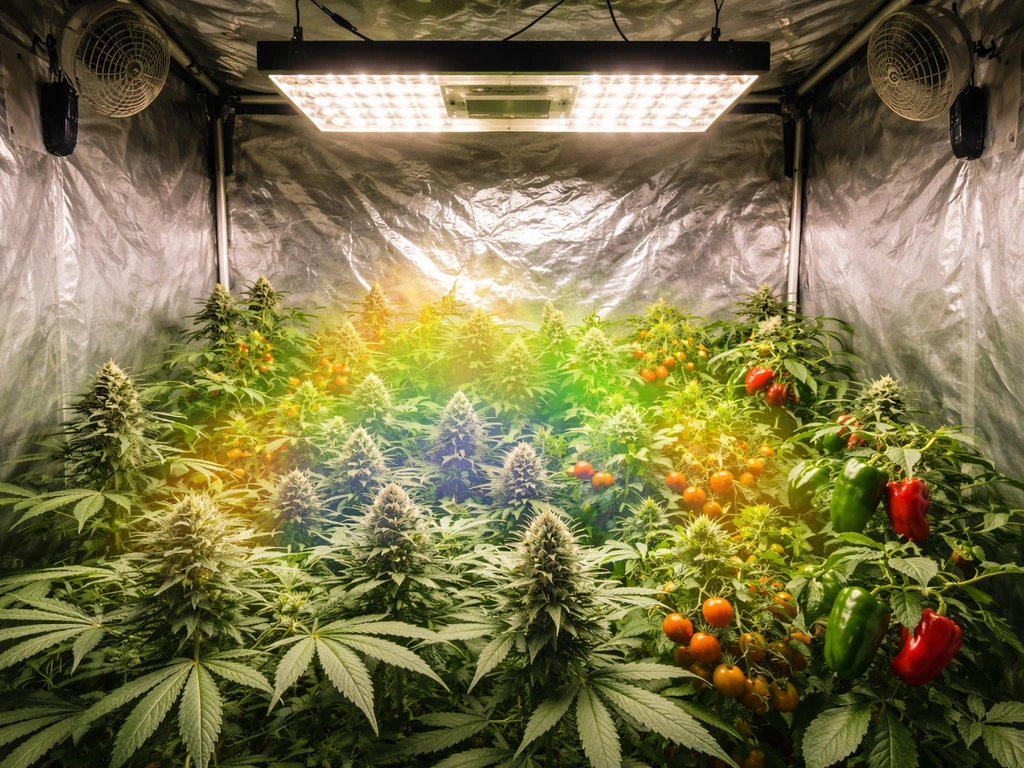
A 4x4 tent (16 sq ft) is the sweet spot for a true 550-650W LED. You want average PPFD across the canopy of 900-1000 µmol/m²/s at flower, which requires roughly 30-35 watts of actual input per square foot. The HLG 600 Rspec is the benchmark here: it draws around 630W, uses Samsung LM301H diodes with a separate deep-red boost for flower, and HLG publishes full PPFD maps and efficiency reports through their downloads page so you can verify the numbers yourself before buying. Mars Hydro FC-E6500 is a credible alternative at a lower price point, also using Samsung diodes with a Meanwell driver. Both handle a 4x4 flower canopy without hot spots when hung at 18-24 inches.
4x4 tent, vegetative crops (leafy greens, herbs, seedlings)
Veg crops need less intensity: 400-600 µmol/m²/s is plenty, and a 600W-class fixture will be running at 50-60% dim for much of the grow cycle. This actually makes a dimmable 600W LED a smart choice for veg-heavy growers because you get flexibility without buying a separate smaller light. If your primary use is vegetables, you might also want to look at 6500K color temperature options, which lean more heavily into the blue spectrum that promotes compact, leafy vegetative growth. For a 4x4 veg space, bar-style fixtures like the Spider Farmer SE5000 or Gavita Pro 1700e LED are over-specified but very usable at lower dim settings.
3x3 tent, flowering
A 3x3 (9 sq ft) does not need a full 600W. A 400W-class fixture handles it better, running at full power without overdriving the canopy. If you already own a 600W unit, dialing it back to 60-70% works fine, but if you are buying new for a 3x3 flower tent, check out the best 400W LED grow light options before committing to a 600W unit you will run underclocked from day one.
5x5 tent or larger
A single 600W fixture starts to underperform in a 5x5 (25 sq ft) at flower intensity. You would be looking at average PPFD closer to 600-700 µmol/m²/s, which is fine for veg but limiting for heavy-feeding flowering plants. For a 5x5 flower tent, either step up to a 1000W-class unit or run two 600W bars. If you are thinking about scaling further, the best 1500W LED grow light category is worth exploring for larger footprints where a single fixture makes more sense.
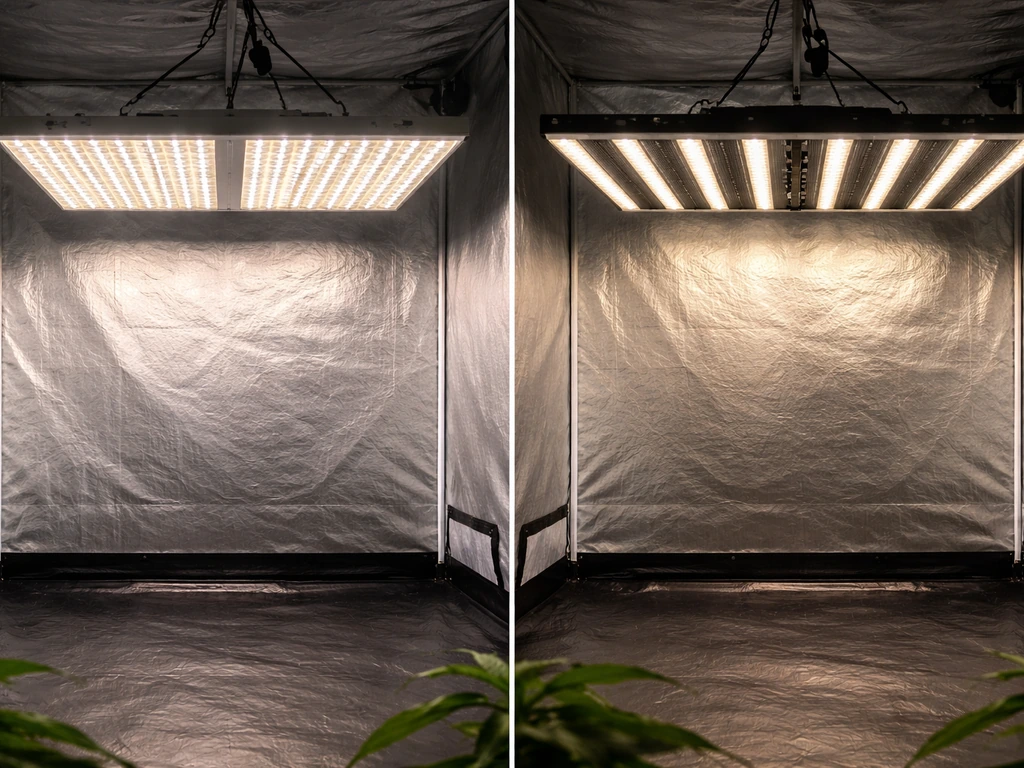
Full-spectrum vs blurple vs bar-style: what the difference actually means
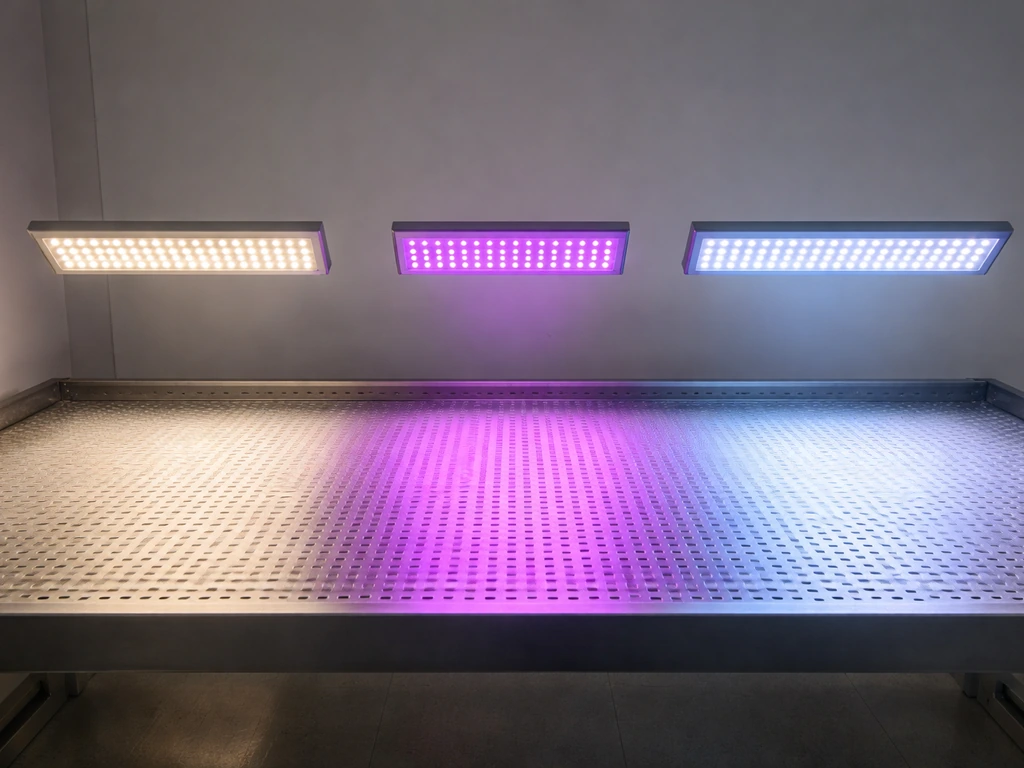
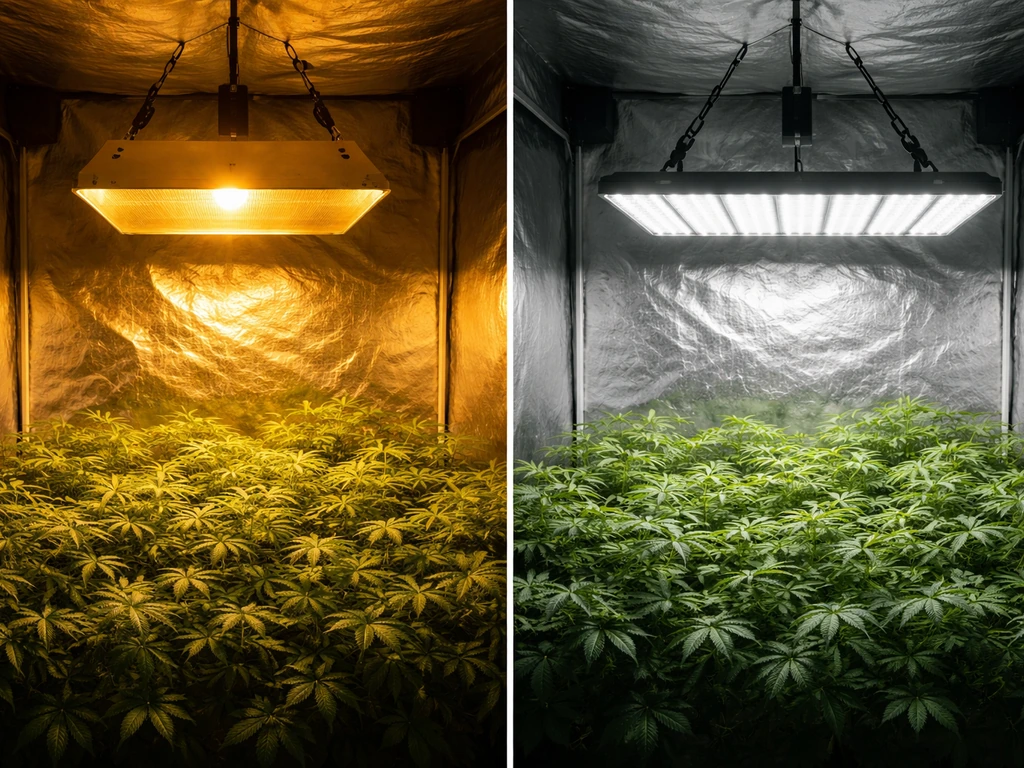
Blurple lights, the purple-looking panels that dominated the market in 2018-2021, use narrow-band red (660nm) and blue (450nm) LEDs. Plants can use those wavelengths, but the lack of green and far-red wavelengths limits canopy penetration and produces lower-quality growth compared to broadband white-light fixtures. Most blurple lights also drastically overstate their wattage. A blurple panel labeled '600W' typically draws 100-200W at the wall. They are not competitive with modern full-spectrum LEDs in 2026 and should be avoided unless you are on an extremely tight budget and growing leafy greens that do not need deep canopy penetration.
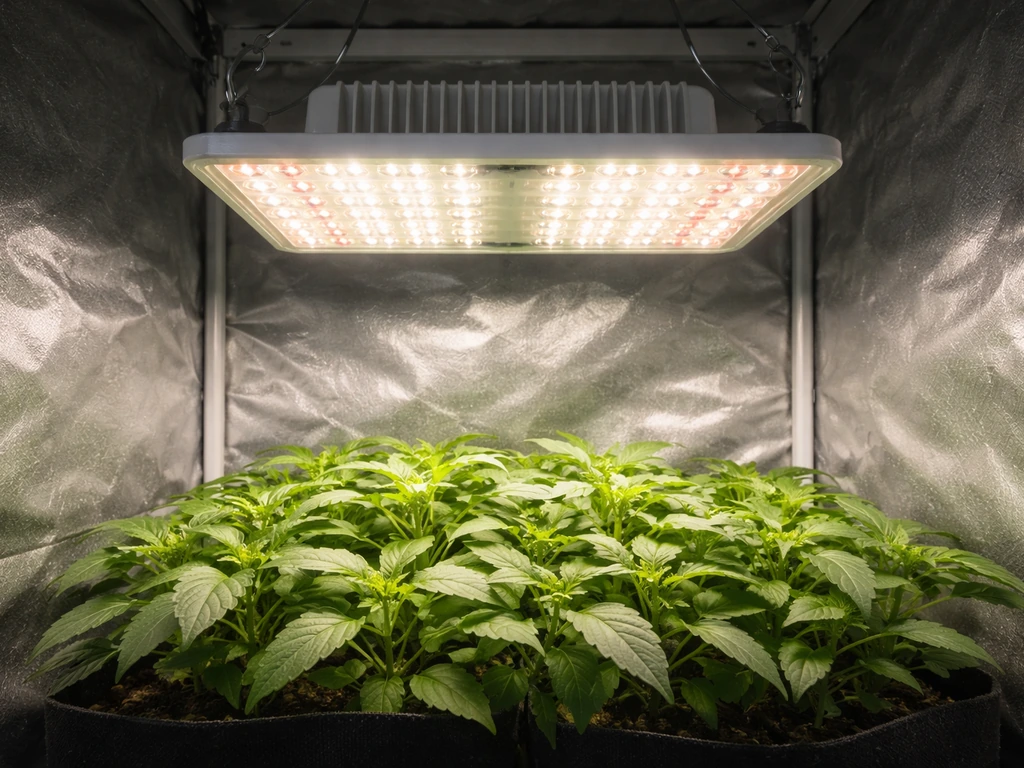
Full-spectrum white-light LEDs use phosphor-converted diodes (typically Samsung LM301 series) that produce a broad spectrum from around 380nm to 780nm. This mimics sunlight far more closely, improves canopy penetration, and produces denser, more resinous flowers on light-sensitive crops. The HLG Rspec variant adds a dedicated 660nm and 730nm (far-red) boost on top of the white-light base, which is specifically optimized for late flower. That far-red addition triggers the Emerson enhancement effect, accelerating flowering in photoperiod plants.
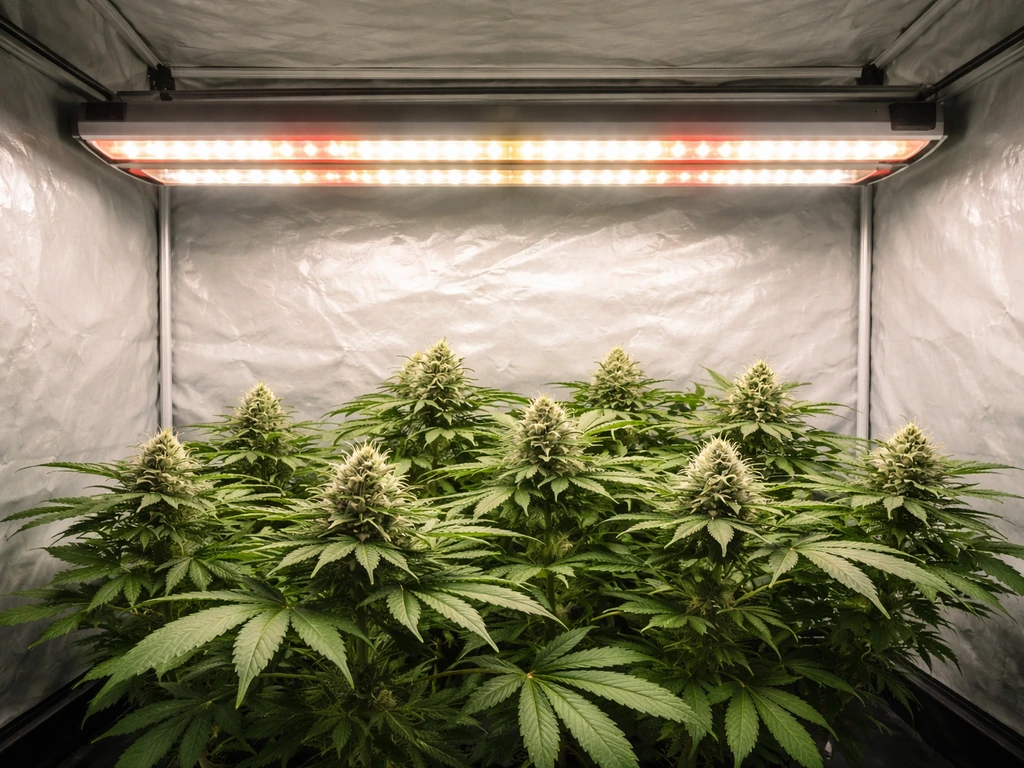
Bar-style fixtures (like the Mars Hydro FC series, HLG Scorpion, and Spider Farmer SE series) distribute the same full-spectrum diodes across multiple folding bars instead of a single flat panel. The advantage is more even light distribution across the canopy with fewer hot spots, better passive airflow underneath, and the ability to fold for shipping. For a 4x4 or larger space, bar-style is worth the slight price premium over a flat-panel equivalent.
Performance metrics that actually matter: PPFD, efficiency, and footprint
PPFD stands for Photosynthetic Photon Flux Density and is measured in µmol/m²/s. It tells you how many photons are hitting a square meter of canopy per second. This is the number that determines whether your plants are getting enough light to grow at their genetic potential. A PPFD of 200-400 µmol/m²/s supports seedlings and clones. Vegetative growth wants 400-600. Flowering crops perform best between 800-1200, with some high-light crops like cannabis pushing into 1200-1500 with CO2 supplementation.
The problem is that manufacturers often report peak PPFD at the center of the coverage area, directly under the fixture. What matters more is average PPFD across the entire footprint. A well-designed 600W bar-style fixture should deliver 900+ µmol/m²/s average across a 4x4 at 18 inches of hanging height. Always ask for or look up the PPFD map, which shows a grid of measurements across the coverage area, not just the center number.
Photon efficacy in µmol/J tells you how efficiently the fixture converts electricity into usable photons. In 2026, anything below 2.3 µmol/J is below average. Good fixtures hit 2.6-2.8 µmol/J. The HLG 600 Rspec sits around 2.7 µmol/J at full power. That efficiency number matters for your electricity bill over a full grow cycle: a 600W fixture running 18 hours per day for a 60-day veg period consumes about 648 kWh. At $0.15/kWh that is roughly $97 just for veg. Higher efficacy means more light per dollar of electricity over the fixture's lifetime.
| Metric | Seedlings/Clones | Vegetative Growth | Flowering |
|---|---|---|---|
| Target PPFD (µmol/m²/s) | 200-400 | 400-600 | 800-1200 |
| Daily Light Integral (DLI) | 10-15 mol/m²/day | 20-30 mol/m²/day | 35-55 mol/m²/day |
| Typical photoperiod | 18-24 hours | 18 hours | 12 hours |
| Recommended dim setting (600W light) | 20-40% | 50-70% | 80-100% |
Build quality, heat, dimming, and driver specs
Driver quality is the single biggest predictor of fixture longevity. Meanwell HLG-series drivers are rated for 50,000 hours at full load and include built-in thermal protection. Inventronics drivers are a close second. If a manufacturer does not name the driver brand in their specs, assume it is a generic Chinese unit with no published MTBF (mean time between failures) and a real-world lifespan of 3-5 years under continuous use. That matters because the driver will fail before the diodes do in most fixtures, and a replacement driver for a non-standard unit often costs more than the fixture is worth at that point.
Heat management in a well-designed 600W LED is passive: the aluminum heat sink and diode board do the work without fans. Fanless fixtures run silently and eliminate a mechanical failure point. Some older or budget designs add small cooling fans, which is not necessarily bad but does add noise and a component that will eventually need replacement. The diode junction temperature is what actually determines lifespan. blank" rel="noopener noreferrer">Samsung LM301H diodes are rated to maintain 90% of their original output after 36,000 hours at 65°C junction temperature. Samsung's LM301H datasheet specifies the electro-optical characterization for the LM301H LED family, including the 90% output after 36,000 hours condition at Ts=25°C and IF=65mA blank" rel="noopener noreferrer">LM301H diodes are specified for 90% output at 36,000 hours (Ts=25°C, IF=65mA). Keep the fixture cool and well-ventilated in your tent and you will realistically get 8-10 years of useful life.
Dimming matters more than most growers expect. A 0-10V external dimming port lets you wire multiple fixtures to a single controller and automate intensity curves across the grow cycle. A simple knob dimmer on the driver is fine for a single-light setup. What you want to avoid is a fixture with no dimming option at all, because you will need to reduce intensity during seedling stages and may want to dial back during hot summer months to manage tent temperature.
Installing your light and dialing in height and timing
Hang the fixture using ratchet hangers rated for at least 1.5x the fixture weight. A 600W bar-style fixture typically weighs 10-15 lbs, so use hangers rated for 20+ lbs and make sure your tent's top bar can handle the load. For a 4x4 tent, center the fixture over the canopy and start with the following height guidelines as a baseline, then adjust based on what your plants tell you.
- Seedlings and clones: hang 30-36 inches above the canopy, running at 20-30% power. You want 200-300 µmol/m²/s at this stage.
- Early vegetative: drop to 24-30 inches, increase to 40-60% power. Watch for signs of stretching (too far, too dim) or bleaching (too close, too bright).
- Late vegetative: 20-24 inches, 60-80% power. Plants should be compact and dark green.
- Early flower: 18-22 inches, 80-90% power. Increase intensity gradually over the first two weeks.
- Mid to late flower: 16-20 inches, 90-100% power. This is where full intensity pays off for bud density and resin development.
The easiest way to verify you are hitting the right PPFD without buying a $200 quantum flux meter is to use a reliable PAR estimation app on your phone (Photone is widely used and reasonably accurate when calibrated for your light type) or simply watch for visual plant cues. Bleaching or yellowing in the top leaves directly under the fixture means you are too close or too bright. Excessive internodal stretching means too far or too dim. A healthy plant in flower should show tight node spacing, dark green leaves, and no discoloration at any point in the canopy.
Photoperiod timing is equally important. For photoperiod flowering crops, a hard 12/12 light schedule is non-negotiable: any light leak during the dark period can prevent or interrupt flowering. Use a mechanical or digital outlet timer rated for the fixture's actual wattage plus 20% headroom. For autoflowering crops and most vegetables, 18/6 or 20/4 works well with a 600W unit and keeps DLI in the productive range without overshooting.
Budget vs price-to-performance: what the price tag actually buys you
The 600W LED market in 2026 roughly splits into three tiers. Understanding what you actually get in each tier helps you decide where to spend. If your budget is tighter and you are weighing down-stepping to a smaller fixture, comparing the best 500W LED grow light options against entry-level 600W units is a worthwhile exercise, since the overlap in coverage and price is real.
| Tier | Price Range | What you get | What you give up |
|---|---|---|---|
| Budget | $80-180 | Functional grow light, basic full-spectrum diodes, generic driver, 1-2 year warranty | Verified PPFD data, driver longevity, dimming control, canopy uniformity |
| Mid-range | $180-350 | Samsung LM301B or equivalent diodes, Meanwell or Inventronics driver, 3-year warranty, dimming, published PPFD maps | Far-red boost, premium build finish, 5-year warranty |
| Premium | $350-700+ | Samsung LM301H diodes, Meanwell HLG driver, 5-year warranty, full PPFD documentation, bar-style distribution, 0-10V dimming | Lower upfront cost, simpler setup |
The premium tier is not just marketing. The Meanwell HLG driver alone is worth $60-80 as a standalone component. The published PPFD maps from brands like HLG let you verify what you are buying before the package arrives. The 5-year warranty (which Spider Farmer offers on qualifying products with documented eligibility conditions) meaningfully reduces long-term cost of ownership compared to a budget fixture you replace every 2-3 years.
That said, the budget tier has gotten genuinely better. A $150 bar-style fixture with LM301B diodes and a half-decent driver will grow excellent vegetables and passable flowers. If you are new to growing and not sure you will stick with it past one or two cycles, starting in the budget-to-mid tier and upgrading later is a reasonable call. If you are growing photoperiod flowering plants as a serious hobby or producing commercially, the premium tier pays for itself in yield consistency and fixture longevity.
One comparison worth making explicitly: if you are debating between a budget '600W' light and stepping down to a properly-rated smaller fixture, the latter usually wins. A well-built 300W LED grow light from a reputable brand with verified specs will outperform a mislabeled 600W budget panel in real canopy PPFD and coverage consistency. The same logic applies if you are comparing across the 300W LED grow light category more broadly, where real-watt fixtures from established brands offer verifiable output numbers.
Your shortlist and next steps
Here is how to finalize your decision in the next 30 minutes. First, confirm your actual grow space dimensions and whether your primary crops are veg, flower, or mixed. Second, look up the actual input wattage on any fixture you are considering: if it is not clearly listed, move on. Third, find a PPFD map or efficiency report for the light, either from the manufacturer's downloads page or a third-party review. Fourth, check the driver brand and warranty length. Fifth, verify the dimming options match how you want to run your tent.
For a 4x4 flower tent, the HLG 600 Rspec or a comparable bar-style fixture from Mars Hydro or Spider Farmer's SE series is the practical recommendation in 2026. For veg-heavy grows or mixed-use setups, a dimmable full-spectrum bar in the mid-range tier covers most scenarios without overspending. Avoid blurple panels and any fixture that cannot provide a real wattage spec and at least a basic PPFD map. Those two filters alone will eliminate 80% of the bad options before you have to think too hard about anything else.
FAQ
If a light is labeled “600W,” what wattage number should I trust when comparing models?
Use the actual input power measured at the wall (sometimes listed as input watts, true wattage, or actual draw). If the spec sheet only gives marketing “LED watts” or doesn’t clearly state wall draw, treat it as unreliable and move on, even if the brand name sounds familiar.
What is a safe way to hang and adjust a 600W LED if I cannot find a PPFD map?
Start with the manufacturer’s recommended hanging height or the article’s baseline (about 18 inches for a 4x4), then adjust by observing canopy response. Increase distance if you see bleaching at the top, shorten distance if plants stretch and have loose internodes, and aim for uniformity across the tent rather than optimizing only the center.
Do I need a par meter to set up a best 600 watt led grow light correctly?
No, but a phone PAR estimation app can help. Photone-style apps are most useful if you input the fixture type accurately and understand they are estimates. For best results, cross-check with visual cues, because reflected light from tent walls can skew phone readings.
How do I choose between “bar-style” and a flat panel for a 4x4 tent?
Bar-style tends to give more even coverage and fewer hot spots, especially if you run at higher power. Flat panels can work, but you should require a PPFD map that shows average output across the full footprint, not just the peak number at the center.
What happens if I buy a true 550-650W-class fixture but my tent is smaller, like 3x3?
You will usually run the fixture at a lower dimming percentage to avoid overdriving the canopy. The practical issue is cost and energy, you may pay for power you do not fully use. If your goal is efficient 3x3 flowering, a properly rated 400W-class fixture is often a better fit.
Is dimming necessary for veg, or can I just run the light at full power?
Dimming helps manage intensity during early growth and can reduce heat and stress. Running at full power in veg can push excess vegetative growth or cause leaflet tip issues in some setups. If your fixture supports smooth dimming (preferably external 0-10V), it is easier to dial in without sudden jumps.
Should I worry about fanless vs fan-cooled designs on a 600W LED?
Fanless designs remove a common mechanical failure point and typically run quieter. If a fan system is used, it usually means an additional component that can clog or fail over time. Either way, the key is keeping the diode and driver environment cool and well ventilated, because heat drives long-term degradation.
How can I tell whether a “premium” 600W LED is actually worth the extra money?
Look for named driver brands, published efficiency (µmol/J), and a warranty period that is backed by real documentation. A higher upfront price can be justified if it has higher efficacy, verified PPFD maps, and a warranty that you can realistically claim, not just a generic statement.
If the driver brand is not listed, is that really a dealbreaker?
It’s a strong warning sign. Without the driver brand, you are more likely to get a generic unit with unclear MTBF, which often fails before the diodes do. If the only way to verify specs is missing, the long-term cost risk increases, especially for fixtures you plan to run continuously.
What electrical capacity do I need for a true 600W draw light?
Plan around the actual wall wattage plus margin, not the marketing wattage. For example, a 600W-class fixture may draw roughly 550 to 650W, so it can be near the limit of a small circuit if you also add fans, dehumidification, or multiple lights. Check circuit rating, and avoid running multiple high-draw devices on one circuit without verifying total load.
Can I chain multiple lights to one controller using dimming?
Yes if the lights accept external dimming (often 0-10V) and your controller matches the input type. If you only have a knob dimmer or no dimming port, you cannot reliably synchronize multiple fixtures. For multi-light tents, confirm wiring compatibility before you mount everything.
How do I prevent light leaks from ruining photoperiod flowering with a strong 600W LED setup?
Use a light-tight dark period and plug timing into a reliable outlet timer, then test the tent after lights-off. Even brief leaks around door seams or cable gaps can interrupt the 12/12 cycle. A practical step is to turn off the light, close the tent fully, then check for any glow with your eyes from outside the tent.
Next Articles
Best Full Spectrum 1000W LED Grow Lights: Buyer Guide
Buy the best full spectrum 1000W LED grow light with spec-to-decision tips on PPFD, coverage, wattage, and tent fit.
Best 100W LED Grow Light: How to Choose the Right One
Choose the best 100W LED grow light with PPFD coverage, spectrum, efficiency, dimming, heat, and setup tips.
Best LED Grow Light to Replace 1000W HPS: Sizing Guide
Sizing and buying guide to replace a 1000W HPS with the right LED using PPFD, layout, mounting, and spectrum for yields.