Quick verdict: are LED grow lights actually good?
Yes, LED grow lights are genuinely good, and in most home tent and commercial scenarios today they're the best option available. A quality LED fixture delivers more usable light per watt than HPS, runs cooler, lasts longer, and gives you spectrum control that older lighting technology simply can't match. That said, the word 'good' does a lot of heavy lifting here. A properly spec'd LED from a reputable brand running at 2.5+ µmol/J efficacy is a serious piece of growing equipment. A cheap 'blurple' panel with inflated wattage claims is not, and buying the wrong one is the most common reason growers decide LEDs 'don't work.' The honest answer is: good LEDs are excellent, bad LEDs are a waste of money, and the gap between the two is wider than in almost any other product category in this hobby.
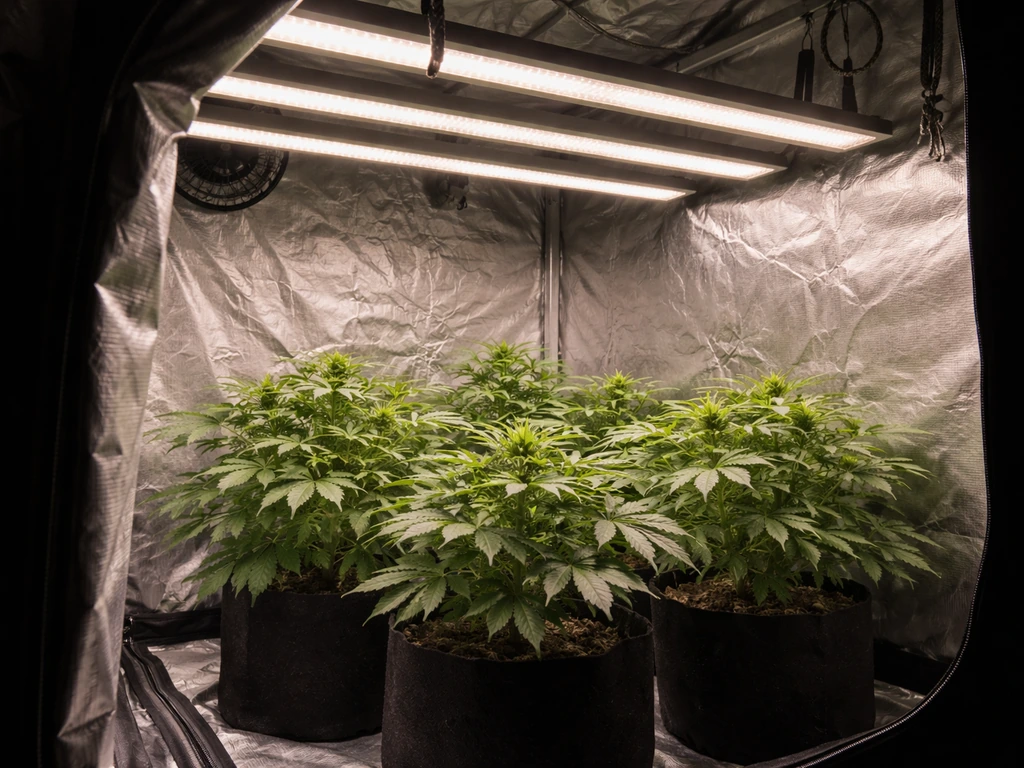
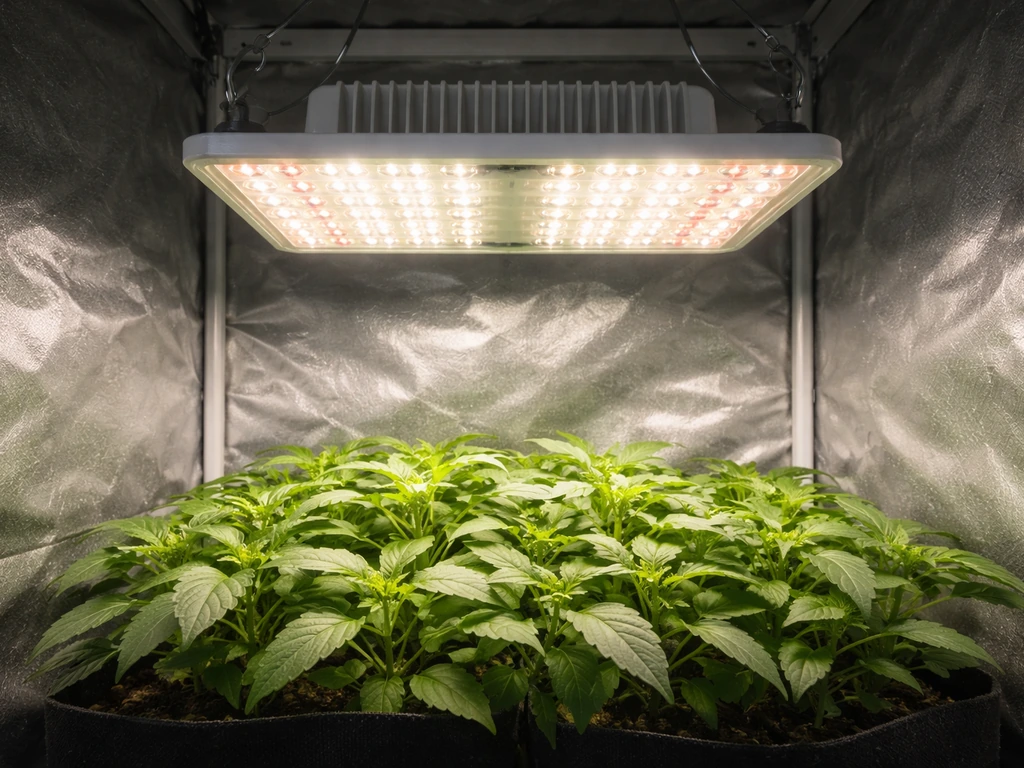
For a 4x4 tent running flowering crops, a quality LED pulling 400-500 true watts from the wall and delivering 1,000+ µmol/m²/s at canopy will outperform a 600W HPS on energy efficiency, heat load, and spectrum flexibility. For seedlings and early veg in a 2x4 or 3x3 space, even a modest 200-250W LED delivers plenty of intensity when dialed in correctly. The key is matching the fixture's actual output to your canopy's needs, not trusting the box art.
What makes an LED grow light 'good': the specs that matter
Wattage is the most abused number in grow light marketing. The figure on the box almost never tells you how much light actually hits your plants. What matters is PPF (Photosynthetic Photon Flux), measured in µmol/s, which tells you the total photon output of the fixture. Divide PPF by actual wall watts and you get efficacy in µmol/J, which is the single best number for comparing LED fixtures. Budget LEDs typically land around 1.8-2.2 µmol/J. Mid-tier fixtures hit 2.5-2.8 µmol/J. Top-shelf commercial boards push past 3.0 µmol/J. That gap translates directly to your electricity bill over a multi-year grow cycle.
The DesignLights Consortium's horticultural technical requirements require manufacturers to blank" rel="noopener noreferrer">report PPF and photosynthetic photon distribution at the fixture level, specifically to prevent the kind of apples-to-oranges comparisons that plague budget listings. DLC also defines spectral quantum distribution (SQD) and photosynthetic photon intensity distribution (PPID) with far-red band handling blank" rel="noopener noreferrer">per ANSI/ASABE S640 standards. If a manufacturer doesn't publish these numbers, that alone is a red flag. Separately, the DOE has noted that claimed efficacy figures in product databases represent specific test conditions and may not match the exact fixture that ships to your door, so always look for independently verified data when you can find it.
- PPF (µmol/s): total photon output of the fixture, the most important headline number
- Efficacy (µmol/J): PPF divided by wall watts; target 2.5+ for mid-tier, 3.0+ for premium
- PPFD map: shows actual intensity in µmol/m²/s at your canopy height across the full footprint
- True wall watts: what the driver actually pulls, not the 'equivalent' or 'peak' wattage on the box
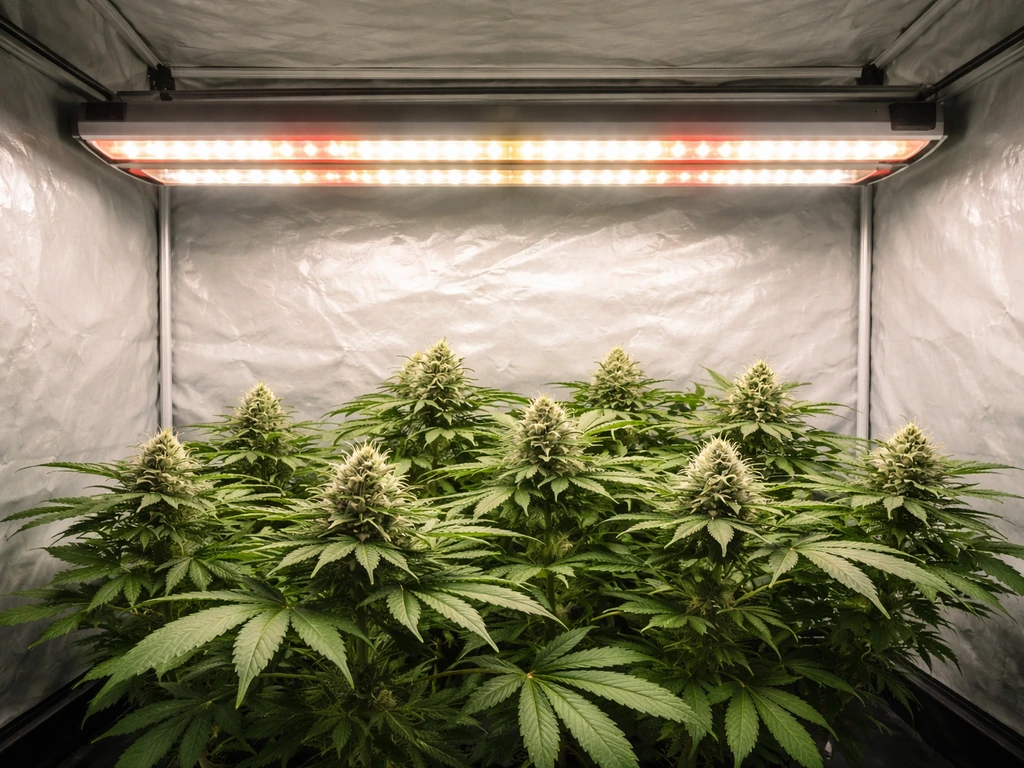
- Spectrum: full-spectrum white (3000K-6500K) with red (660nm) and optional far-red (720-740nm) for flowering
- DLC or ENERGY STAR listing: third-party verification that efficacy claims have been tested
Uniformity is underrated. A light that delivers 1,000 µmol/m²/s dead center but drops to 400 at the corners of your 4x4 is significantly worse than one that maintains 800 across the entire footprint. Always ask for the full PPFD map, not just the center measurement. Many budget fixtures look impressive on paper because the single quoted PPFD number is taken at the hotspot directly below the unit.
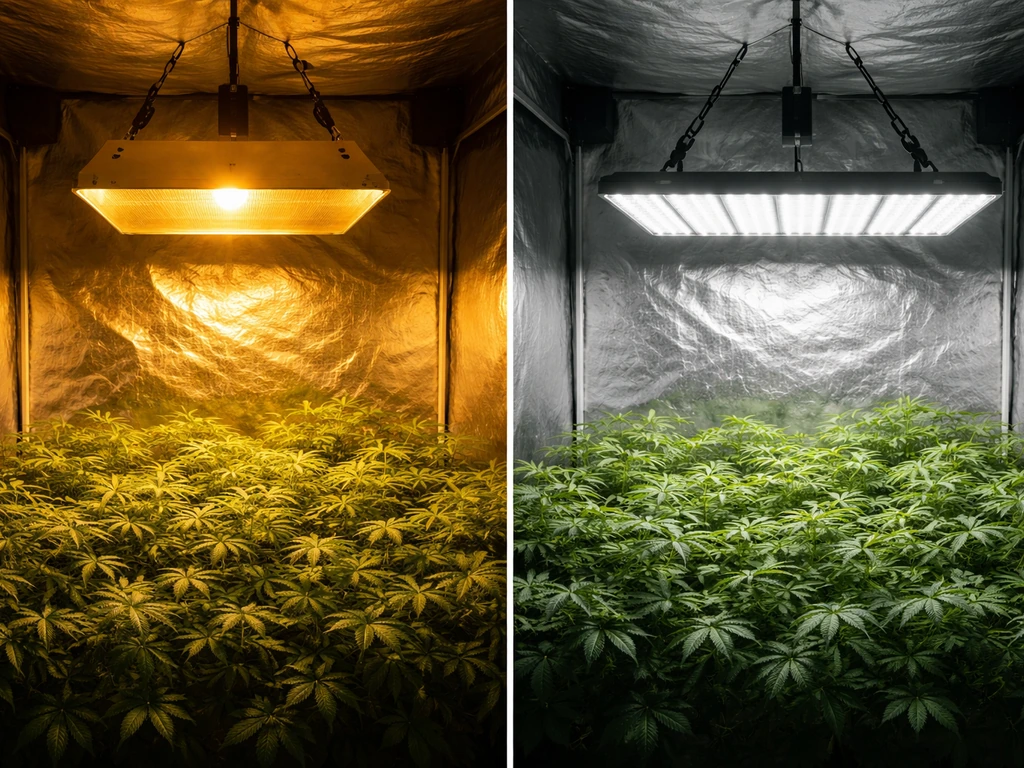
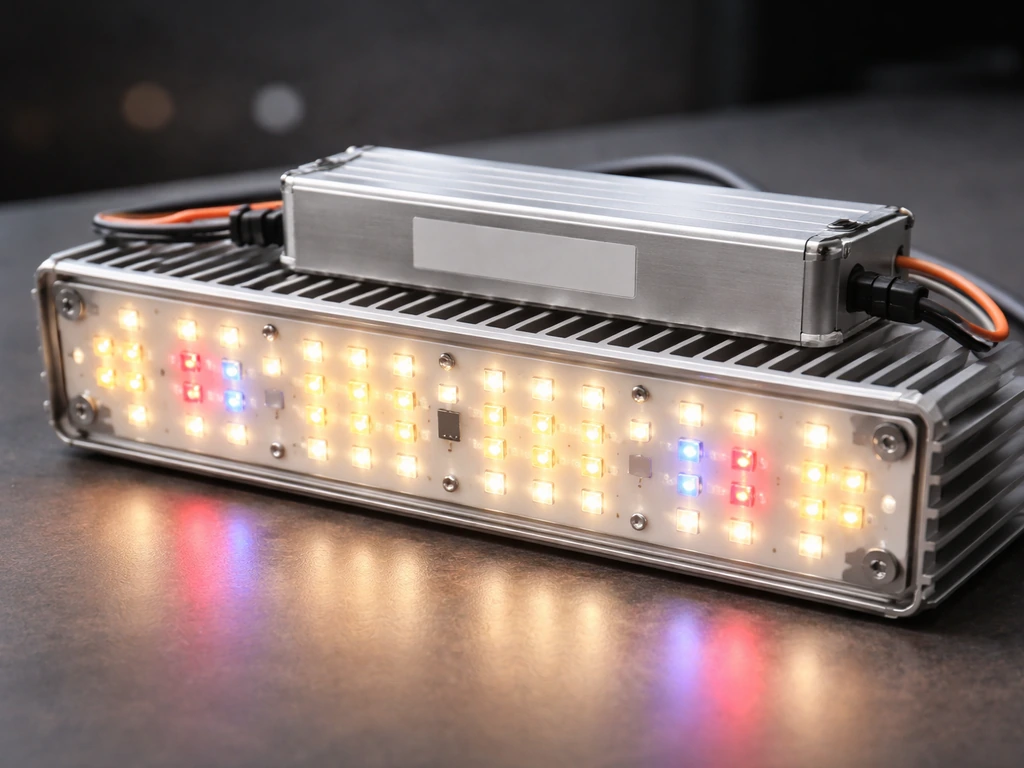
Modern full-spectrum LED fixtures use white phosphor LEDs (typically a mix of 3000K and 5000K or 6500K chips) combined with dedicated red and sometimes far-red diodes. This approach produces a broad spectrum that covers the full photosynthetically active radiation (PAR) range from 400-700nm, with options to push into the far-red range (700-750nm) for accelerated flowering responses. The old blurple lights that flooded the market a decade ago were inefficient partly because of their narrow red/blue spectrum and partly because they just weren't very efficient diodes. Modern white-dominant boards leave them behind entirely.
| Growth Stage | Target PPFD (µmol/m²/s) | Target DLI (mol/m²/day) | Spectrum Notes |
|---|
| Seedling / Clone | 100-300 | 6-12 | Lower intensity, blue-heavy spectrum supports compact growth; avoid intense reds |
| Early Veg | 300-600 | 15-25 | Full spectrum; higher blue ratio (5000-6500K) keeps internodes tight |
| Late Veg | 500-800 | 20-35 | Full spectrum; can begin introducing more red to prep for flower transition |
| Flower / Fruit | 800-1200+ | 30-50+ | Maximize red (660nm) and far-red (730nm); push intensity with CO2 supplementation if available |
| Fruiting Crops (tomato, strawberry) | 800-1000+ | 20-30 | Red-heavy spectrum with adequate blue; DLI target depends on variety |
Research from USDA-ARS comparing supplemental LED and HPS lighting in greenhouses found that growth and quality under LEDs were similar to or sometimes better than HPS under equivalent PPFD and DLI conditions. That's a key point: the metric that determines plant growth is the light dose (DLI) delivered to the canopy, not which fixture type you use. LEDs earn their advantage by delivering that dose more efficiently and with better spectral precision, not by some magical plant-growth property of the diodes themselves.
Far-red (700-750nm) is worth understanding. It falls outside the traditional PAR range but drives the Emerson enhancement effect, where brief far-red exposure at the end of the photoperiod can accelerate flowering in long-day and short-day plants. Some fixtures include dedicated far-red channels you can toggle independently. If you're growing cannabis, tomatoes, or fruiting crops like strawberries where flowering speed matters, far-red capability is a meaningful differentiator. If you're mostly running leafy greens or herbs, it's a nice-to-have rather than a requirement.
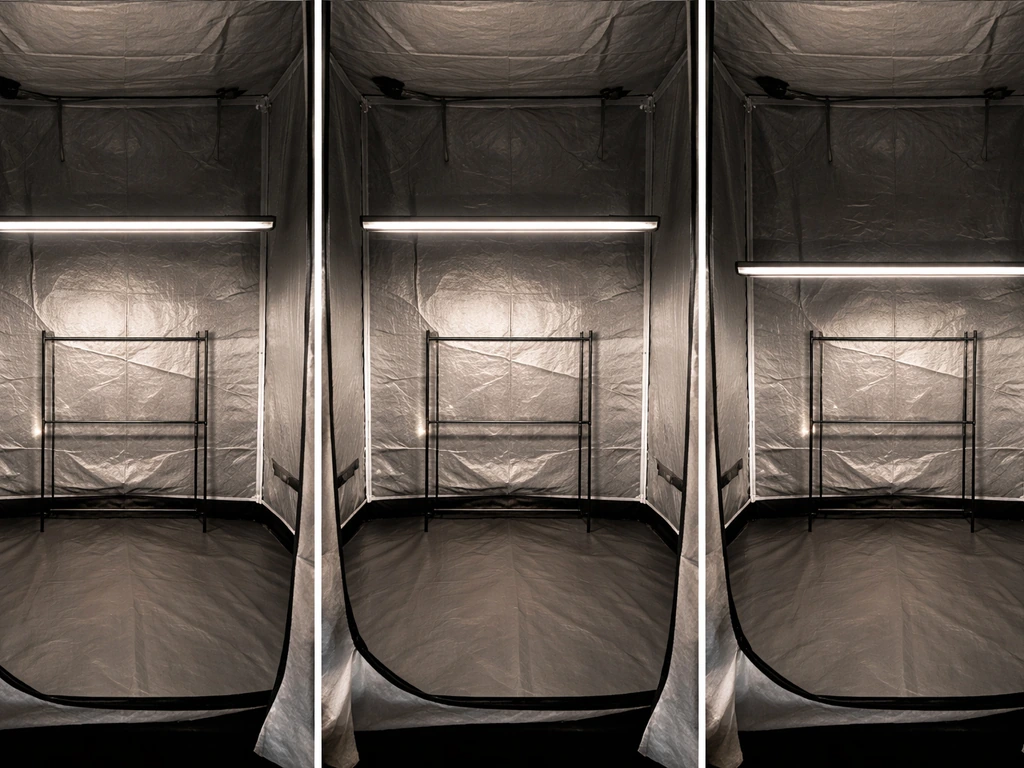
Coverage and setup: sizing lights to your tent and dialing distance
Matching fixture output to tent size is where a lot of growers go wrong, in both directions. Underpowering a canopy is the most common mistake, but overpowering without dimming capability causes stress and bleaching. The general target for flowering is 400-600W of true wall draw per 4x4 (16 sq ft) of canopy, which should deliver 800-1,200 µmol/m²/s across the footprint with a quality fixture. Veg stages need roughly half that intensity. For a 3x3 tent (9 sq ft), a 200-300W fixture is the sweet spot for flower. A 5x5 (25 sq ft) typically needs 600-800W.
Hanging distance affects both intensity and uniformity. Most bar-style LED fixtures designed for a 4x4 perform best at 12-18 inches above canopy for flowering. Raising the fixture spreads the footprint and improves uniformity but reduces intensity. Lowering it concentrates intensity but creates hot spots and uniformity problems. Always check the manufacturer's PPFD map at the specific height you plan to run, and use a PAR meter (or at least a smartphone-based PAR app as a rough guide) to verify you're hitting your target PPFD during the first run. Adjust from there based on plant response.
Dimming is one of the most practical features on a modern LED fixture and it's worth spending a little more to get it. A quality dimmable LED grow light lets you run seedlings and early veg at 30-40% power without raising the fixture, scale intensity through the grow cycle, and back off during heat waves or when ambient temperatures are already high. Fixtures without dimming force you to manage intensity entirely through height adjustment, which is a clumsy workaround.
For supplemental lighting in greenhouses or mixed-light setups, the math changes. You're not trying to hit full flowering PPFD from your fixtures alone; you're topping up what the sun provides on low-light days. MSU Extension research frames this well: effectiveness in supplemental setups depends on matching delivered light intensity and timing to what the crop needs, not on the fixture type. Choosing the right supplemental LED grow light for a greenhouse is a different exercise than spec'ing a full-replacement fixture for a light-sealed tent, and the two shouldn't be approached the same way.
Common reasons LED grow lights disappoint
The single biggest source of LED disappointment is buying a fixture whose actual output doesn't match the marketing. 'Equivalent wattage' is a fabricated number. A fixture advertised as '1000W equivalent' might pull 150W from the wall and deliver PPF that's appropriate for a 2x2 tent at best. Lumens is another number to ignore entirely for grow lights: it measures light as the human eye perceives it, weighted toward green, not as plants use it. A red/blue blurple panel can show impressive lumen numbers while delivering relatively little useful PAR. Always anchor your evaluation to PPF, PPFD maps, and true wall watts.
Uniformity problems are the second most common complaint. Bar-style fixtures with multiple independent bars distributed across the tent produce far more even PPFD maps than single-panel units of the same wattage. If you've ever seen a grow where center plants are bleaching while edge plants are stretching, that's a uniformity problem, not necessarily an intensity problem. When you're optimizing for high yield, even coverage across the entire canopy matters as much as peak PPFD. Light that doesn't reach the edges is wasted electricity.
Cheap drivers and thermal management are quiet killers of LED performance. LED diodes degrade faster when run hot, and a fixture with inadequate heat sinking or a low-quality driver will lose meaningful output within the first year. Reputable fixtures use meanwell or equivalent-grade drivers and passive aluminum heatsinks sized for the diode load. Budget panels often run the diodes hotter than rated to hit peak PPF numbers in short test bursts, which looks good in spec sheets but accelerates lumen depreciation. At 50,000+ hours of rated lifespan, quality LEDs deliver. Budget units often don't.
Poor diffuser or optic design can also hurt performance. Some fixtures use secondary optics or lenses to concentrate light, which increases center PPFD but worsens uniformity at the edges. Others have diffuse panels that scatter light inefficiently. The bar/strip form factor with bare diodes and a reflective housing has largely won this argument for tent growing because it balances output, uniformity, and thermal management better than the older panel designs. Speaking of which, LED grow light strips have become a particularly practical option for multi-tier shelving or low-ceiling setups where traditional bar fixtures don't hang properly.
Heat, power use, noise, and lifespan tradeoffs vs other lighting
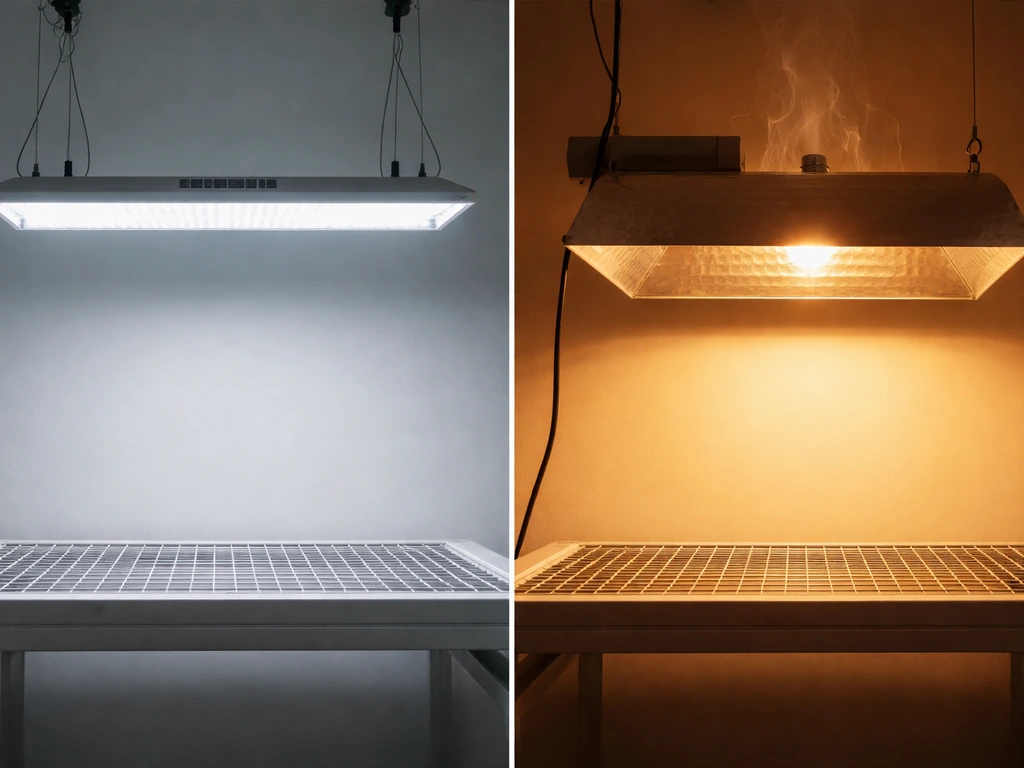
LEDs run significantly cooler than HPS or CMH at equivalent output, but they're not zero-heat. A 500W LED fixture still puts 500W of electrical energy into your tent, and most of that eventually becomes heat. The difference is that LEDs convert a much higher percentage of input power into light (rather than radiant heat), so the heat they do produce is mostly conducted through the heatsink into the air rather than radiated directly onto the canopy. This means your tent temperature management is still important, but you're dealing with a more manageable, diffuse heat load rather than an intense radiant source a foot above your plants.
IES research has found that converting horticultural lighting operations to LED can reduce lighting energy use substantially compared to HPS and other traditional sources. In practice, replacing a 600W HPS with a quality 400W LED delivering equivalent PPFD saves 200W per fixture per hour, which adds up to real money over a grow season. At 18 hours/day for veg plus 12 hours/day for flower over a full cycle, the electricity savings alone can offset a meaningful portion of the fixture cost.
| Factor | Quality LED | HPS | CMH (LEC) | T5 Fluorescent |
|---|
| Efficacy (µmol/J) | 2.5-3.2 | 1.5-1.9 | 1.9-2.1 | 0.9-1.3 |
| Heat (radiant) | Low (conducted) | Very high (radiant) | Moderate | Low-moderate |
| Spectrum control | Excellent (tunable) | Fixed (warm) | Good (broad) | Limited |
| Lifespan | 50,000-100,000 hrs | 10,000-24,000 hrs | 20,000+ hrs | 20,000-40,000 hrs |
| Noise | Silent (passive) or low (active fan) | Silent fixture, noisy ballast | Silent or low | Silent |
| Upfront cost | Moderate to high | Low to moderate | Moderate | Low |
| Best use case | All stages, all sizes | Large flower rooms | Veg and flower, smaller spaces | Seedlings, clones, low-light crops |
Noise is worth a mention. Most bar-style LED fixtures use passive cooling and are completely silent. Some high-powered units include small fans for active cooling; these are generally quiet but not silent. HPS ballasts can hum noticeably. If noise matters (stealth grows, bedroom setups), passive-cooled LED is the clear winner. On lifespan, quality LEDs rated at 50,000-100,000 hours will outlast HPS bulbs by a factor of 4-6x, and you don't have the recurring cost of bulb replacements that HPS and CMH setups require.
How to choose and buy today: a practical checklist and next steps
Here's the process I'd use if I were buying a fixture today. Start with your space and target intensity. Know your tent dimensions, what you're growing, and whether you're in veg, flower, or both. Calculate your target PPFD for the growth stage (400-600 for veg, 800-1,000+ for flower) and use that to reverse-engineer how much PPF you need from the fixture. For a 4x4 at 900 µmol/m²/s average, you need roughly 900 x 1.5 sq meters = 1,350 µmol/s PPF minimum. Then find fixtures that hit that PPF at your budget, with verified specs.
- Define your space: tent dimensions and canopy area in square meters or square feet
- Set your PPFD target: 200-400 for seedlings, 400-700 for veg, 800-1,200 for flower
- Calculate required PPF: multiply target PPFD by canopy area (in m²) and add 30-40% for edge falloff
- Find fixtures with published PPF, efficacy (µmol/J), and full PPFD maps at your hanging height
- Prioritize DLC-listed or independently verified fixtures over unverified marketing specs
- Check driver quality: Meanwell, HLG, or equivalent; avoid unbranded drivers in budget panels
- Confirm dimming capability if you plan to use the fixture across multiple growth stages
- Calculate total cost of ownership: fixture price plus estimated electricity cost over 3-5 years
- Match form factor to your setup: bar fixtures for tents, strip lights for shelving, panels for small supplemental use
- Buy from brands that publish real PPFD maps, not just center-point numbers
Before you commit to a specific fixture, it's worth looking at what the community is running in real grows. Growers who track and share their results with specific fixtures are one of the best reality checks on manufacturer claims. Community recommendations for LED grow lights on forums like Rollitup often surface which fixtures actually perform in real tents versus which ones looked good on spec sheets and underdelivered. Combine that real-world feedback with the spec-driven evaluation above and you'll have a complete picture before spending money.
Once you've installed the fixture, spend the first week dialing distance and confirming canopy PPFD with a meter. Watch your plants: tight internodes and deep green color in veg are signs of healthy intensity. Stretching means more light or closer distance. Bleaching, curling, or upward leaf cupping means too much intensity or too close. Adjust in small increments (2-3 inches of height or 10% dimmer steps) and give plants 2-3 days to respond before adjusting again. Most growers get to their optimal setup within two to three weeks of first hanging a new fixture.
If you're building out a more complex setup, consider whether you need primary fixtures plus dedicated supplemental units for side lighting or canopy fill. Adding a supplemental LED grow light to boost lower canopy sites in a dense flower room can meaningfully improve yield without the heat and cost of scaling up primary fixtures. And if you're evaluating the full range of options, fixtures optimized for high yield often pair well with the kind of dialed-in setup this checklist helps you build.