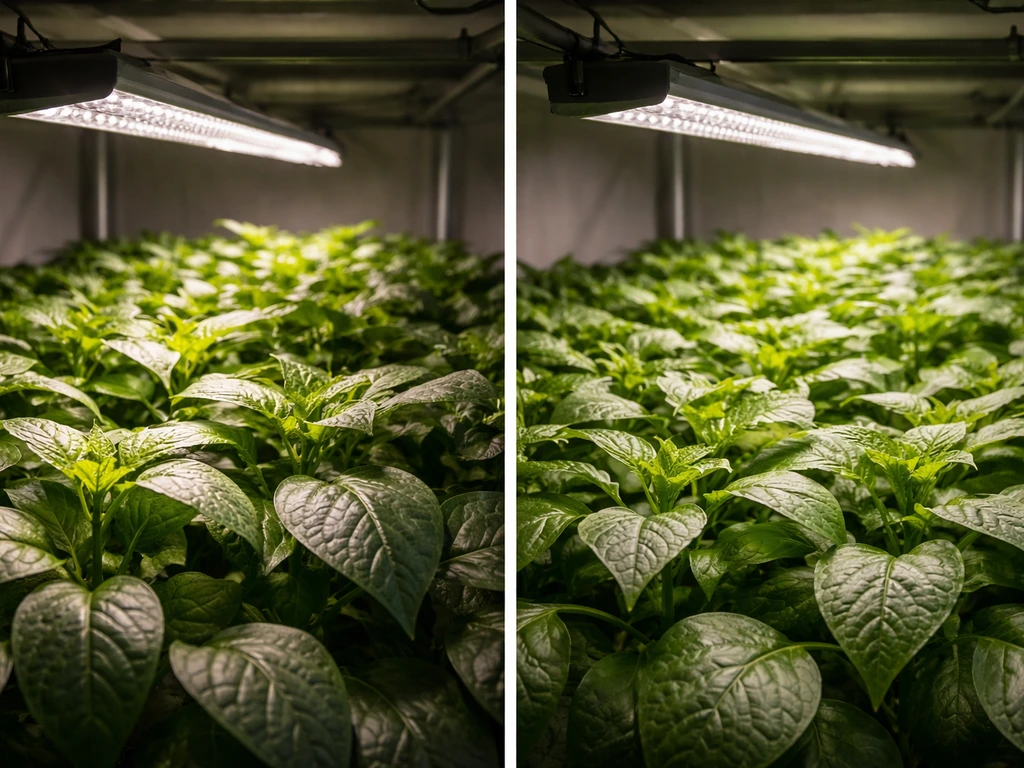
Under-canopy LED grow lights are low-profile fixtures mounted beneath or within the plant canopy to push usable light to lower bud sites and leaves that your main overhead fixture simply cannot reach. If you've ever pulled apart a dense flowering plant and found pale, underdeveloped buds three-quarters of the way down the stem, that's exactly the problem these lights solve. This guide will walk you through how to pick the right fixture, calculate how many you need, and install them without burning your plants or wasting money.
Best Under Canopy LED Grow Lights: Buyer’s Guide and Picks

Marcus Rutherford
5 Apr 2026
What 'under canopy' actually means in a real grow setup
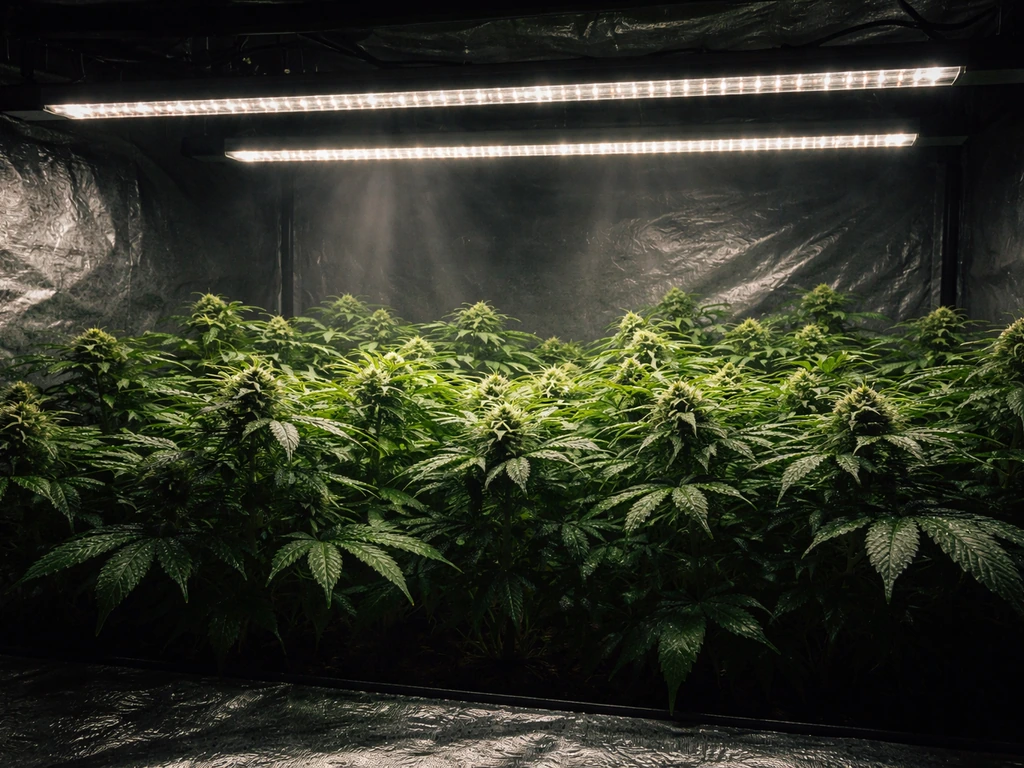
In a typical tent or grow room, you have three distinct placement zones: top fixtures hanging above the canopy for primary photosynthesis, side lights positioned at mid-height along the walls for canopy edge penetration, and under-canopy lights mounted below the leaf ceiling to supplement the lower third of the plant. The 'under-canopy' zone is everything from mid-plant down to the substrate. Light from overhead fixtures drops off dramatically as it travels through dense foliage, so by the time photons reach lower bud sites, PPFD can fall to a fraction of what the top of the plant receives. Under-canopy lighting corrects that deficit directly.
It's worth being honest about what under-canopy placement can and can't do. Leaf anatomy is optimized for top-down light reception, so intra-canopy and top-down lighting will always be more efficient on a per-photon basis than lighting from below. That said, targeted under-canopy supplementation during the final weeks of flowering, when lower bud sites are actively developing, is a well-documented strategy. One commonly cited scenario shows yield improvements of roughly 60% attributed to adding under-canopy lights during the last two weeks of flower, though results depend heavily on canopy density, strain, and how dialed-in your primary lighting already is. Treat under-canopy lights as a precision tool, not a replacement for a proper primary fixture.
Choosing the right LED type and spectrum for canopy work
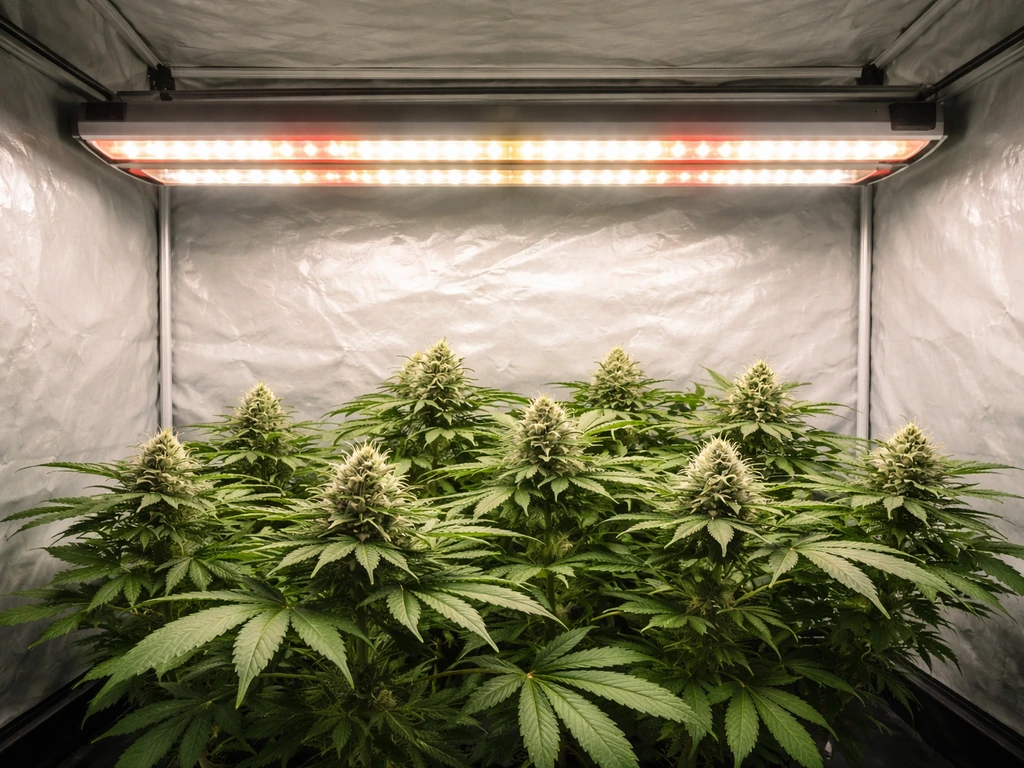
Full-spectrum white LEDs paired with targeted red and far-red diodes are the dominant configuration in quality under-canopy products right now, and for good reason. Full-spectrum coverage handles the broad photosynthetic needs across the 400–700 nm PAR range, while the red and far-red additions specifically accelerate flowering responses and stem elongation signals. The FloraFlex Under Canopy 3-Bar uses exactly this approach: custom full-spectrum diodes combined with Osram red chips and a deliberate far-red inclusion, tuned specifically for the flowering window when under-canopy light matters most.
For most growers, a full-spectrum fixture with red boost is the right call. If you're running under-canopy lights primarily during late veg or early flower, a balanced white-dominant spectrum works well. If you're specifically targeting the last four to six weeks of flower, leaning into red-heavy or far-red-supplemented fixtures accelerates the responses you're after. Avoid narrow-band red/blue 'blurple' fixtures for under-canopy work, they were designed for a different era of grow light technology and their PPFD uniformity at close mounting distances is poor.
Full spectrum vs. targeted spectrum: a quick comparison
| Spectrum Type | Best Use Case | Under-Canopy Suitability | Notes |
|---|---|---|---|
| Full-spectrum white + red/far-red | Late veg through harvest | Excellent | Most versatile; mimics solar spectrum; good PPFD uniformity |
| Full-spectrum white only | Seedling through early flower | Good | Lower cost; slightly less flowering optimization |
| Red-dominant targeted | Flowering/fruiting final weeks | Good for specialists | High efficacy at red wavelengths; less flexible |
| Blurple (narrow red + blue) | Legacy use | Poor | Uneven distribution; outdated diode efficiency |
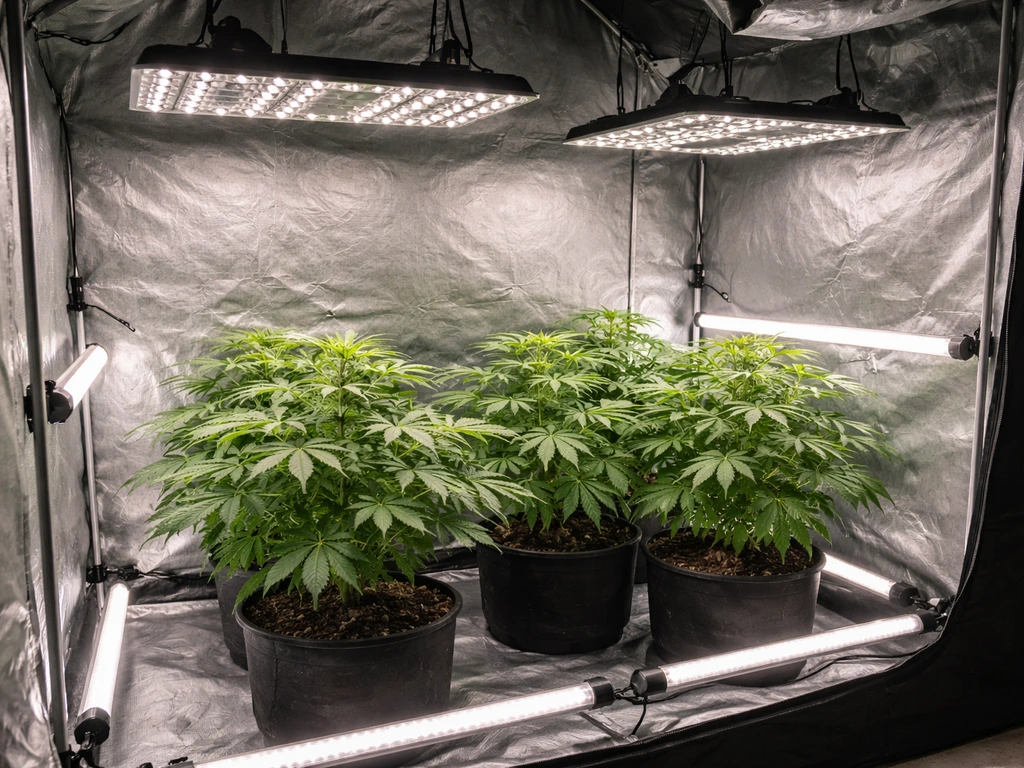
Coverage math: beam spread, mounting height, and PPFD targets
PPFD (photosynthetic photon flux density) is the number you care about, measured in µmol·m⁻²·s⁻¹. It tells you how many photons per second are landing on each square meter of plant surface. For reference, seedlings and cuttings do well in the 100–300 µmol·m⁻²·s⁻¹ range, leafy crops like lettuce sit around 250–350, and flowering crops like cannabis or tomatoes want 600–1000+ at peak. Under-canopy lights aren't expected to hit those top numbers alone, they're supplementing your primary fixture to bring the lower zone up from near-zero to a productive level, typically targeting 200–500 µmol·m⁻²·s⁻¹ in the lower bud zone.
Beam angle and mounting height are the two variables that control how that PPFD spreads. A fixture with a 150° beam angle mounted 6–12 inches from the canopy floor (as IONLIGHT specifies for their 120W under-canopy model) throws light broadly across a wide area at lower intensity. A fixture with a tighter 120° beam angle and a recommended mounting height of more than 30 cm gives you a smaller, more intense footprint. The FloraFlex 3-Bar at 360W covers a 4x4 foot footprint with an output of 1,188 µmol/s at 3.3 µmol/J efficacy, which is among the best efficiency numbers in purpose-built under-canopy hardware right now. The RetroFit Far Red bars page lists a far-red bar PPF output of 289 µmol/s and 3.3 µmol/J efficacy (and mentions Osram 6.24 LED chips). For comparison, some BIOS Grow Lights under-canopy models come in at 2.7–2.9 µmol/J with mounting guidance of 6 to 18 inches or 12 to 36 inches depending on the model.
To calculate your coverage practically: take the beam angle, apply the standard half-angle math (coverage diameter at a given height = 2 × height × tan(beam angle / 2)), and cross-reference against the manufacturer's PPFD map at that distance. Some manufacturers test at very close distances, for example a 3-inch measurement showing 1,649 PPFD is useful for knowing peak output but doesn't tell you much about real-world uniformity at a 12-inch mounting height. Always ask for or find the PPFD map at your actual intended mounting height, not just the closest-possible measurement.
DLI (daily light integral) ties it all together. Multiply your target PPFD by 86,400 seconds per day, then divide by 1,000,000, and you get mol·m⁻²·day⁻¹. Flowering crops generally want 30–50 mol·m⁻²·day⁻¹ total across all light sources. If your primary fixture is already delivering 35 mol·m⁻²·day⁻¹ at the top of the canopy but lower bud sites are seeing 5–8 mol·m⁻²·day⁻¹, a well-placed under-canopy fixture bringing those sites up to 15–20 mol·m⁻²·day⁻¹ makes a measurable difference.
Wattage, efficiency, and heat in tight canopy spaces
Heat management is more critical for under-canopy lights than for overhead fixtures because you're mounting them in the warmest, most humid zone of your grow space. A fixture running hot at 12 inches from foliage can cause heat stress faster than the same fixture overhead at 18–24 inches. This makes efficacy (µmol/J) directly tied to heat management: a more efficient fixture generates less waste heat per unit of light output. At 3.3 µmol/J, the FloraFlex 3-Bar generates significantly less heat per photon delivered than a fixture running at 2.0 µmol/J. The Grow Illumination PRO Series, for example, lists efficacy in the 2.6–2.7 µmol/J range, which is acceptable but sits below the current best-in-class threshold.
Driver reliability is the other piece of the heat puzzle. Cheap drivers run hotter and fail faster in humid canopy environments. Look for fixtures specifying meanwell or equivalent-grade drivers, and check for LM-80 and TM-21 documentation, which projects long-term LED lumen maintenance. TM-21 is used to project lumen degradation lifetime beyond the LM-80 test duration, helping estimate when L70/L80/L90 performance thresholds may be reached blank" rel="noopener noreferrer">check for LM-80 and TM-21 documentation, which projects long-term LED lumen maintenance. The TSRgrow IL-240HVL-FP3 under-canopy fixture, for instance, specifies Q90 LED lifetime of more than 36,000 hours, meaning the diodes will maintain 90% of original output for at least that duration. That kind of spec transparency is what separates serious manufacturers from marketing-copy operations.
On wattage: for a 2x2 under-canopy zone, 60–120W is typically sufficient. A 4x4 zone needs 200–360W from dedicated under-canopy fixtures to meaningfully supplement a well-lit primary canopy. Going much beyond 360W in a 4x4 under-canopy zone starts to create heat management challenges that outweigh the PPFD gains unless you have serious climate control in place.
Best picks by canopy size and budget
Here's how I'd approach the decision by scenario. Before you spend on under-canopy supplementation, make sure your primary fixture is actually doing its job. If you're working with a constrained budget, it's worth considering a capable LED grow light under $100 for your primary overhead position first, and only then adding targeted under-canopy support. Similarly, for growers who are sensitive to running costs, exploring best low watt LED grow light options can help you find efficient supplemental fixtures that add meaningful PPFD without spiking your electricity bill.
2x2 canopy: compact and budget-conscious
For a 2x2 under-canopy zone, you need 60–100W with a wide beam angle (120–150°) and a mounting height of 6–12 inches. A single bar-style fixture works well here. Budget target: under $80 for a workable option, under $150 for something with decent efficacy and dimming. If you're already spending on a quality overhead light and want to keep total spend under $300, check what's available in the best LED grow light for $300 range and budget your remaining allowance for an under-canopy supplement.
4x4 canopy: the most common scenario
The 4x4 is where under-canopy lighting pays off most clearly because canopy density at this scale almost always creates significant light deficits below the top 12–18 inches. The FloraFlex Under Canopy 3-Bar at 360W is purpose-built for this footprint, covers it well at 3.3 µmol/J, and backs it with a 10-year standard warranty that no budget brand comes close to matching. It's a premium price point (typically $400–600), but for commercial or semi-commercial operations where yield per cycle matters, it's the right math. If you're working with a tighter budget, a 200W LED grow light can be used as an under-canopy fixture in a 4x4 with good results if its beam angle is 120° or wider, though you'll want to verify the PPFD map at your intended mounting distance.
Larger commercial spans
For 6x6, 8x8, or larger canopy zones in a commercial setting, you're typically running multiple under-canopy bar fixtures in a grid pattern. At this scale, budget per fixture matters less than system efficiency and fixture uniformity across the run. If you're planning a scaled build and working out your per-fixture spend, a look at the best LED grow lights under $500 can help you identify fixtures with solid efficacy numbers that won't break the bank across a multi-fixture array. Target 2.8 µmol/J or better at this scale, and confirm that each fixture has dimmable output so you can tune the array uniformly.
Spec checklist for evaluating any under-canopy LED
- Actual wattage draw (not 'equivalent' wattage): confirmed from the driver spec sheet or measured draw
- Efficacy in µmol/J: target 2.7 µmol/J minimum, 3.0+ for premium tier
- PPF output in µmol/s: tells you total photon output independent of coverage area
- PPFD map at your intended mounting height (not just at 3 inches): must show uniformity across the coverage zone
- Beam angle: 120–150° for close-mount under-canopy applications
- Dimming capability: analog 0–10V or at minimum discrete steps (25/50/75/100%)
- Spectrum: full-spectrum white with red/far-red included for flowering stages
- Driver quality: meanwell or equivalent, with LM-80/TM-21 data available
- Third-party testing: look for ANSI/IES LM-79 test reports, not just marketing claims
- Warranty: 3 years minimum; 5+ years for commercial use; 10 years is the current benchmark
- Thermal management: passive or active cooling rated for humid canopy environments
- Safety certification: UL, ETL, or CE at minimum for electrical safety
Installation tips and mistakes that will cost you yield
Mounting height is the most common mistake. Too close and you create hotspots, too far and you lose the PPFD intensity that makes under-canopy lighting worth running. Stick to the manufacturer's recommended range (typically 6–18 inches) and start at the upper end of that range, then use a PAR meter to verify actual PPFD at leaf level. Only move the fixture closer if your readings show you're under-illuminating the zone. If you don't have a PAR meter, rent or borrow one: guessing on under-canopy mounting height is one of the fastest ways to either stress your plants or waste the fixture entirely.
Spacing matters enormously in multi-fixture under-canopy arrays. Uneven spacing between bar fixtures creates alternating bands of high and low PPFD that translate directly to uneven bud development. If you're running three bars across a 4x4, space them evenly at roughly 16-inch intervals across the width, and verify with a PAR meter that the readings between fixtures don't drop more than 15–20% from the readings directly under each bar. Hotspot-to-underlit ratios worse than 2:1 will show up in your harvest.
Use dimming actively, not just at installation and then never again. Under-canopy intensity needs change as your canopy develops. During early flower when the canopy is open, you may run at 50–75% to avoid light stress on exposed lower leaves. As the canopy closes and shading increases, ramp up to 100%. The VIVOSUN Lumaray system, for example, supports discrete dimming steps (25/50/75/100%) through its control interface, which gives you enough resolution to tune output meaningfully as the grow progresses. More sophisticated fixtures with analog 0–10V dimming give you finer control, which matters at commercial scale.
Wiring and driver placement in a humid canopy environment requires attention. Mount drivers outside the canopy zone if possible, drivers run hot and don't benefit from the high humidity your plants prefer. Run the fixture heads inside the canopy on extension wires, and make sure all connectors used inside the canopy are rated for the humidity level you're running. Waterproofing ratings (IP65 or higher for the fixture head) matter much more for under-canopy placement than for overhead fixtures.
Finally, verify manufacturer claims before you buy. PPFD numbers in marketing materials are often measured at the closest possible distance under ideal conditions. Look for ANSI/IES LM-79-compliant test reports, which are conducted using integrating sphere photometry under standardized electrical and thermal conditions. Any manufacturer making specific efficacy or output claims should be able to provide this documentation on request. If they can't, treat their numbers skeptically. Third-party PAR maps and independent reviews from sources that use calibrated quantum sensors are more trustworthy than manufacturer-produced data sheets alone.
The short version: what to do next
Measure your canopy footprint and identify the mounting height range you can realistically achieve given your plant size and training style. Set a PPFD target for the lower bud zone based on crop stage (200–300 µmol·m⁻²·s⁻¹ for supplemental early flower, 400–500 for late flower push). Use the coverage math from the manufacturer's PPFD map to confirm how many fixtures you need at that height. Cross-reference efficacy (target 2.7 µmol/J minimum), verify dimming capability, and check for LM-79 test data before you pull the trigger. For a 4x4 with budget headroom, the FloraFlex 3-Bar is the current benchmark. For tighter budgets or smaller spaces, a purpose-built 60–120W bar-style fixture with a 120–150° beam angle will do the job if you verify the PPFD map is real. Install at the upper end of the recommended height range, verify with a PAR meter, tune with dimming as the canopy develops, and your lower bud sites will thank you at harvest.
FAQ
Do I need under-canopy lights if my overhead light is already strong?
Only if your lower bud sites are actually light-starved. The practical check is to measure PPFD at the lower third with a PAR meter at your intended mounting height, then compare it to the lower-zone target you want (for late-flower supplementation this is often roughly 400 to 500 µmol·m⁻²·s⁻¹ when aiming for a push). If your lower zone is already near-adequate, under-canopy lights mostly add complexity and heat without much yield gain.
What’s the difference between “supplemental” under-canopy lighting and trying to replace my overhead fixture?
Supplemental means you raise PPFD in the bottom zone while relying on overhead for most of the daily light integral. If you try to run under-canopy lights as the primary source, efficiency and uniformity usually suffer because leaf structure and scattering favor top-down light. Treat under-canopy bars as a precision tool, and keep overhead as the main driver of DLI.
How do I avoid hotspots when mounting under-canopy bars?
Start at the upper end of the manufacturer’s height range, then verify with a PAR meter to confirm the in-between areas are not far below the points directly under the bar. If you see a large spread, reduce output using dimming rather than immediately lowering the fixture. Lowering almost always increases hotspot severity and canopy heat stress.
Can I use red/blue “blurple” under-canopy fixtures instead of full-spectrum with red boost?
You can, but it’s usually a trade-off you do not want. Blurple panels often have weaker PPFD uniformity at the close mounting distances under canopies, and they can also make it harder to maintain a balanced photon mix across the 400 to 700 nm range. If you want reliable results, prioritize full-spectrum white with targeted red (and far-red only if you are specifically tuning late-flower responses).
What mounting height should I choose if my plants are trained low or have a dense canopy?
If your lower leaves are close to the fixtures, do not default to the shortest mounting height. Start higher within the recommended range so you get a wider, smoother footprint, then use dimming and add fixtures if needed for coverage. Dense training styles usually need better spacing and measurement, not simply closer mounting.
How many under-canopy bars do I need for a 4x4 if I’m spacing them across the width?
A common starting point is three evenly spaced bars across the 4-foot width, but the real answer depends on your actual beam angle and the manufacturer’s PPFD map at your exact mounting distance. Use the coverage math for planning, then confirm with PAR readings that the PPFD between bars does not drop dramatically (a good rule of thumb is keeping gaps within about 15 to 20% of the peaks).
Should I run under-canopy lights at full power all the time?
No, intensity needs usually change as the canopy closes. During earlier flower or when lower leaves are relatively exposed, running at reduced output helps prevent light stress. As shading increases and lower bud sites become more protected, ramp up toward 100% so the bottom zone keeps receiving enough photons.
Is dimming required, or can I just run them at a fixed output?
Dimming is strongly recommended because under-canopy needs shift through time and because measurements can show you are slightly high or low. Discrete dimming steps (for example 25/50/75/100%) are often enough for home grows, while analog dimming (0 to 10V) is better for larger operations where you want finer uniformity control across multiple fixtures.
Where should I place the drivers, especially in a humid canopy zone?
Place drivers outside the canopy zone whenever possible, because they run hot and humidity is higher near foliage. Keep the fixture heads inside, using humid-rated connectors and making sure the head’s protection rating is appropriate (IP65 or higher for the head is a common target). This reduces corrosion and premature driver failures.
How important is LED efficacy (µmol/J) for under-canopy lights?
It matters because under-canopy fixtures are installed in the warmest, most humid zone. Higher efficacy usually means more usable photons for the same electrical input and less waste heat per unit of light. If two fixtures deliver similar PPFD coverage, the one with better µmol/J typically helps you stay closer to safe leaf temperatures.
What LED lifetime specs should I look for before buying?
Look for published lifetime metrics such as an LM-80-backed approach and projections like TM-21, or clear claims about diode lumen maintenance (for example, a Q90 value). Be cautious with vague “years of life” marketing without any maintenance projection, because under-canopy heat and humidity can accelerate real-world degradation.
Marketing PPFD numbers look high, how can I tell if they’re meaningful?
Ask for PPFD maps at the mounting height you can actually use. Numbers measured at extreme close distances can be misleading because they do not represent uniformity across the footprint where buds are developing. Also treat output and efficacy claims skeptiously if there are no standardized test reports supporting them.
Do I need a PAR meter to tune under-canopy lighting?
You can make educated guesses, but a PAR meter is the fastest way to avoid wasting money or stressing plants. Since beam angles, reflector behavior, and mounting height all change the real PPFD distribution, measuring at leaf level lets you adjust height and dimming with confidence instead of relying only on coverage diagrams.
How should I set a PPFD target for the lower bud zone by crop stage?
A practical approach is to use a lower target early in flower when supplementation is meant to support rather than push, then increase in late flower for the bottom sites. Many growers start supplemental targets around the low hundreds µmol·m⁻²·s⁻¹ in early flower, and aim higher, roughly 400 to 500 µmol·m⁻²·s⁻¹, when they are trying to maximize late-flower development, all while keeping overhead DLI as the main baseline.
What’s the quickest way to verify my DLI goals after adding under-canopy lights?
Measure or estimate PPFD at the lower zone, then translate it into DLI using the standard conversion (PPFD times seconds per day, then divide by one million). After that, confirm your combined light sources bring the lower zone into your desired mol·m⁻²·day⁻¹ range for flowering. This ensures you are not chasing PPFD that does not translate into enough daily photons.
Can I run more wattage to compensate for poor spacing or a wrong beam angle?
Sometimes, but it usually makes heat and uniformity problems worse. If your spacing creates bands of high and low PPFD, adding wattage often amplifies the peaks more than the gaps. The better solution is to correct mounting height, beam coverage, and fixture spacing first, then fine-tune with dimming and additional bars only if PAR measurements show it’s necessary.
Next Articles
Best Full Spectrum 1000W LED Grow Lights: Buyer Guide
Buy the best full spectrum 1000W LED grow light with spec-to-decision tips on PPFD, coverage, wattage, and tent fit.
Best 100W LED Grow Light: How to Choose the Right One
Choose the best 100W LED grow light with PPFD coverage, spectrum, efficiency, dimming, heat, and setup tips.
Best LED Grow Light to Replace 1000W HPS: Sizing Guide
Sizing and buying guide to replace a 1000W HPS with the right LED using PPFD, layout, mounting, and spectrum for yields.