A 10x10 grow tent is 100 square feet of canopy, and that size demands a serious, deliberate lighting plan. The short answer: you need between 1,000W and 2,000W of LED draw (true wall watts, not claimed equivalent) depending on what you're growing and how hard you're pushing yield. For most full-cycle veg and flower grows, targeting 1,200W to 1,600W across multiple fixtures gives you the PPFD range most crops want (500–1,000+ µmol·m⁻²·s⁻¹) without cooking your tent. This guide walks through the math, the fixture types, the placement strategy, and the specific picks worth your money right now.
Best LED Lights for a 10x10 Grow Tent: Sizing Guide

Marcus Rutherford
22 Apr 2026
Sizing LED power for a 10x10 tent: the coverage math
The standard rule of thumb for LED in a flowering tent is 30–50 true watts per square foot. At 100 sq ft, that puts your target range at 3,000W on the low end to 5,000W on the high end, but those numbers assume HID-era thinking. Modern high-efficiency LEDs (2.5–3.0+ µmol/J) deliver more photons per watt, so in practice growers get excellent flower results at 1,200–1,600 true watts using quality bar-style or quantum board fixtures. Pushing to 2,000W is viable if you're running CO2 enrichment and your HVAC can handle it.
The cleaner way to size is by PPFD target. Most crops in veg want 400–600 µmol·m⁻²·s⁻¹ at the canopy. Flowering crops want 800–1,000 µmol·m⁻²·s⁻¹, and high-light crops like cannabis pushed with CO2 can handle 1,200–1,500 µmol·m⁻²·s⁻¹. Multiply that target PPFD by your photoperiod to get DLI (Daily Light Integral, in mol·m⁻²·day⁻¹), which is the real measure of how much light a plant accumulates over a day. A flowering photoperiod of 12 hours at 900 µmol·m⁻²·s⁻¹ average delivers roughly 38.9 mol·m⁻²·day⁻¹, which is in the sweet spot for most high-light crops.
Here's the practical sizing math: take your target PPFD, multiply by your tent area in square meters (a 10x10 ft tent is about 9.3 m²), and divide by the fixture's efficacy in µmol/J to get estimated wattage needed. At 900 µmol·m⁻²·s⁻¹ average across 9.3 m² with fixtures running at 2.7 µmol/J efficiency, you need roughly (900 × 9.3) / 2.7 = 3,100 µmol total flux, which works out to about 1,150W of draw. Add 15–20% buffer for real-world uniformity losses and edge falloff, and you land at 1,300–1,400W. That's your practical target for a serious flower setup without CO2.
| PPFD Target (avg) | Use Case | Estimated True Watts Needed | CO2 Required? |
|---|---|---|---|
| 400–600 µmol·m⁻²·s⁻¹ | Veg / seedlings / clones | 600–900W | No |
| 700–900 µmol·m⁻²·s⁻¹ | Flower, most crops | 1,100–1,400W | No |
| 1,000–1,200 µmol·m⁻²·s⁻¹ | High-yield flower | 1,400–1,800W | Recommended |
| 1,200–1,500 µmol·m⁻²·s⁻¹ | Maximum output, CO2 enriched | 1,800–2,200W | Yes |
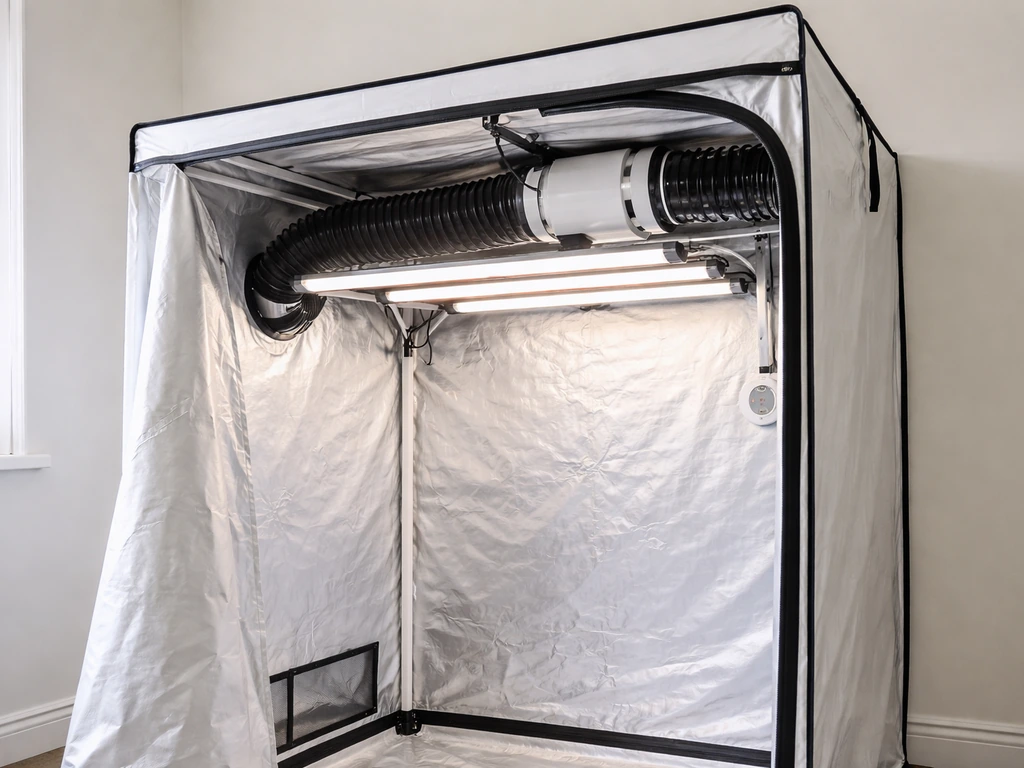
Bar lights vs panels vs COB: what works best in a 10x10
The fixture format matters more in a 10x10 than in a smaller tent because you're covering a large, wide footprint where hotspots and edge falloff become real problems. Each format handles that challenge differently.
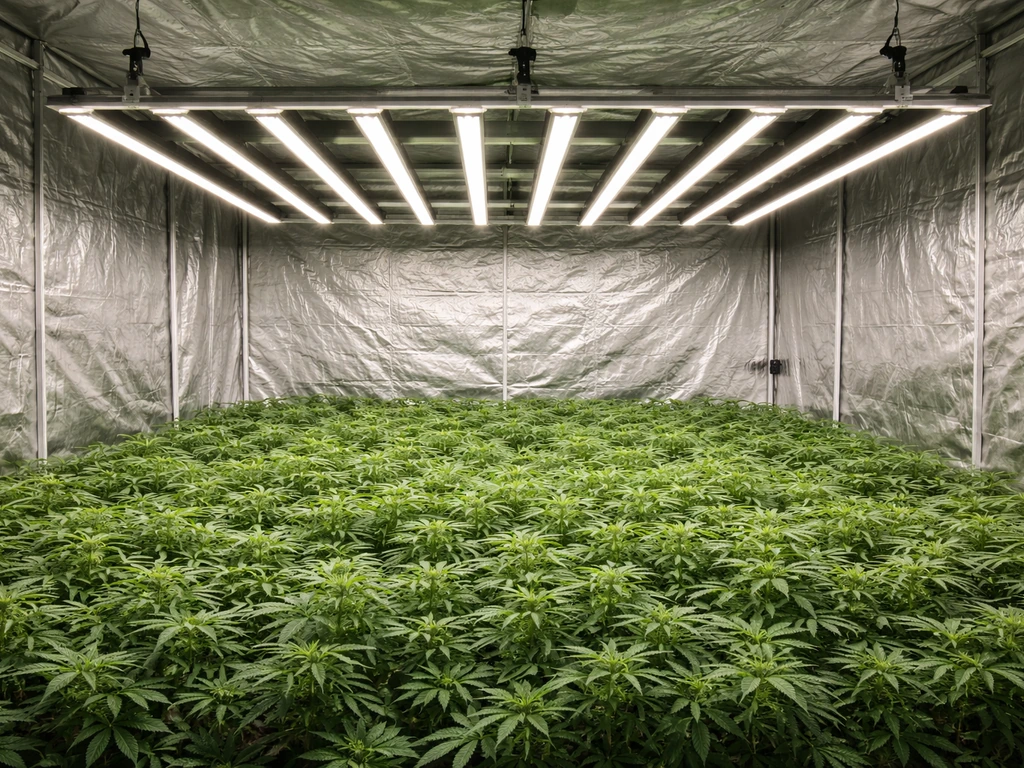
Bar-style LED (the current standard for big tents)
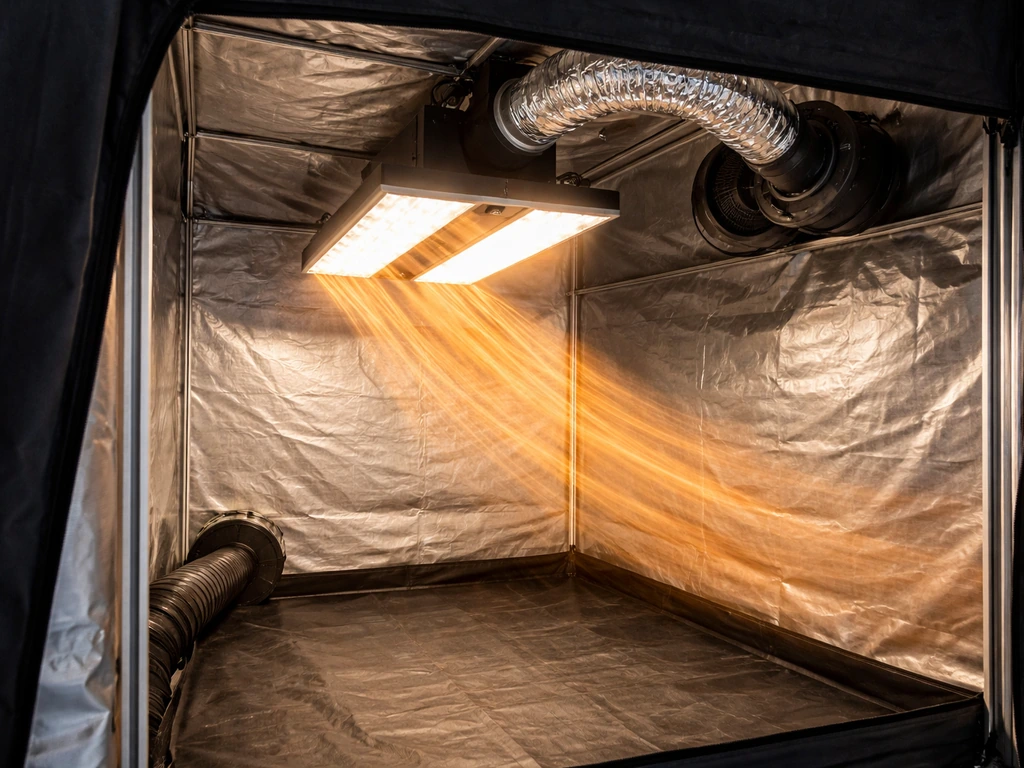
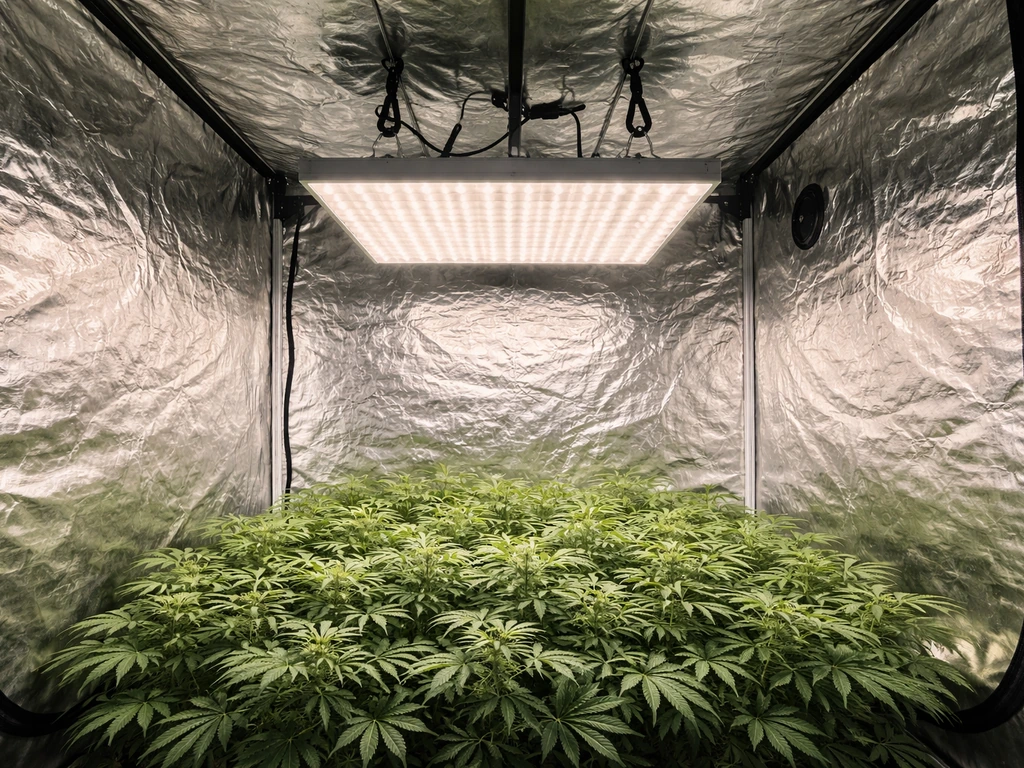
Bar lights distribute diodes across multiple elongated arms, which spreads the photon output more evenly than a single point or flat panel. In a 10x10, running 2–4 bar fixtures side by side gives you a more uniform PPFD map across the canopy versus stacking square panels. Brands like Spider Farmer's SE series and AC Infinity's IONFRAME EVO series both use this approach. Bar lights also run cooler per diode because the thermal load is spread across more surface area, which matters a lot when you're pulling 1,200W+ in an enclosed tent. The trade-off is that quality bar fixtures cost more upfront.
Quantum board / panel lights
Quantum boards (flat panels with SMD diodes) are excellent for smaller spaces but become limiting in a 10x10. A single 1,000W board can't physically cover the full footprint with uniform PPFD, so you need multiple fixtures, at which point you're dealing with overlapping coverage zones and potential hotspots directly under each panel. That said, running four 300–400W quantum boards in a 2x2 grid pattern across a 10x10 works well and gives you dimming flexibility per zone. Panels remain a solid budget option when you already own several and need to fill a larger space.
COB (Chip on Board)
COB fixtures concentrate high-intensity output into a small emitter area, which creates intense center PPFD but steep falloff toward the edges. In a 10x10 they require many individual COB units (8–12 or more) to achieve even coverage, and the installation complexity plus heat management make them harder to work with than bars or boards. COB made sense in an earlier LED generation. For a new 10x10 build today, bar or quantum board is the better call unless you have a specific reason (e.g., supplemental lighting for specific zones).
| Fixture Type | Uniformity in 10x10 | Heat Management | Cost | Best For |
|---|---|---|---|---|
| Bar-style LED | Excellent | Good (distributed thermal load) | Medium to High | New builds, high-output flower |
| Quantum Board / Panel | Good (multiple units needed) | Moderate | Low to Medium | Budget builds, mixed veg/flower |
| COB | Poor (per unit) | Requires active cooling per unit | Variable | Supplemental / specialty use |
Spectrum and features you actually need for full-cycle growing
Full-cycle means veg and flower in the same tent, possibly over multiple runs. The spectrum and control features need to support both phases without swapping fixtures.
Spectrum: what the science actually says
A full-spectrum white LED (roughly 3000K–5000K phosphor-converted) covering 400–700nm PAR is the baseline. Beyond that, far-red (700–750nm, peak around 735nm) is worth having. Research shows far-red photons can be photosynthetically effective when they make up a portion of total photon flux, with some studies testing scenarios up to around 30% far-red contribution. More practically, far-red promotes the Emerson Enhancement Effect, speeding up photosynthesis when combined with red (660nm) photons, and phytochrome (the plant's light-sensing pigment) responds directly to the red-to-far-red ratio, which affects flowering signals and stem elongation. Look for fixtures that include a far-red channel rather than just marketing a 'full spectrum' white chip with no supplemental bands.
UV (280–400nm) is a nice-to-have, especially for terpene and resin production in cannabis, but it's less critical than getting your red and far-red dialed in. If a fixture includes UV, verify it's a dedicated UV LED channel, not just a marketing label applied to a violet diode.
The feature checklist
- Dimming: 0–10V analog or PWM dimming (not just a physical knob), ideally compatible with ecosystem controllers like AC Infinity or GrowFlux so you can automate ramp-up/ramp-down schedules
- Smart control: app-based scheduling (sunrise/sunset curves, intensity scheduling by time of day) saves power and reduces heat spikes during lights-on
- Daisy-chain or master-slave: lets you control multiple fixtures as one unit, critical when running 2–4 fixtures in a 10x10
- Independent veg/bloom channels: allows spectrum tuning per growth stage without separate fixtures
- Efficiency rating: 2.5 µmol/J minimum, 2.7–3.0+ for premium picks
- Warranty: 3+ years for drivers, 5 years for the fixture itself is the current market standard from reputable brands
- Samsung LM301H or equivalent diodes (or newer): proven long-term lumen maintenance and efficiency at scale
How to place lights in a 10x10 for even coverage
Placement is where a lot of 10x10 growers leave yield on the table. Hanging everything in the center creates a hot spot in the middle and dim corners that produce airy, underdeveloped buds. The goal is uniform PPFD across as much of the canopy as possible, which Philips and other lighting engineers describe through uniformity ratios: ideally your minimum-to-average PPFD ratio across the canopy should be above 0.7 (70% uniformity). Below that, the dim zones pull down your overall yield.
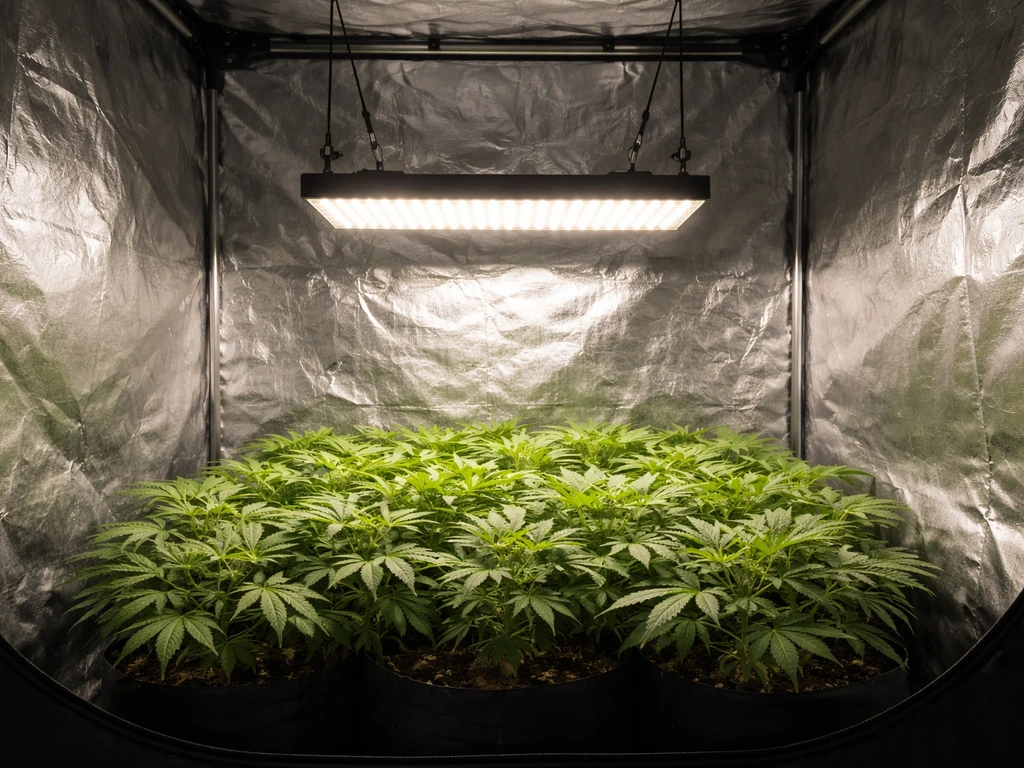
Recommended layout for 2 fixtures
If you're running two large bar-style fixtures (e.g., two 700W bars), position them parallel to each other, each centered on the 5-foot mark along one axis, spaced roughly 3–4 feet apart on the other axis. This puts each bar over its own 5x10 half of the tent rather than stacking them in the center. Orient the bars lengthwise across the 10-foot dimension for maximum spread.
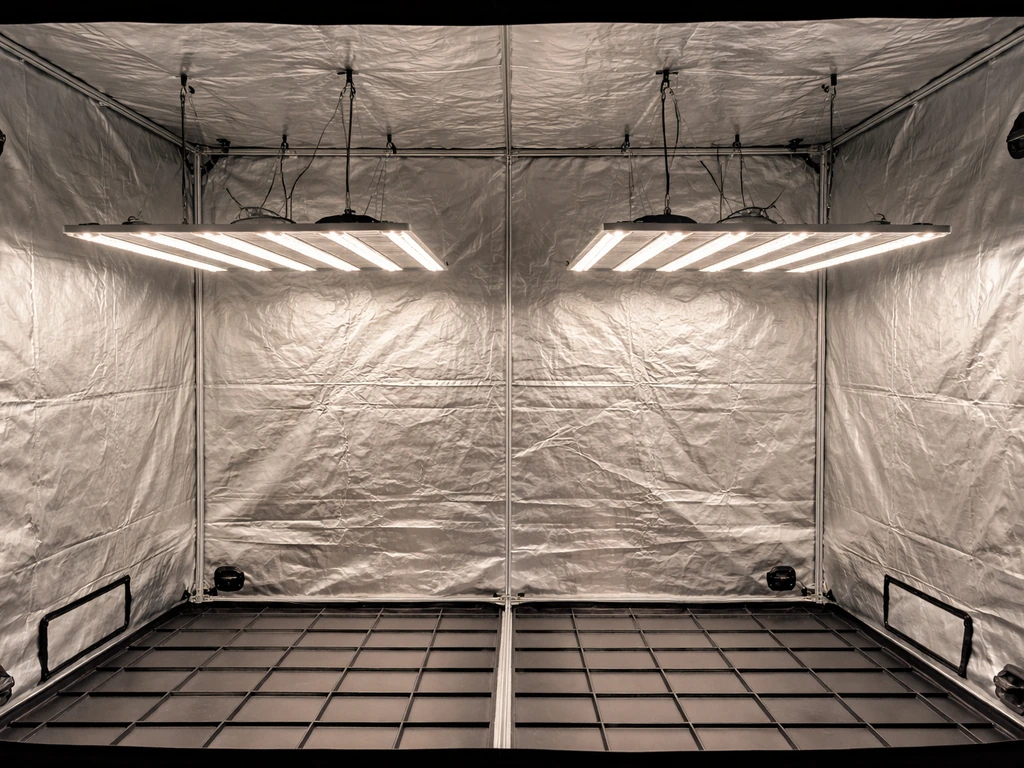
Recommended layout for 4 fixtures
Four fixtures in a 2x2 grid is the most uniform setup in a 10x10. Space them evenly: 2.5 feet from each wall on both axes, which puts the center-to-center spacing at 5 feet. This distributes PPFD far more evenly than two large fixtures, and it also gives you per-zone dimming flexibility if each fixture has independent control.
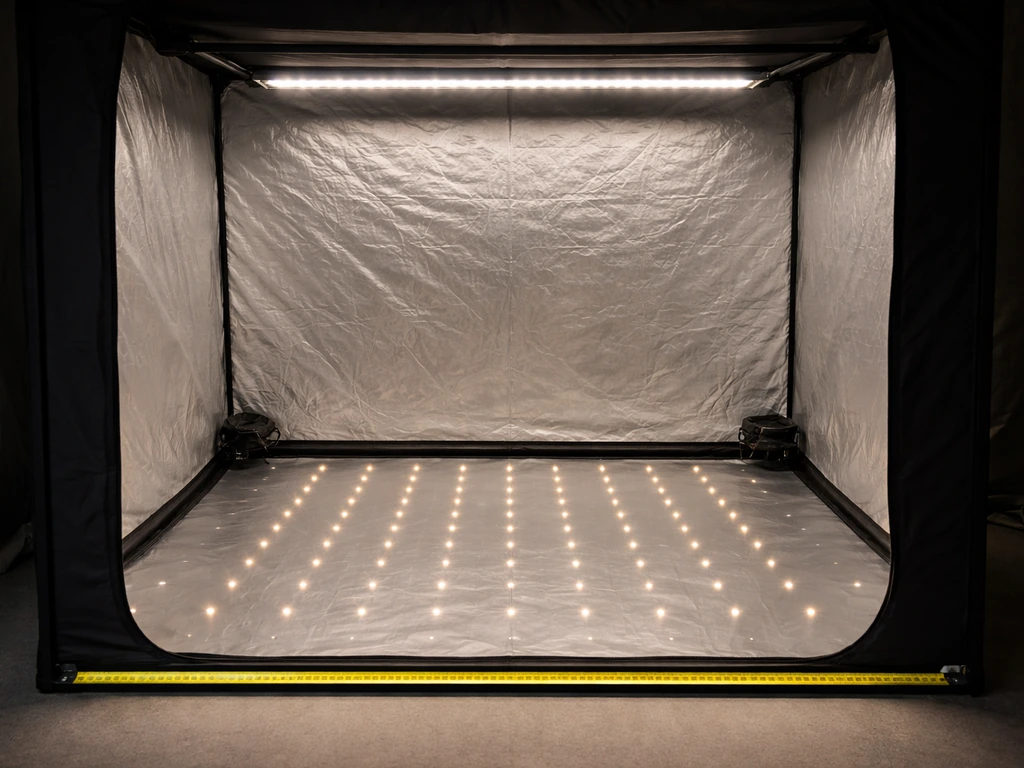
Mounting height
Bar lights perform best hung 18–30 inches above the canopy for flowering. Lower than 18 inches concentrates light too intensely in the center footprint directly below each bar. Above 30 inches, you start losing intensity at the canopy faster than you gain uniformity. During veg, raising to 30–36 inches and dimming to 50–60% keeps plants from stretching while saving power. Use adjustable ratchet hangers (most quality fixtures include these) and recheck hanging height when switching from veg to flower phase. Your tent's interior height sets the hard ceiling: standard 10x10 tents run 6.5–7 feet tall, leaving 4–5 feet of usable grow space after lights and ducting occupy the top.
Top picks by use case
These recommendations are based on current 2026 market specs, real efficiency ratings, and what delivers reliable canopy PPFD in a 10x10 without requiring a commercial HVAC system to compensate.
Best overall: AC Infinity IONFRAME EVO10 (pair of two)
Running two IONFRAME EVO10 units in a 10x10 gives you 2,000W of well-distributed bar-style output with full AC Infinity ecosystem integration: schedule programming, sunrise/sunset dimming curves, multiple intensity levels, and app control. The EVO10 carries high PPFD output (peak claims around 2,146 µmol·m⁻²·s⁻¹ at close range, so verify against the official PPFD map at your actual hanging height), and the bar format spreads photons well across a wide footprint. Running them at 70–80% lets you dial in the 900–1,000 µmol·m⁻²·s⁻¹ flower target while keeping heat manageable. The smart controller integration is genuinely useful over a full season, not just a feature checkbox.
High-output / max yield: Spider Farmer SE1000W (two to four units)
The SE1000W is a bar-style fixture with Bluetooth and WiFi smart app control, 0–10V dimming, and daisy-chain capability, meaning you can chain multiple units and manage them as one system. Two units at full power give you 2,000W with strong efficiency. Four units give you the full 4-bar grid layout described above, maximizing uniformity and letting you push PPFD into the CO2-enriched range (1,200+ µmol·m⁻²·s⁻¹). The SE series user manual explicitly documents multi-fixture dimmer-box behavior, which matters when you're trying to get consistent PPFD across all four fixtures rather than running them independently.
Budget pick: Spider Farmer SF1000D (four units)
The SF1000D (2026 version) supports 0–10V dimming control and includes updated PPF output data on the product page. Four units at 1,000W total spread across a 10x10 using a 2x2 grid will underpower a serious flower run (you'll land closer to 600–700 µmol·m⁻²·s⁻¹ average), but it's a workable veg setup or a starter flower build where budget is the hard constraint. Add two more SF1000Ds later and you have a respectable 1,500W build. The per-unit cost is low enough that this approach makes sense for growers who want to scale incrementally.
Beginner-friendly: single 2000W bar fixture (e.g., Spider Farmer SE2000 or equivalent)
If you want to minimize complexity and just hang one fixture and grow, a single high-wattage bar fixture in the 1,500–2,000W range works for a 10x10 at reduced intensity expectations. If you want a simple starting point, the best 5x5 LED grow light options usually prioritize good PPFD coverage and controllability so you can dial intensity without wasting power.
You won't hit full uniformity across the whole footprint, especially in the corners, but for a first grow focused on learning rather than maximum yield, this setup is far simpler to manage. It also makes sense if your 10x10 is actually being used as a veg tent feeding a separate flower space. The trade-off is clear: single-fixture setups always have worse uniformity than multi-fixture grids. Grow plants toward the center of the tent if you go this route.
How to verify real performance before you buy
LED marketing numbers are notoriously optimistic. PPFD claims on product pages are often measured at close range (12–18 inches) under ideal lab conditions and don't reflect what you'll see 24 inches above a real canopy. Here's how to sanity-check specs:
- Ask for or find the full PPFD map: a credible manufacturer publishes a grid showing PPFD values at multiple points across the coverage area at a specified hanging height. A single peak number tells you almost nothing about uniformity.
- Check the measurement conditions: Philips explicitly warns that hang height, free height, reflection factors, and the exact area over which uniformity is calculated all affect reported numbers. A PPFD of 1,000 µmol·m⁻²·s⁻¹ measured at 12 inches over 2x2 feet is not comparable to 1,000 µmol·m⁻²·s⁻¹ measured at 24 inches over a 5x5 foot grid.
- Verify efficiency independently: divide the reported PPF (µmol/s) by the fixture's true wall wattage. A 1,000W fixture rated at 2,700 µmol/s PPF is running at 2.7 µmol/J. Anything below 2.3 µmol/J in 2026 is below current market standards.
- Look for third-party test data: IES test reports (LM-79 for electrical, LM-82 for LED component) and independent PAR meter measurements from grow forums or reviewers provide actual canopy numbers rather than factory claims.
- Check uniformity targets: aim for a minimum-to-average ratio above 0.7 across your canopy. Some manufacturer calculators (like SANlight's tent calculator) estimate output with a stated accuracy of ±10%, which is honest and typical for planning tools.
- Evaluate long-term performance: LED output degrades over time (lumen maintenance). Look for L90 ratings (the point at which output drops to 90% of original) and whether the manufacturer publishes multi-year efficiency data.
Installation, heat, and airflow: keeping your tent running at full power
Heat is the most common reason growers don't actually run their lights at full power in a 10x10. A 1,400W LED setup generates roughly 4,780 BTU/hr of heat that has to leave the tent. If it doesn't, canopy temps rise above the 75–85°F range most crops want, VPD goes out of balance, and you end up dimming the lights not because the plants need less light but because your exhaust can't keep up.
Exhaust and intake math
A 10x10x7 tent has about 700 cubic feet of air volume. For a hot-running high-watt setup, you want to exchange that volume every 1–2 minutes. That means a minimum 350–700 CFM inline fan on exhaust, and ideally a matching passive or active intake on the opposite side. Running a 6-inch inline fan at 400–500 CFM is typically adequate for a 1,200–1,500W build in a climate-controlled room. Push to 2,000W and you want an 8-inch inline or dual 6-inch setup. Make sure your carbon filter (if used for odor control) is rated for the same CFM as your fan, or your actual airflow will be significantly lower than the fan's rated spec.
In-tent air circulation
Horizontal oscillating fans positioned at canopy level prevent hot spots and strengthen stems. In a 10x10, two 6-inch or one 12-inch oscillating fan at mid-canopy height is usually enough. Point them across the canopy, not directly down onto plants. Moving air also lowers leaf surface temperature by a few degrees, which effectively raises the CO2 absorption rate and reduces the risk of heat stress even when ambient temps are at the upper edge of acceptable.
Controller and dimming integration
If you're using an ecosystem controller like AC Infinity's app-based system, verify that your fixtures support the right dimming protocol: 0–10V analog or PWM. The AC Infinity UIS Lighting Adapter supports both 0–10V and PWM dimming standards, but a firmware update via the app may be required for some fixtures. The GrowFlux Universal dimmer similarly requires analog 0–10V compatibility. Mismatched dimming protocols mean you either lose control functionality or damage the driver, so confirm before buying. Most modern bar-style fixtures from reputable brands support 0–10V natively, but always check the spec sheet, not just the marketing copy.
Pre-commit checklist for your 10x10 setup
- Measure your actual tent interior height and subtract 12 inches for ducting, light hangers, and headroom: this is your usable grow height
- Calculate your target PPFD and total PPF needed using the coverage math above, then verify the fixture's published PPF at your planned hanging height
- Confirm dimming protocol compatibility (0–10V or PWM) with any controller or smart hub you plan to use
- Check your electrical circuit: 1,400W at 120V pulls about 11.7A. A 20A circuit gives you headroom; running on a 15A circuit is risky if anything else is on the same breaker
- Plan your exhaust/intake CFM before buying the lights, not after: under-ventilating a high-watt tent is the most common yield killer
- Map your fixture placement using the 2x2 grid or parallel-bar layout before hanging, using tape on the tent floor to mark the footprint of each light
- Run lights at 50% for the first week of a new grow to let plants acclimate, then ramp up 10–15% per week toward your target intensity
A 10x10 tent is genuinely a significant grow operation. The investment in getting the lighting right, including correct wattage, multiple fixtures in a grid layout, and proper ventilation to support those watts, pays off across every subsequent grow. Growers who underlight a 10x10 to save money upfront consistently pull yields that would have been better in a 5x5 with the lights sized correctly.
If you're also evaluating lighting for adjacent spaces, the same sizing methodology applies: a 5x5 flower tent needs roughly 600–800W of quality LED, and smaller setups benefit from the same PPFD-first approach used here. For a compact setup, you can use the same PPFD-first approach to choose the best LED for a small grow tent best led for small grow tent.
If you want a similar quick starting point for a 10x10, use the best led grow tent kit approach and match fixture wattage to your PPFD goals and ventilation capacity best LED for a small grow tent. If you want a quick starting point for a smaller footprint, compare options for the best 5x5 led grow light based on real PPFD and controllability.
FAQ
I do not have a PPFD meter, how should I set initial power and hanging height for a 10x10?
If you cannot measure canopy PPFD, use a conservative hanging-height and dimming plan. Start with the midpoint target for your crop (veg 500 µmol·m⁻²·s⁻¹, flower 900 µmol·m⁻²·s⁻¹), hang bars at about 24 inches for flower (or 30 to 36 inches for veg), then run at 70 to 80% power. You can fine-tune by watching canopy temperature and internode stretch, but the most reliable check is still a PPFD meter at canopy level across the full tent, especially near corners.
When sizing LED for a 10x10, should I rely on brand “equivalent wattage” claims or real wall draw?
For LED, you generally want “true watts at the wall” as your baseline for electrical sizing, since claimed “HID equivalents” are marketing. In a 10x10, the practical way to avoid an underpowered build is to count total wall draw across fixtures and then ensure your plan achieves your PPFD target through dimming and uniform layout (2x2 grid for panels or multiple bars spaced away from the center). If your heater exhaust or CO2 system is limited, stay closer to the 1,200 to 1,600W draw band for flower.
What are the most common placement mistakes in a 10x10 that reduce yield?
In practice, the “best” layout depends on fixture geometry, and you should avoid stacking multiple fixtures in the center of a 10x10. Two common mistakes are placing everything on the same centerline (creating dim edges) and under-spacing fixtures (overlapping hotspots). If you use two long bar fixtures, orient them along the 10-foot length and separate them by about 3 to 4 feet, centered on the 5-foot marks along one axis. If you use four fixtures, use a symmetric 2x2 grid with about 2.5 feet from each wall on both axes.
Should I prioritize far-red channels, or is it more important to hit the main PPFD first?
Far-red is helpful, but it is not a “free yield” button. It works best when total photon delivery is already in the right range, and it should be added as a channel that increases red-to-far-red balance rather than replacing core red and PAR power. If your fixture lets you set far-red percentage, start modestly (for example, a far-red contribution well under the upper extreme of what studies test) and confirm you can maintain temperature and uniform PPFD without raising power.
Is UV actually worth buying for a 10x10 grow tent?
UV in LEDs is usually a minor advantage compared with achieving correct PAR and uniform coverage, especially for most new growers. If a fixture includes UV, confirm it is a dedicated UV LED channel and then test gradually because UV-heavy settings can raise stress and also add heat load. A practical approach is to treat UV as supplemental for certain phases or runs, rather than running it at full intensity continuously.
Can a two-fixture setup match the uniformity of a 4-fixture 2x2 grid in a 10x10?
Two fixtures at 1,000W each can still be uneven if they are not arranged and dimmed correctly. If you run a simplified “one big fixture” setup, expect weaker corner PPFD and plan to keep more plants toward the center. For maximum uniformity, the 2x2 grid concept reduces corner drop, because multiple light sources overlap across the full 10x10 instead of relying on a single coverage footprint.
Do I need per-fixture dimming in a 10x10, or is one shared dimmer fine?
Yes, but only if you can independently control intensity per zone and your controller supports the dimming protocol you are using. For a grow tent, independent control is most valuable for reducing hotspot overlap (where PPFD is too high) and compensating for edge falloff. If your fixtures share a controller but only one protocol works (for example, 0–10V vs PWM), you may lose dimming or risk driver issues, so verify compatibility before wiring anything.
How do I make sure my controller dimming protocol will not cause issues?
Check that the dimming method is compatible with your ecosystem controller and that the firmware is correct when applicable. A practical rule is: confirm your fixtures state support for 0–10V or PWM, match that to your controller’s adapter, and expect to recheck after firmware updates. If you see inconsistent output or a fixture fails to dim, do not keep experimenting at full power, switch to the documented dimming standard, and retest.
If my lights are rated for the wattage, why do I still need to size exhaust fan and airflow?
Ventilation is also your lighting limit, not just a comfort setting. As a rough planning check, higher wattage means more exhaust demand, and undershooting airflow forces you to dim to protect canopy temperature and VPD. For a 10x10, start by targeting enough airflow to exchange the tent air every 1 to 2 minutes, then scale fan size when you increase draw. Also ensure your carbon filter matches the same CFM rating as the exhaust fan, because mismatch can bottleneck airflow.
How do I adjust hanging height if I see hotspots in the middle or weak corners?
The 18 to 30 inch guidance for bar fixtures is a starting point, but the “right” height depends on whether your priority is uniformity or maximum intensity. If you are getting center hotspots and weak corners, raise the fixture slightly (within reason) or switch to more fixtures (grid layout). If you are struggling to hit canopy PPFD, lower within the safe range and increase power gradually, but monitor canopy temps because lowering height can intensify heat and stress.
What setup details matter for safety and consistency in a 10x10 lighting install?
A 10x10 tent is large enough that your wiring and mounting plan can affect uniformity and safety. Use adjustable ratchet hangers so you can re-level and change height during veg-to-flower transitions, and recheck height after you change ducting or add insulation. Also plan cord routing so it does not obstruct airflow near the ceiling and so the hanging cables stay taut and evenly tensioned across fixtures.
How should climate swings (ambient temperature, humidity) change my LED wattage plan for a 10x10?
If you are in a room with stable ambient conditions, start with your lighting plan and then size HVAC and exhaust to match. If your room swings a lot (hot summers, cold winters), you may need lower max light intensity and more aggressive dimming schedules. A decision aid is to build your target around your worst-case canopy temperature and VPD, not the best-case day, then choose fixture wattage that gives you headroom rather than running lights near the ceiling every time.
Next Articles
Best LED Grow Tent Kit UK Guide for Picking the Right Setup
UK guide to choose the best LED grow tent kit by coverage, spectrum, dimming, airflow, and setup for reliable yields.
Best LED for Small Grow Tent: How to Choose Right Light
Pick the best LED for a small grow tent by matching coverage, spectrum, wattage, and hanging height to your crop and PPF
Best 5x5 LED Grow Light: Buying Guide and Top Picks
Find the best 5x5 LED grow light with specs on PPFD coverage, spectrum, wattage, dimming, efficiency, and setup tips.