A 150W LED grow light is genuinely useful for small spaces, but the '150W' label tells you almost nothing on its own. Some fixtures pulling 150 watts real power will cover a 2x2 tent in flower with 800+ PPFD at canopy. Others with the same sticker are stretched thin trying to light a 3x3 and leaving your corners dim. This guide cuts through the label confusion and gives you a direct answer: which 150W-class LED works for your space, your crop stage, and your budget, and exactly how to set it up so it actually performs.
Best 150 Watt LED Grow Light Guide for Coverage and PPFD

Marcus Rutherford
20 Apr 2026
How to read a '150 watt' LED label the right way
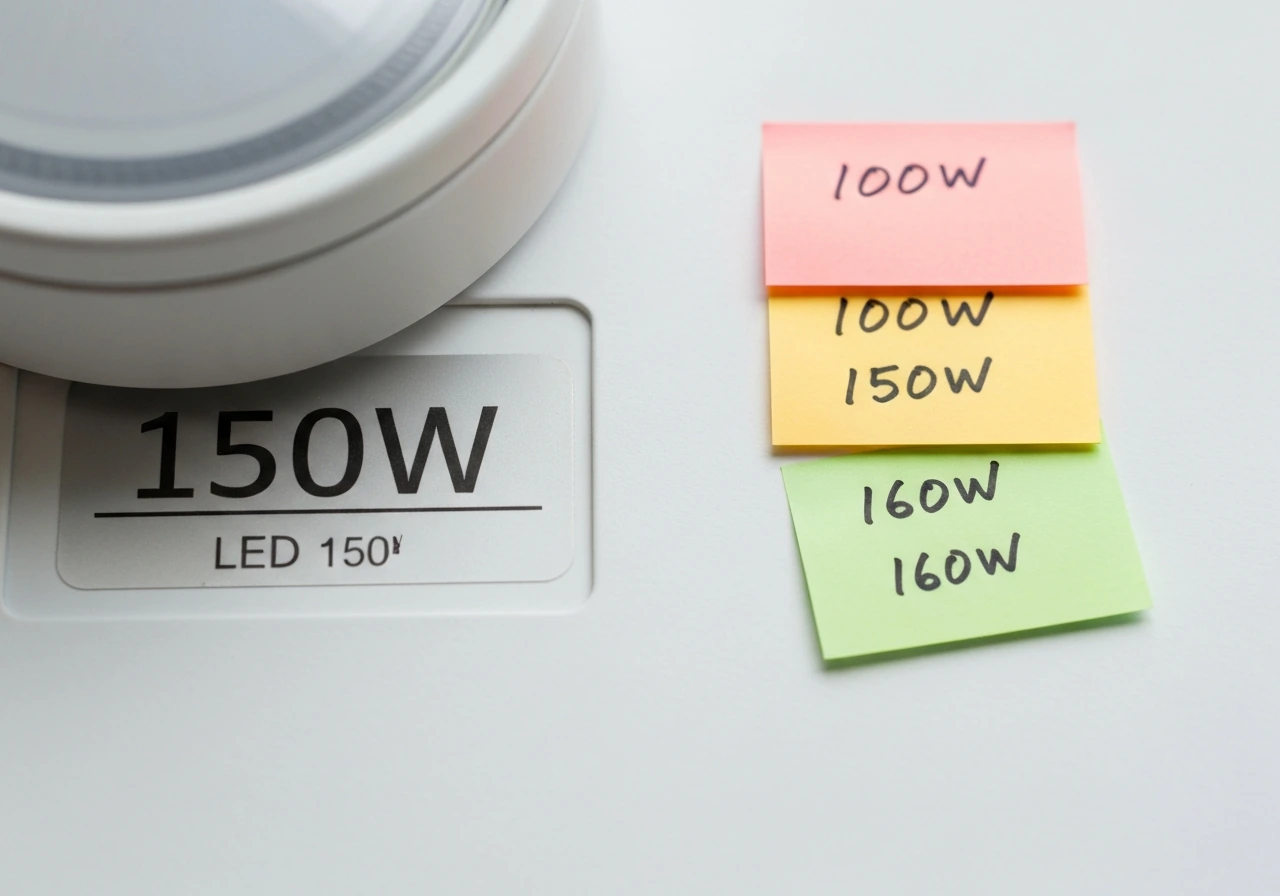
The first thing you need to understand is the difference between marketing watts and actual draw. A fixture marketed as '150W' might actually pull anywhere from 100W to 160W from the wall. The number that matters is the actual wattage listed in the electrical specs, usually labeled 'wattage' or 'power consumption' in the spec table, not the headline number in the product title. Always check the real draw.
Beyond wattage, the spec you want to focus on is PPE (photon efficacy), measured in µmol/J. This tells you how efficiently the fixture converts electricity into usable light for plants. The Mars Hydro TS 1000, for example, draws about 150W at the wall and delivers a PPE of 2.3 µmol/J with a PPF of 343 µmol/s. The Spider Farmer SE1500 pulls the same real wattage and pushes PPE to 2.85 µmol/J, which is a meaningful improvement in output for the same electricity. Higher PPE means more light per watt, and in a small tent that efficiency gap shows up directly in your canopy PPFD.
PPFD (photosynthetic photon flux density), measured in µmol/m²/s, is what you actually care about at canopy level. A good 150W fixture should be able to deliver 600–900 µmol/m²/s over a 2x2 footprint during flower, and 400–600 µmol/m²/s over a slightly larger area for veg. If a manufacturer does not publish a PPFD coverage map with the mounting height specified, treat that as a red flag.
Best 150W LED picks by grow space
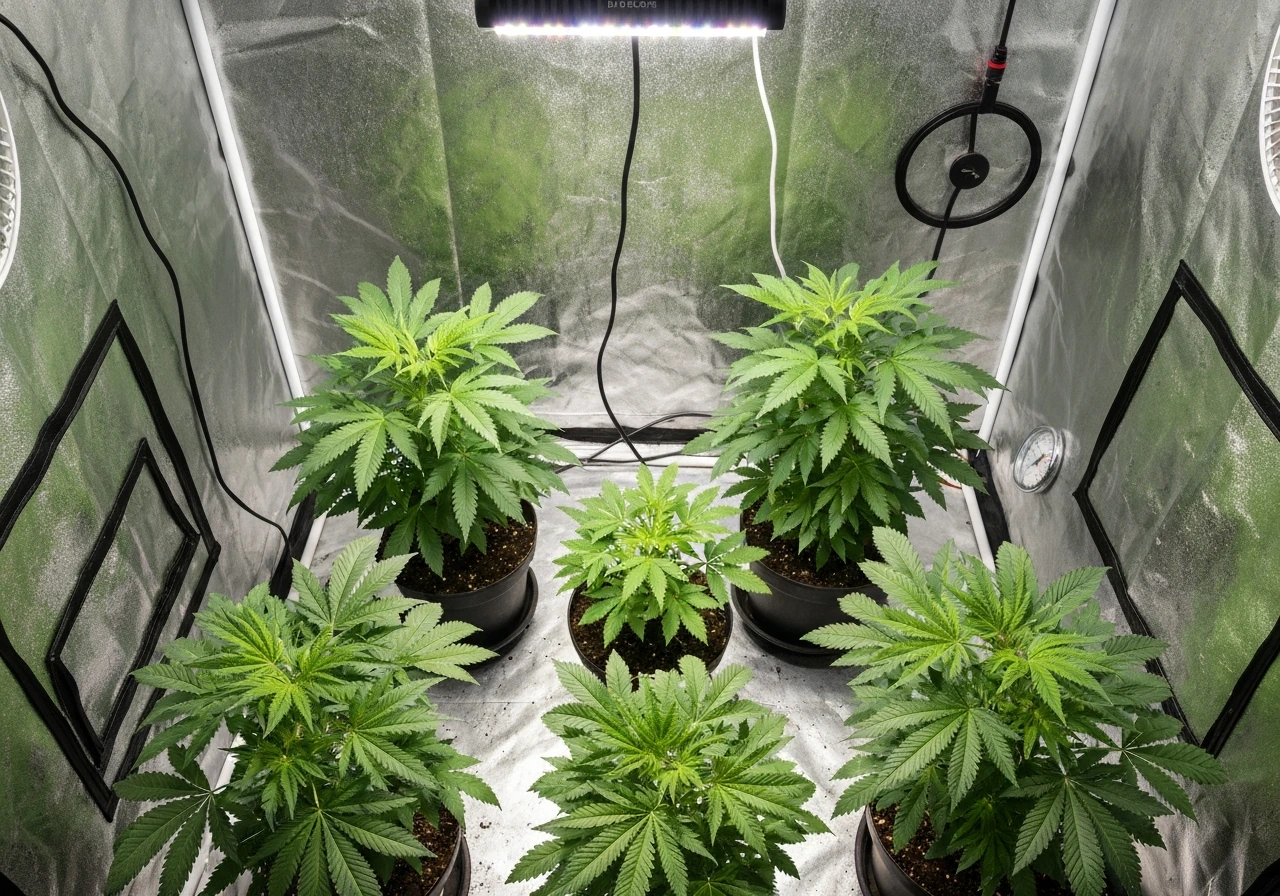
2x2 tent: the sweet spot for a single 150W light
A 2x2 tent (4 sq ft) is where a true 150W LED really earns its keep. The Spider Farmer SE1500 is the standout pick here. At 2.85 µmol/J efficiency and a full-spectrum output designed specifically for a 2x2 footprint, it delivers the PPFD range you need for a full veg-to-flower cycle without thermal issues in a small tent. Its smart controller lets you set a target PPFD rather than just dialing a percentage, which is genuinely useful for dialing in the right intensity at each growth stage. If you want solid performance at a lower price point, the Mars Hydro TS 1000 covers the same 2x2 core footprint at 2.3 µmol/J and is a proven, well-documented option with ETL certification and published spectral data.
3x3 tent: a 150W light is veg-only territory
Running a single 150W fixture over a 3x3 (9 sq ft) tent for flowering is undershooting. You are looking at PPFD in the 300–450 µmol/m²/s range at canopy, which is fine for seedlings and early veg but well short of the 600–900 µmol/m²/s that most flowering crops need. For a 3x3 in veg, a single 150W light at the right hanging height works. For a full 3x3 flower run, either step up to a 200–300W fixture or pair two 150W units. Two Spider Farmer SE1500s or two Mars Hydro TS 1000s mounted side by side give you good coverage and the flexibility to dim them independently.
4x4 tent: a 150W light is supplemental only
A single 150W LED in a 4x4 (16 sq ft) is not a primary grow light for flowering. It simply does not have the photon output to cover that area meaningfully. In a 4x4, 150W-class fixtures work best as supplemental side lighting, seedling stations, or propagation lights. If your goal is a full 4x4 flower tent, look at higher-wattage options in the 400–600W range. The guides covering the best 1200W and 1500W LED grow lights on this site are worth reading if you are planning a 4x4 build. If you are planning a bigger setup and want a 3000W option, see the best 3000w led grow light picks for coverage and real power. If you are specifically targeting the best 1500 watt led grow light options, compare coverage, PPFD, and real wattage against your grow space.
Full-spectrum vs bloom-only vs veg-only: which to buy and when
Full-spectrum lights are the right default choice for most growers running a 150W light. Both the SE1500 and the TS 1000 are full-spectrum, meaning they combine warm white LEDs (around 2800–3200K), cool white LEDs (around 4800–6500K), and targeted red (660–665nm) wavelengths. Some include deep red or far-red (730–740nm) for end-of-day signaling. This combination works from seed through harvest in a single fixture, which is the practical reality for anyone growing in a 2x2 tent where you are not splitting your space into veg and bloom rooms.
Bloom-only (red-heavy) lights are a legacy product category that made more sense when LED diodes were less efficient. The argument was that red wavelengths drive flowering and blue is wasted energy. That logic has mostly collapsed now that full-spectrum quantum board designs are efficient enough that the 'extra' blue bandwidth costs you almost nothing in practice and keeps your plants healthier through the whole cycle. Avoid bloom-only fixtures unless you have a very specific reason and already own a separate veg light.
Veg-only (blue-heavy) fixtures in the 150W range do have a use case: large propagation racks, seedling stations, or mother plant maintenance. If you are running dedicated cloning and propagation, a cooler spectrum (5000–6500K dominant) works well and is sometimes available at lower cost. But for general use, a full-spectrum quantum board outperforms it across the entire grow cycle.
The specs that actually matter when you're comparing options
Here is what to check in any listing before you buy. If a product page does not publish most of these, that tells you something.
| Spec | What it means | What to look for in a 150W light |
|---|---|---|
| Actual power draw (W) | Real electricity consumed at the wall | Match to marketing label; should be 140–160W for a true '150W' fixture |
| PPE (µmol/J) | Efficiency: photons produced per watt of electricity | 2.3 µmol/J is solid; 2.7+ µmol/J is excellent for this class |
| PPF (µmol/s) | Total photon output of the fixture | 300–400+ µmol/s is typical; higher is better |
| PPFD map | Photon density at canopy level, by position and height | Look for published maps at 12", 18", and 24" height over your tent size |
| Spectrum | Wavelength distribution across the light | Full-spectrum (3000K + 5000K + 660nm) for general use; check for far-red (730nm) as a bonus |
| Driver brand/quality | Controls power delivery and thermal management | Meanwell or equivalent; in-house drivers vary widely in reliability |
| Dimming | Ability to reduce intensity | 0–100% dial or smart controller preferred; fixed intensity is a significant limitation |
| Operating temp / heat output | How hot the fixture runs | Passively cooled quantum boards run cooler than older COB/blurple designs |
| Warranty | Manufacturer support period | 3 years minimum; 5 years is the benchmark for reputable brands |
Driver quality deserves extra attention. A quality constant-current driver, like those made by Meanwell, keeps the diodes running at consistent power even when input voltage fluctuates, and it protects against thermal runaway. Cheap in-house drivers are the most common failure point in budget LED grow lights. If you cannot identify the driver brand in the listing or manual, that is a risk worth factoring into your decision.
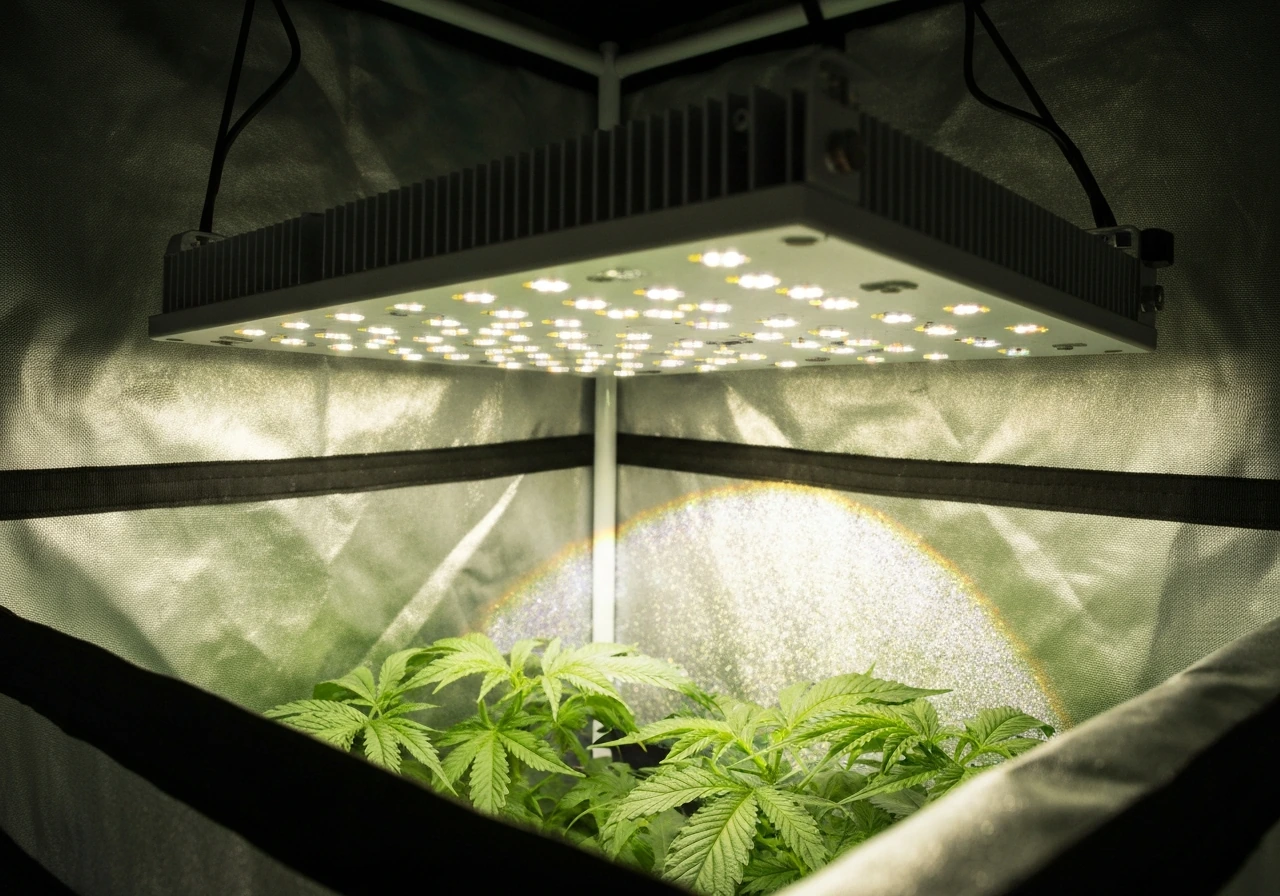
Light placement, hanging height, and coverage testing
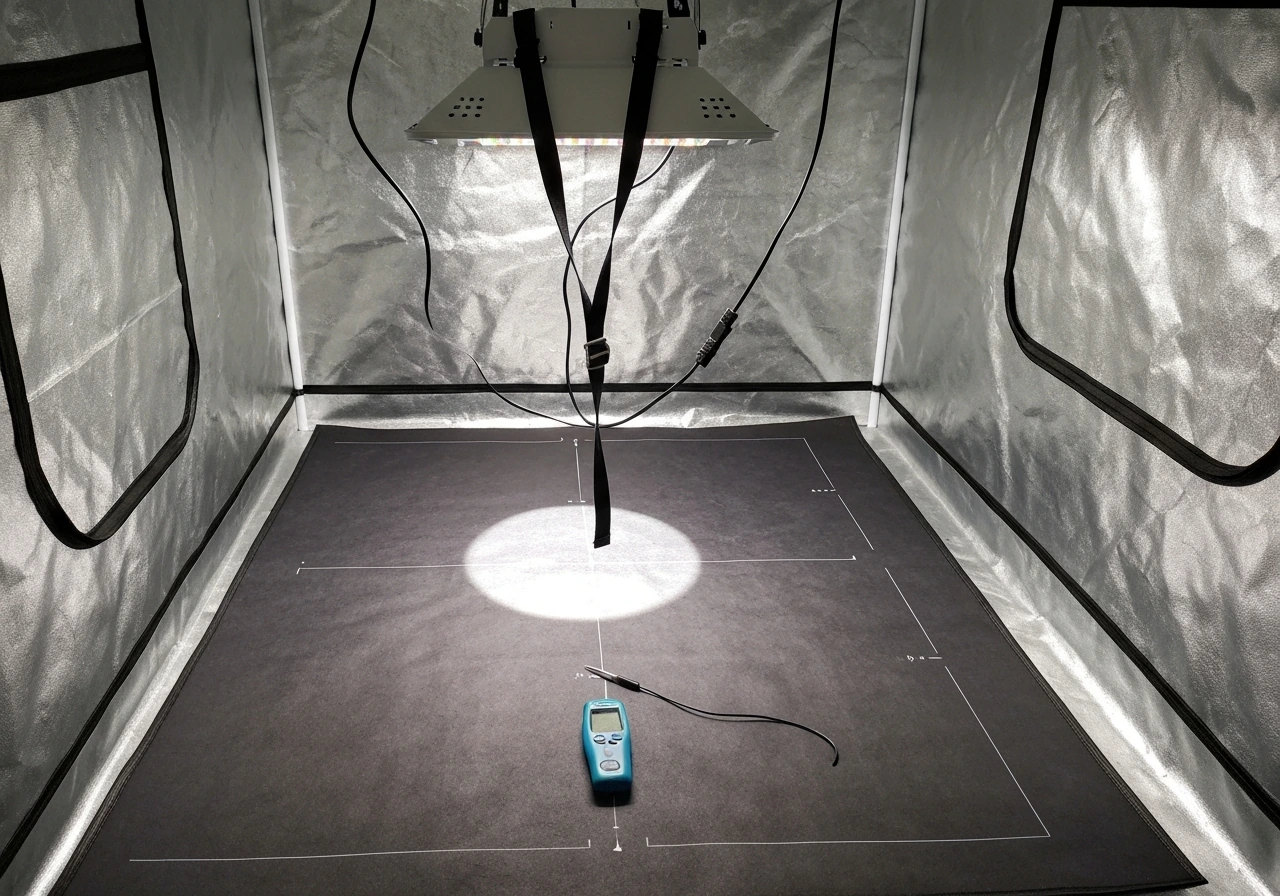
Hanging height is not one-size-fits-all. It changes depending on the growth stage, whether the light is dimmable, and the specific fixture. As a starting framework for a 150W quantum board in a 2x2 tent: hang at 24–30 inches above canopy for seedlings at reduced power, drop to 18–24 inches for veg, and bring it down to 12–18 inches for flower, dialing intensity up progressively as the plants mature. If the light is not dimmable, keep it at the higher end of each range to avoid light stress.
The Spider Farmer SE1500's PPFD mode is worth calling out here: instead of guessing at a percentage and hoping, you set a target PPFD value and the controller adjusts output to match. Scale & Stem explains that PPFD is the intensity measurement growers should look for in a spec sheet and ties it to planning coverage at a specified hanging height Instead of guessing at a percentage. For seedlings, target 200–400 µmol/m²/s. Veg runs well at 400–600 µmol/m²/s. Flowering cannabis typically wants 600–900 µmol/m²/s, with some strains and CO2-enriched environments pushing beyond 1000 µmol/m²/s. Without a smart controller, you are approximating these numbers based on height and dimmer position, which is workable but less precise.
If you do not own a PAR meter, you can still make reasonable judgments by using the manufacturer's published PPFD map (if provided) and cross-referencing with your actual hang height. If you want the most reliable way to verify your setup, Hydrobuilder explains using a PAR/PPFD meter to measure grow light intensity at the canopy. Position the light so the center of your canopy sits under the fixture's center point, and make sure the edges of your coverage area are not falling off the map's lower PPFD zones. In a 2x2, a well-centered 150W quantum board should give you reasonably uniform coverage if hung at the right height. In a 3x3, you will see meaningful drop-off in the corners at any height, which is why the earlier sizing advice matters.
One practical test that costs nothing: at full power and target height, hold your hand palm-up at canopy level for 30 seconds. It should feel warm but not hot. If it is uncomfortable, the light is too close or too intense for the current growth stage. This is not a substitute for a PPFD reading, but it is a sanity check that catches obvious mistakes.
Cost per watt, heat, and long-term reliability
At 150 watts of actual draw, your electricity cost is relatively low. Running a 150W light 18 hours per day during veg costs roughly 2.7 kWh per day. At the US average residential rate of around $0.16/kWh (as of early 2026), that is about $0.43 per day, or roughly $13 per month. Dropping to a 12-hour flower schedule cuts that to under $10 per month. The electricity cost of a 150W fixture is genuinely modest and rarely a meaningful factor in the decision.
Heat output is where passively cooled quantum boards like the SE1500 and TS 1000 have a real advantage over older designs. Both fixtures dissipate heat through aluminum heatsink panels without any fans, which means near-silent operation and no moving parts to fail. In a 2x2 tent with basic ventilation, a 150W quantum board should add only 3–5°F above ambient air temperature when paired with a small inline fan. That is very manageable. If you are stacking two units in a 3x3, budget for slightly more aggressive air exchange.
On long-term reliability, the diode lifespan on quality LED fixtures is typically rated at 50,000+ hours, which is 10–15 years at typical grow schedules. The failure point is almost always the driver, not the diodes. This is why driver brand matters so much, and why warranty length is a meaningful signal. Spider Farmer offers a 5-year warranty on the SE1500; Mars Hydro covers the TS 1000 for 3 years. Both are credible, but the longer warranty reflects the manufacturer's confidence in their components.
Budget fixtures from lesser-known brands can undercut these prices by 30–40%, but the trade-off is almost always driver quality and warranty support. If you plan to run the light through multiple grows over several years, the per-grow cost of a $20–30 price premium on a name-brand fixture is negligible. If you are running a one-off test grow, the math looks different.
Installation, safety, and making your setup work from day one
Most 150W quantum boards come with a simple rope ratchet hanger system. Use it. Do not improvise with zip ties or wire that can fail under heat cycling. Most tent crossbars are rated for 10–20 lbs, and a 150W quantum board typically weighs 4–8 lbs with the driver, so structural load is not an issue. If your driver is external (some SE series lights have a separate driver box), hang it outside the tent where it stays cooler, which also reduces ambient heat inside the grow space.
On the electrical side, a 150W fixture draws about 1.25 amps at 120V. A standard 15-amp household circuit handles this comfortably, even when combined with a small fan and a timer. Do not use extension cords longer than 6 feet, and do not daisy-chain power strips inside the tent. Use a heavy-duty outdoor-rated power strip with surge protection at the minimum.
Timer compatibility is straightforward with modern LED fixtures: both the SE1500 and TS 1000 work with any standard mechanical or digital outlet timer. If the SE1500 is running through its smart controller, check the manufacturer's guidance on whether the controller should be on the always-on circuit and the timer only controls the light signal, or if the whole unit cycles on and off. Incorrect timer wiring on a smart controller can cause issues.
Ventilation is not optional even with a passively cooled light. A small 4-inch inline fan and carbon filter combination keeps air moving through the tent, prevents heat buildup, and handles odor if you are growing anything fragrant. In a 2x2 tent with a single 150W light, a 100–150 CFM inline fan is plenty. Keep one small oscillating fan at canopy level for stem strengthening and to prevent hot spots, which matter even with an efficient LED.
Finally, a quick word on scale: if you are planning to eventually grow in a larger space, know that the 150W class is a natural starting point but has a ceiling. When you are ready to step up to a 3x3 flower tent or larger, the guides covering higher-wattage options (such as those in the 1200W and 1500W LED categories on this site) are worth reviewing. The same principles around PPE, PPFD maps, and driver quality apply at every wattage, so the evaluation framework you learn at 150W transfers directly.
Your short decision path
If you are growing in a 2x2 tent and want the best performance at 150W right now, the Spider Farmer SE1500 is the pick: 2.85 µmol/J efficiency, smart controller with PPFD targeting, full-spectrum output, and a 5-year warranty. If budget is a constraint or you want a proven, simpler option, the Mars Hydro TS 1000 covers the same footprint at a lower price with solid published specs and ETL certification. If you want more options in this price range, compare the top picks in our best LED grow light under 200 guide. For a 3x3, either run two 150W units or step up to a single higher-wattage fixture. For a 4x4, 150W is supplemental lighting only.
- Confirm the fixture's actual power draw (not just the marketing watts) matches the 140–160W range.
- Check for a published PPFD map at your specific tent size and planned hang height.
- Verify PPE is at least 2.3 µmol/J; prioritize fixtures at 2.7 µmol/J or above.
- Confirm dimming capability so you can match intensity to growth stage.
- Check the driver brand; Meanwell or equivalent is the benchmark.
- Verify warranty is at least 3 years from a brand with accessible customer support.
- Set your initial hang height based on the manufacturer's PPFD map, then adjust after observing plant response in the first week.
FAQ
If a grow light says “150W,” how can I tell what I will actually pay and what PPFD I will get at my dimmer setting?
Look for the spec line that lists actual wattage or power draw at the wall, then confirm whether it matches the dimming behavior you plan to use. Many “150W” lights only reach their headline output at 100% power, and at 50% they may drop efficiency (PPE) slightly, which affects canopy PPFD.
Can I use any dimmer or smart plug to dim a 150W LED grow light safely?
Only use dimming if the driver/controller is designed for it, and keep the dimmer steps consistent with the manufacturer’s PPFD mode targets. A common mistake is using a separate wall dimmer or lowering the light voltage, which can cause flicker or unstable output, especially with smart-controller units.
Is 150W truly “enough” for flowering, or does it depend on strain and conditions?
A 150W light can be enough for some crops in a 2x2, but the deciding factor is whether your target PPFD matches your cultivar and your CO2 and airflow setup. If you cannot reliably maintain the intended canopy distance and intensity, you may see slower flower development even if the light has good PPE.
How do I sanity-check coverage if I do not have a PAR meter, and the manufacturer’s PPFD map may not match my setup?
Measure at canopy, not at bench height, and take readings in multiple spots (center plus at least the two far corners). If the manufacturer provides a PPFD map, verify your hung height matches that map, otherwise the edge-to-center drop-off can be much worse than the marketing numbers.
What’s the best way to optimize ventilation for a 150W quantum board in a small 2x2 tent?
In a passively cooled quantum board, odors and heat management depend more on your exhaust and air exchange than on adding another small fan for “extra cooling.” Focus on creating consistent airflow through the tent, then position an oscillating fan at canopy level to reduce hot spots and strengthen stems.
If the driver is external, where should it be mounted and what airflow considerations matter?
For external drivers, mount the driver outside the tent if the cord length allows and follow the manual for cable routing. For internal drivers, give them clearance, avoid tucking the driver against fabric, and keep the intake path unobstructed, because driver heat reduces longevity.
How should I set a timer with a smart-controller 150W LED, so I do not mess up PPFD targeting?
Check the photoperiod and the controller schedule, not just the timer. If the light uses a controller with its own settings, confirm whether the timer should cut power entirely or only control the light signal, otherwise you can lose saved PPFD targets or create inconsistent daily ramping.
Why do some plants in my tent grow slower even though the light is the right wattage?
If you are seeing uneven results, the most common causes are incorrect hanging height, using a non-centered placement, and ignoring edge PPFD drop-off. In a 2x2, center the fixture, keep the canopy level even across the tent, and avoid rotating the plants into different light zones mid-cycle.
What should I watch for when dialing hanging height, beyond the hand-warmth test?
Do not judge intensity only by “how hot it feels.” Your hand-test is a coarse check for gross distance errors; the better approach is to set height based on stage and then adjust using PPFD mode targets or dimmer output while watching plant response for bleaching (too close) or stretching (too far).
What changes if my 150W LED is not dimmable?
If a fixture is not dimmable, you can still use it safely by setting the fixed hang height to your highest-intensity stage and then using schedule adjustments only within reason. For seedlings and early veg, you may need a taller mount or a reduced photoperiod, but you still cannot reliably “dial down” intensity the way you can with PPFD mode.
How do driver brand and warranty length affect real long-term value for the best 150 watt led grow light?
Budget fixtures sometimes save money by using unknown drivers or shorter warranties, which matters more than the diode package because drivers often fail first. If the driver brand is missing, treat it as a risk, and prioritize longer warranty terms and accessible documentation.
If I try to use one 150W light in a 3x3, what is the most realistic way to manage the uneven corners?
If you are running a 150W light for a 3x3 flower tent, expect corner drop-off and plan around it. Either run two units side-by-side with independent control, or accept that you may need to train plants to occupy the higher-PPFD center zone rather than trying to grow everything evenly across the full footprint.
Next Articles

Best 1200 Watt LED Grow Light: Buyer Guide by Space
Choose the best 1200W LED grow light by PPFD coverage, spectrum, cooling, dimming, and setup for your tent size
Best 3000W LED Grow Light: Buying Guide and Setup Tips
Buying guide to choose the best 3000W LED grow light, decode real watts, compare PPFD coverage, and set up safely.
Best 1500 Watt LED Grow Light: Buyer Guide for True Performance
Choose the best 1500W LED grow light by real watt draw, PPFD and coverage, plus setup tips for 4x4 to bigger tents.