The best red:blue ratio for most LED grow lights sits somewhere between 3:1 and 5:1 for flowering and fruiting crops, and closer to 2:1 to 3:1 for vegetative growth and seedlings. But here's the thing: chasing a specific ratio number without first nailing your PPFD and DLI targets is one of the most common mistakes growers make. Spectrum matters, but intensity and duration matter more. This guide walks you through both, so you can set up your tent with confidence instead of guessing.
Best Red Blue Ratio for LED Grow Lights by Stage

Marcus Rutherford
18 Apr 2026
What red:blue ratio actually means on an LED grow light
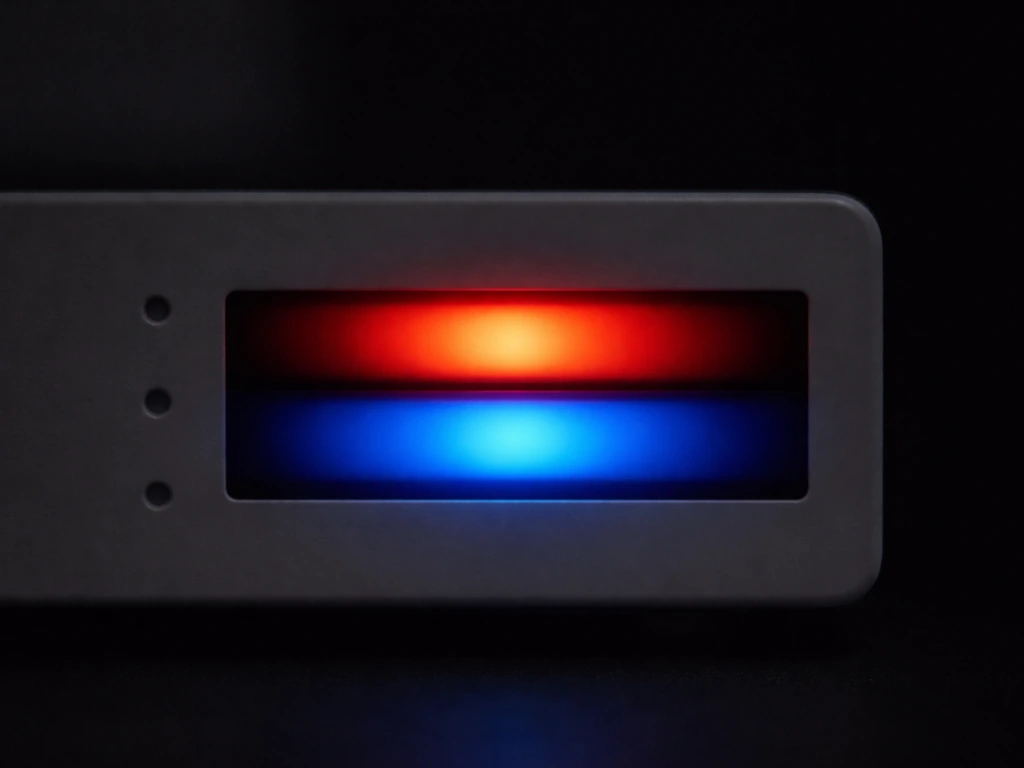
When manufacturers talk about red:blue ratio, they're referring to the relative output of two specific wavelength bands: red LEDs typically centered around 630–660 nm, and blue LEDs centered around 430–460 nm. The ratio is usually expressed as a simple number like 3:1, meaning for every unit of blue light output, there are three units of red.
Where it gets tricky is how that ratio is measured and reported. Some manufacturers quote it by wattage (how many watts of red chips vs blue chips are installed). Others quote it by photon flux, meaning how many micromoles per second of red photons vs blue photons the fixture actually emits. These are not the same thing. Red LEDs tend to be more efficient at converting electricity to photons than deep blue LEDs, so a fixture with equal red and blue wattage will typically produce more red photons than blue. Always look for spectral distribution data, ideally a spectrograph or a table showing µmol/s by wavelength band, rather than just taking a watt-channel claim at face value.
It's also worth separating "red:blue ratio" from "R:FR ratio," which is red-to-far-red (700–800 nm). Far-red light drives phytochrome-mediated responses like internode elongation and flowering timing, and it's a completely separate dial from the red:blue balance. Some premium fixtures let you tune all three channels independently. Most budget bars just give you a fixed white-plus-red spectrum and call it full spectrum. Know which kind of fixture you're working with before you try to optimize anything.
Best red:blue ratios by growth stage
Plants use red and blue light for fundamentally different purposes. Blue light (430–460 nm) drives stomatal opening, compact vegetative growth, and strong stem structure. Red light (630–660 nm) is the primary driver of photosynthesis efficiency and is especially important for flower and fruit development. The balance you want shifts meaningfully between growth stages.
Seedlings and early propagation
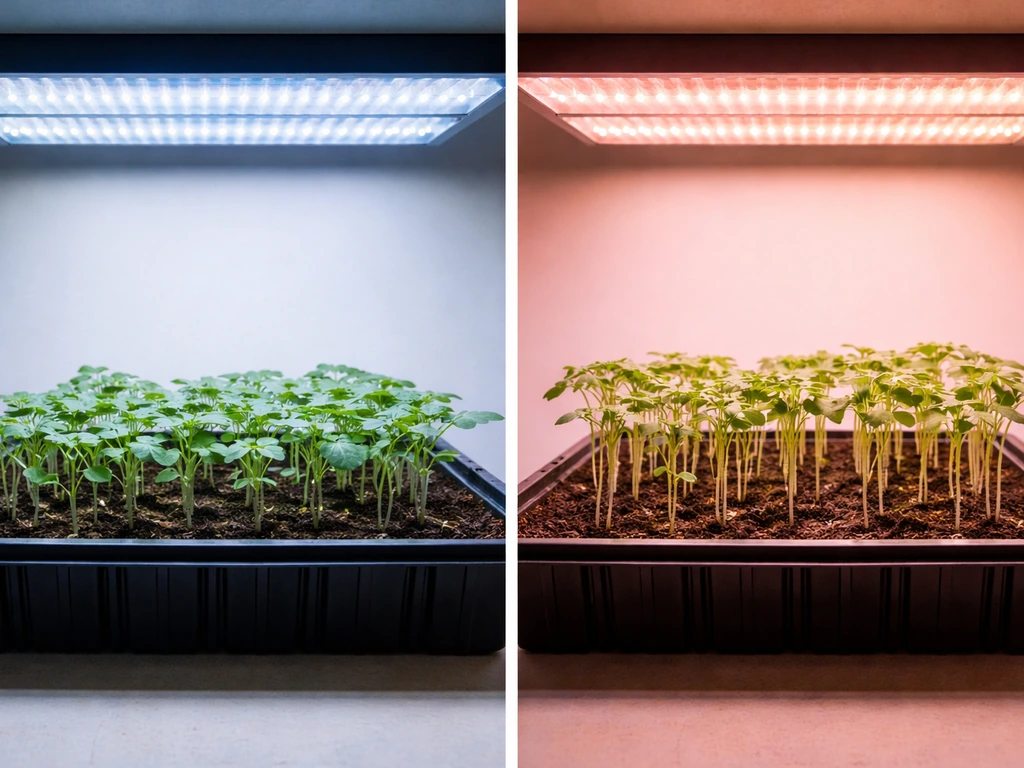
Keep more blue in the mix during propagation. A red:blue ratio of around 1:1 to 2:1 (by photon flux) gives young seedlings the blue stimulus they need to build compact, stocky structure right from the start. Stretchy, weak seedlings are almost always a sign of too much red and not enough blue, or simply not enough total light. Target PPFD of 100–200 µmol/m²/s at canopy level and a DLI of 6–12 mol/m²/day for most seedlings. At 18 hours of light, 150 µmol/m²/s delivers a DLI of about 9.7 mol/m²/day, which is a solid seedling target.
Vegetative growth
During veg, you can push the red up slightly while keeping a meaningful blue contribution. A ratio of 2:1 to 3:1 works well for most leafy and branching crops. Blue light continues to regulate leaf thickness, branching patterns, and chlorophyll density. Dropping too far into red during veg will produce elongated internodes and thinner leaves, which look impressive in height but actually indicate light stress or phytochrome imbalance. Veg PPFD targets are typically 400–600 µmol/m²/s, with DLI goals of 20–30 mol/m²/day depending on the crop.
Flowering and fruiting

This is where you can safely bias toward red. Research with ratios spanning roughly 0. 7 to 5. 5 has shown that higher red:blue ratios in the 3:1 to 5:1 range support flower development and biomass accumulation in fruiting crops.
A 3:1 ratio has been identified as a critical driver of early flowering in some long-day crops. For most flowering tent grows, targeting 4:1 to 5:1 (photon flux) is a reasonable practical goal. If you want to dial in the right red:blue emphasis for real results, match your spectrum targets to the best strains for LED grow setups.
Anything above 6:1 starts introducing diminishing returns and can cause the same internode stretch issues you'd see in veg if blue drops too low. PPFD during flower should be 600–900 µmol/m²/s for most crops, with DLI of 30–40 mol/m²/day.
| Growth Stage | Recommended R:B Ratio | Target PPFD (µmol/m²/s) | Target DLI (mol/m²/day) | Photoperiod |
|---|---|---|---|---|
| Seedling / Propagation | 1:1 to 2:1 | 100–200 | 6–12 | 18 hours |
| Vegetative | 2:1 to 3:1 | 400–600 | 20–30 | 18 hours |
| Flowering / Fruiting | 4:1 to 5:1 | 600–900 | 30–40 | 12 hours |
Plant-specific guidance: leafy greens, herbs, and flowering crops
Not every crop needs the same red:blue target even within the same growth stage. The crop type matters a lot, and getting this wrong usually shows up as either quality issues (pale flavor, loose structure) or yield issues (underdeveloped fruit, slow canopy fill).
Leafy greens (lettuce, spinach, chard)
Leafy greens are harvested before flowering, so you're optimizing entirely for vegetative biomass and leaf quality. A red:blue ratio of 2:1 to 3:1 is the practical sweet spot. Higher blue ratios increase anthocyanin content (redness and purple in lettuce varieties) and improve leaf texture and flavor, which matters for premium market lettuce. If you're growing for maximum yield speed rather than quality differentiation, bias toward 3:1. If you're growing specialty leaf for flavor or appearance, keep it at 2:1 or even 1.5:1 and accept slightly slower growth.
Herbs (basil, mint, cilantro)
Culinary herbs generally benefit from more blue light than fruiting crops. Blue light encourages essential oil production and compact, bushy structure. A ratio of 1.5:1 to 2.5:1 works well. Basil in particular gets leggy fast under high-red spectra, and that stretch comes with reduced flavor intensity. Keep blue prominent, keep intensity moderate (300–500 µmol/m²/s), and you'll get tighter nodes and better-quality harvests.
Flowering and fruiting crops (tomatoes, peppers, cannabis, flowers)
These crops benefit most from stage-shifting your ratio. During their vegetative phase, treat them like vegetative crops (2:1 to 3:1). Once you flip to flowering, push to 4:1 to 5:1. Research on flowering crops like amaryllis has shown that red:blue tuning directly affects flower quality, not just flower timing, so this isn't just about triggering the photoperiod response. Dense, well-formed flowers with good bract development and strong pigmentation are downstream benefits of getting the red:blue ratio right in combination with the correct PPFD.
PPFD and DLI come first, ratio comes second
This is the point that most ratio-focused articles miss, so I want to be direct about it: if your PPFD is too low, no red:blue ratio will save your grow. Plants need a minimum photon flux to drive photosynthesis at a useful rate, and a 5:1 red:blue ratio at 200 µmol/m²/s will underperform a 3:1 ratio at 600 µmol/m²/s every single time. Spectrum is a fine-tuning variable. Intensity is a baseline requirement.
DLI ties intensity and time together. blank" rel="noopener noreferrer">DLI (mol/m²/day) equals PPFD (µmol/m²/s) multiplied by photoperiod hours multiplied by 0.0036. A 12-hour photoperiod at 600 µmol/m²/s delivers a DLI of about 25. A DLI can be calculated from PPFD and photoperiod using the relationship DLI (mol/m²/day) = blank" rel="noopener noreferrer">PPFD (µmol/m²/s) × duration (s) × 0.0036. 9 mol/m²/day. An 18-hour photoperiod at the same intensity gives you 38.9 mol/m²/day. That difference is massive, and it means you can compensate for a lower-intensity fixture with a longer photoperiod in veg, up to a point. During flower on a 12-hour light cycle, you need your intensity doing the heavy lifting.
The practical hierarchy is: set your PPFD target for the growth stage, confirm your DLI using your photoperiod, then dial in your spectrum. Trying to solve yield or morphology problems by adjusting red:blue ratio when you haven't confirmed intensity is a frustrating dead end.
How to read LED specs and verify real red:blue output
Most spec sheets tell you something about spectrum, but they're not all equally useful. Here's what to look for and what to ignore.
What good spec data looks like
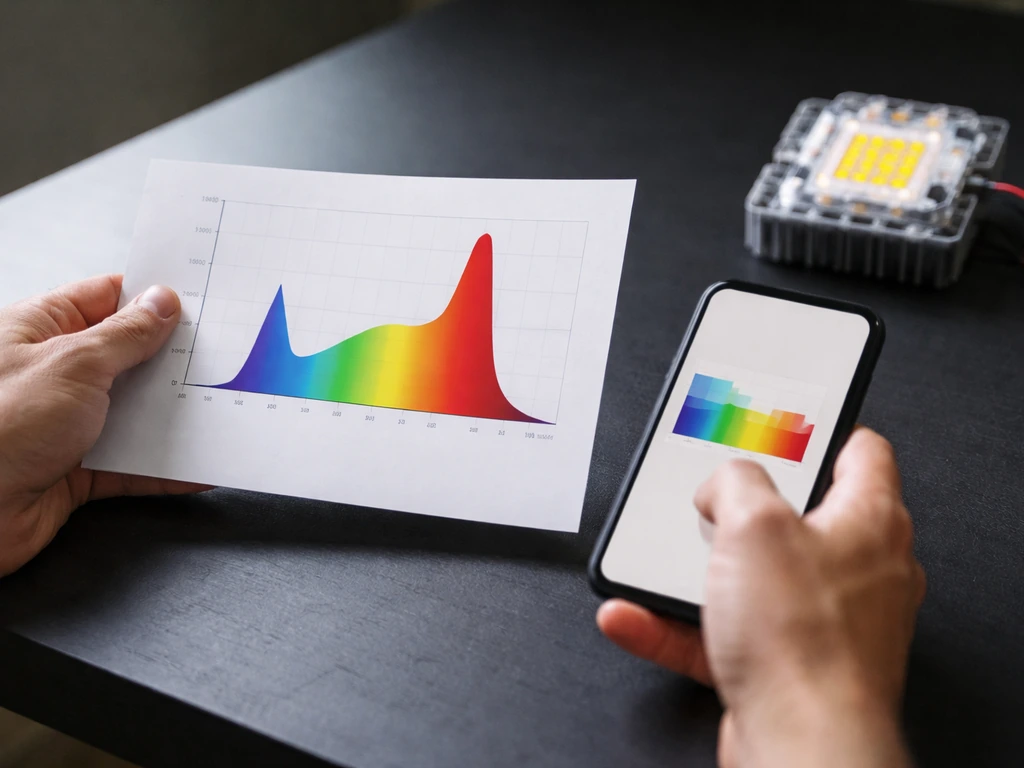
A useful spec sheet will include a spectral power distribution (SPD) chart showing relative output across the 400–700 nm range, and ideally a table breaking down photon flux (µmol/s) by wavelength band. From that, you can calculate the actual red:blue ratio by photon flux rather than by chip wattage. If the manufacturer only gives you a generic "full spectrum" label with a picture of a rainbow bar chart and no data, that's a red flag. It doesn't mean the light is bad, but it means you're being asked to trust marketing copy rather than measured output.
The sensor measurement problem
If you're using a handheld quantum sensor or a phone-based PAR app to verify your PPFD, be aware that sensor accuracy is spectrum-dependent. Quantum sensors are calibrated against a reference spectrum (typically sunlight or white fluorescent), and narrowband LED peaks, especially deep blue at 430–450 nm, can introduce meaningful measurement error. Apogee's own documentation on their 500-series sensors acknowledges this spectral error for deep blue and violet LEDs.
This means your measured PPFD under a heavy-blue or purple-dominant fixture may read lower than the actual photon flux. If you're running a fixture with strong deep blue channels, factor in that your sensor may be underreporting, and don't assume you need to crank intensity because the meter says so. Sensor positioning matters too: quantum sensors should be held flat and perpendicular to the light source to minimize cosine response errors.
What to do if the fixture lacks deep blue or uses non-standard red wavelengths
Some budget fixtures use 620–630 nm "red" LEDs rather than the 660 nm deep red that drives photosynthesis most efficiently. The difference matters: 660 nm sits at the peak of the chlorophyll-a absorption curve, while 630 nm is somewhat less efficient. If your fixture spec lists red at 630 nm, you're still getting useful photosynthetic light, but you may need slightly more total photon flux to hit equivalent plant response compared to a 660 nm fixture.
Similarly, if there's no discrete deep blue channel (only a broad white LED spectrum), your effective blue photon output depends entirely on the white LED's color temperature. A 4000K white LED will have a higher blue component than a 3000K warm white. Most good quality commercial full-spectrum fixtures now combine a white LED base with supplemental 660 nm deep red and sometimes 730 nm far red, which is generally a better design than separate red/blue chip arrays.
Dialing in your tent: height, dimming, and photoperiod
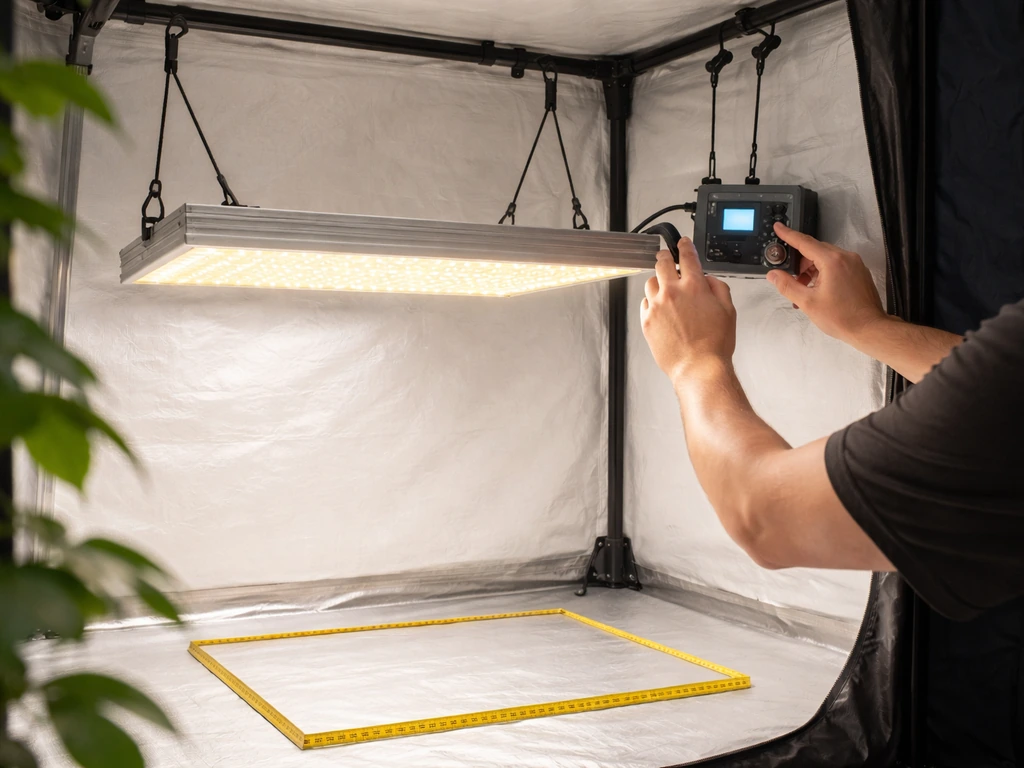
Spectrum ratio is only one variable. The way you position and run your fixture determines whether the plants actually receive the spectrum and intensity you're targeting. These three parameters work together.
Mounting height
Mounting height affects both the intensity and the uniformity of light reaching your canopy. Lowering the fixture increases PPFD at the center but creates a steeper drop-off toward the edges. Raising it reduces peak intensity but spreads light more evenly across the canopy. For a 4x4 tent, most quality LED bars and quantum board fixtures perform best at 18–24 inches above canopy during flower and 24–36 inches during veg and seedling stages. Check your fixture's coverage footprint at different heights, which should be in the spec sheet, and prioritize uniformity over peak reading. A tight hot spot in the center with dim edges is a common cause of uneven development that growers mistakenly attribute to spectrum issues.
Dimming
Most quality LED grow lights now include 0–100% dimming. Use it. Seedlings at full intensity from a high-powered fixture will bleach or stall. Start seedlings at 30–40% output with the fixture at maximum height, then ramp up intensity and lower the fixture as plants establish. During veg, run 50–70% and adjust to hit your PPFD target at canopy. Full power is typically reserved for late flower when you want to push toward 800–900 µmol/m²/s. Dimming doesn't change the spectral ratio on most fixtures, it just scales the output, which is good news for ratio consistency.
Photoperiod
For seedlings and veg, 18 hours on / 6 hours off is the standard starting point for most crops. It gives you a high DLI without pushing plants into heat stress from continuous light. Flowering crops that are photoperiod-sensitive (like cannabis or many annual flowers) switch to 12/12. Non-photoperiod crops (tomatoes, peppers, strawberries) can be kept on 16–18 hour cycles through fruiting to maximize DLI. Don't try to compensate for a weak light by running 20–24 hour photoperiods; continuous light causes stress and circadian disruption in most species, and it's a short-term fix that creates longer-term problems.
Common mistakes and how to troubleshoot by what you see
Plants tell you a lot if you know what to look for. Most spectrum and intensity problems show up as observable morphology changes within 1–2 weeks of exposure. Here's how to read them and what to adjust.
| What You're Seeing | Likely Cause | What to Adjust |
|---|---|---|
| Stretchy seedlings with long internodes | Too much red, not enough blue, or low total PPFD | Increase blue ratio, lower fixture, or increase dimmer output |
| Thick, dark leaves, very compact but slow growth | Too much blue or too-low PPFD for stage | Shift ratio toward red, verify PPFD is hitting stage target |
| Light bleaching or white/yellow tips at top | PPFD too high (light burn), fixture too close | Raise fixture, reduce dimmer output |
| Pale, yellow-green leaves throughout canopy | Nitrogen deficiency or insufficient DLI/PPFD | Check nutrients first; if OK, increase intensity or extend photoperiod |
| Slow or absent flowering despite correct photoperiod | PPFD too low, spectrum lacks deep red or far red | Verify PPFD at 600+ µmol/m²/s; consider adding 660 nm or 730 nm supplemental |
| Loose, airy flower structure | Insufficient red or too-low late-flower intensity | Increase red ratio and push PPFD toward 800–900 µmol/m²/s in late flower |
| Uneven canopy development, center grows faster | Poor light uniformity from fixture height or placement | Raise fixture, check coverage footprint, consider LST or canopy training |
One mistake I see constantly is growers blaming their ratio when the real issue is total intensity. If your plants look sad and slow regardless of what you've set on your light controller, take a PPFD reading at canopy before you touch any spectrum settings. Nine times out of ten, the fixture is too high, too dim, or just undersized for the coverage area.
Another common one: assuming more blue always reduces growth. In reality, some blue is necessary for proper development at every stage. The problem with excess blue isn't growth reduction per se, it's that it can shift morphology toward overly compact, slow-developing plants that look healthy but underperform on yield. The goal is balance appropriate to the stage, not maximizing any one channel.
A simple decision flow for choosing and dialing in your setup
If you're starting from scratch or trying to tighten up your existing setup, run through this sequence once per crop cycle. Within one to two cycles, you'll have a dialed-in baseline for your specific tent, fixture, and crop.
- Identify your growth stage and look up the PPFD and DLI target for that stage using the table above.
- Set your fixture at the manufacturer's recommended height for your tent size, then take a PPFD reading at canopy center with a decent quantum sensor (not a phone app under a narrowband LED).
- Use the dimmer to reach your target PPFD. Don't obsess over the ratio yet.
- Once you're hitting the right intensity, check whether your fixture allows spectrum adjustment. If yes, set red:blue ratio per the stage targets above. If it's a fixed-spectrum fixture, verify the spec sheet shows a meaningful blue contribution (look for the 430–460 nm peak on the SPD chart).
- Set your photoperiod timer and confirm your DLI math matches the target for the stage.
- Observe plant morphology at 7 and 14 days. Use the troubleshooting table above to make adjustments.
- When transitioning to the next growth stage, shift PPFD target, photoperiod, and red:blue ratio together rather than changing one at a time.
Buying guidance: matching fixture specs to your ratio targets
If you're shopping for a new fixture based on this guide, here's what to prioritize. For home tents in the 4x4 to 5x5 range growing flowering crops, look for fixtures with at least a 660 nm deep red channel alongside a white LED base, with the option to independently dim the red channel.
For help choosing a unit that makes these red:blue adjustments easier, see our guide on the best glasses for LED grow lights tune your ratio per stage. This lets you tune your ratio per stage rather than being locked into a fixed spectrum. Commercial-grade quantum board and bar-style fixtures from reputable brands publish actual SPD data; if a manufacturer only shows a rendered spectrum graphic rather than measured data, ask for the test report or move on.
For veg-only or leafy green setups, a high-quality white LED with a 4000K color temperature (which has a natural blue peak around 450 nm) will give you a usable red:blue ratio without needing a supplemental blue channel. If you also want to pair your spectrum and red:blue ratio with the right feeding approach, check the best nutrients for led grow as a related guide for stage-matched results.
If you want precise control, choose a two-channel or three-channel fixture that separates white, deep red (660 nm), and optionally far red (730 nm). The ability to tune spectrum across the crop cycle is worth the additional cost if you're growing through both veg and flower in the same space. Choosing the right LED type for your grow is a closely related decision that affects every spectrum and ratio choice you make.
Finally, pair any new fixture with a properly spec'd quantum sensor for your LED type. If your fixture has strong deep blue or UV channels, account for the spectral error that can affect handheld sensor readings and verify with manufacturer data where possible. Getting your intensity measurements right is just as important as getting your spectrum right, and the two are tightly linked.
FAQ
How should I adjust red and blue channels without confusing intensity problems with spectrum problems?
If your fixture supports dimming, tune the red:blue ratio and intensity separately. First hit the PPFD target for that stage, then adjust the red channel (and blue or white) in small steps and watch morphology changes over 7 to 14 days. If you change both at once, it becomes hard to know whether quality issues came from spectrum or from insufficient photon dose.
Why do two lights with the same red:blue “watt ratio” perform differently, even at the same distance?
Watt-based red:blue claims can be misleading because LEDs convert power to photons differently by wavelength. The most reliable approach is to use the fixture’s spectral distribution data to compute a photon-flux ratio (µmol/s by wavelength band). If the manufacturer only provides chip wattages, treat the ratio as an estimate and validate with PPFD measurement plus whatever spectral info you can obtain.
Does the red:blue ratio mean the same thing on a white-plus-deep-red fixture compared with a true red and blue channel fixture?
Yes. Many fixtures include white plus deep red, where the “blue” portion is generated mostly by the white LED spectrum (its color temperature sets the blue fraction). In that case, changing the deep red channel mostly changes the red bias, while the blue component may stay nearly constant unless you have a dedicated blue channel or can change white CCT.
What if my plants stretch or look compact, should I always change red:blue first?
Start by confirming canopy PPFD and DLI, then decide what morphology you are trying to fix. If plants are stretching with thin leaves, first raise intensity or reduce photoperiod stress, then only after that shift toward more blue (lower red emphasis). If plants are short and dull but not thriving, you may already be too blue or too dim, so avoid “more blue” reflexively.
How do I avoid getting a wrong PPFD reading from my quantum sensor when my light is very blue-heavy?
For deep blue and violet-heavy spectra, handheld quantum sensors can underread compared with their calibration reference, so you may think you need more power than you actually do. Use the fixture’s recommended measurement protocol, ensure the sensor is flat and perpendicular, and if possible compare with manufacturer PPFD data or run a sanity check by matching your target DLI and observing whether plants respond within 1 to 2 weeks.
My PPFD is below target. Should I fix that by increasing red:blue or by changing something else first?
If your meter shows you are low, consider the practical causes before changing ratios: fixture undersizing for the tent, mounting height too high, dimmer too low, or blocked optics (reflector, film, or canopy obstruction). Only after intensity is corrected should you adjust spectrum, because the article’s main rule holds: spectrum fine-tunes, intensity sets the baseline.
Can I use a 20 to 24 hour light schedule to make up for low PPFD and keep my ratio the same?
Do not try to compensate for a weak fixture by extending the photoperiod to 20 to 24 hours. Most species show circadian and stress issues, and you will still struggle to reach the right DLI uniformly. A better approach is to correct intensity (or lamp coverage) and then fine-tune photoperiod within normal ranges for your crop type.
What happens if I push red higher than the recommended flowering range, like 7:1 or 8:1?
The safe operating method is to find your stage-appropriate PPFD and DLI first, then apply the ratio range. If you run the suggested flowering PPFD but choose an extreme red bias, you might get diminished returns or unwanted morphology, especially if blue drops too low. Treat 6:1 and above as an experiment you validate with both yield and plant structure, not a default setting.
How can I dial in a “correct” ratio faster if I’m not seeing results immediately?
If the fixture’s spectrum is adjustable but you only care about one crop, keep the dimming and channel changes consistent across runs. Document your settings (stage, photoperiod, PPFD at canopy, and the ratio you set) and evaluate after 1 to 2 weeks, not just after the first day, because visible morphology lag makes early decisions unreliable.
If my photoperiod-sensitive plants do not flower on schedule, is it ever the red:blue ratio’s fault?
A small portion of “flowering” response is photoperiod and phytochrome signaling, but your red:blue setting still needs intensity and DLI to support real photosynthesis. If a photoperiod-sensitive crop fails to flower, correct the light schedule first (for example, 12/12 for cannabis and many annual flowers), then optimize spectrum and intensity once the photoperiod trigger is correct.
How do I troubleshoot quality problems like pale color, poor leaf texture, or slow canopy fill using ratio targets?
Yes, especially for leafy greens and herbs where quality traits matter. If you see excessive stretch, leggy structure, or washed-out color, you may be too red or too dim. If you see overly compact, slow plants with poor performance, you may have too much blue relative to stage or you might be at too low a DLI. Adjust using PPFD and DLI checkpoints rather than changing ratio blindly.
Next Articles
Best Strains for LED Grow: Pick by Goal and Space
Choose the best strains for LED grow by space and goal, with growth, yield, stretch control, spectrum tips, and troubles
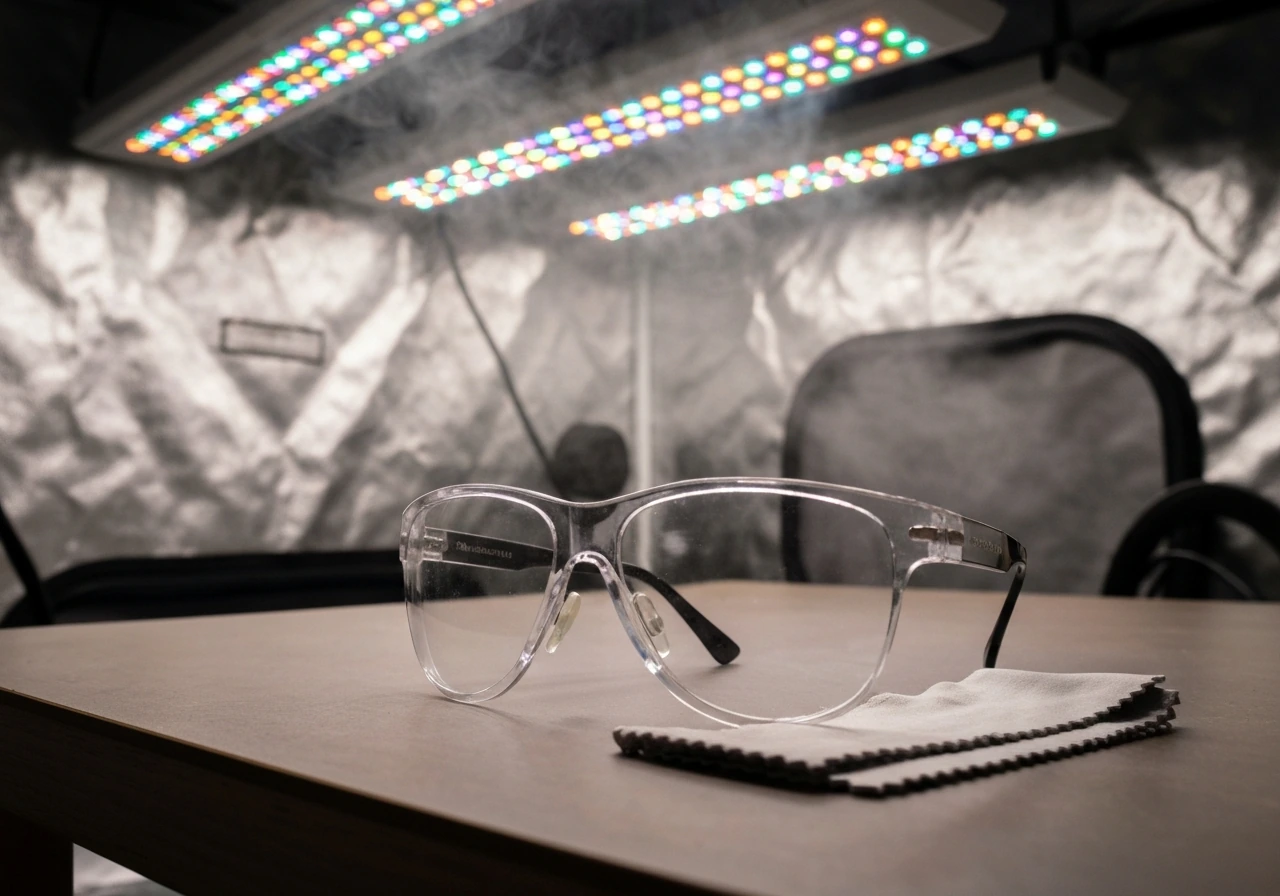
Best Glasses for LED Grow Lights: What to Buy
Learn if you need grow light glasses and how to buy the best lenses for full-spectrum LED glare and comfort.

Best Height for LED Grow Lights: Distance Guide to Avoid Burn
Set the best height for LED grow lights with rules and PPFD measuring to prevent burn and get even coverage.