Here is the short answer: most lights sold as "1500W LED grow lights" actually draw somewhere between 200 and 400 watts from the wall. The "1500W" label is a marketing-equivalent number meant to suggest the fixture replaces a 1500W HPS, not describe real power consumption. Once you understand that, the shopping process gets a lot cleaner. You are looking for a fixture in the 250–380W actual-draw range that covers a 4x5 or 5x5 footprint, delivers at least 1,000–1,200 µmol/m²/s PPFD at canopy level in flower, and hits 2.5 µmol/J or better in efficiency. That is the class of light this guide is about.
Best 1500W LED Grow Light: How to Choose and Set Up

Marcus Rutherford
12 Apr 2026
What "1500W" actually means on the label
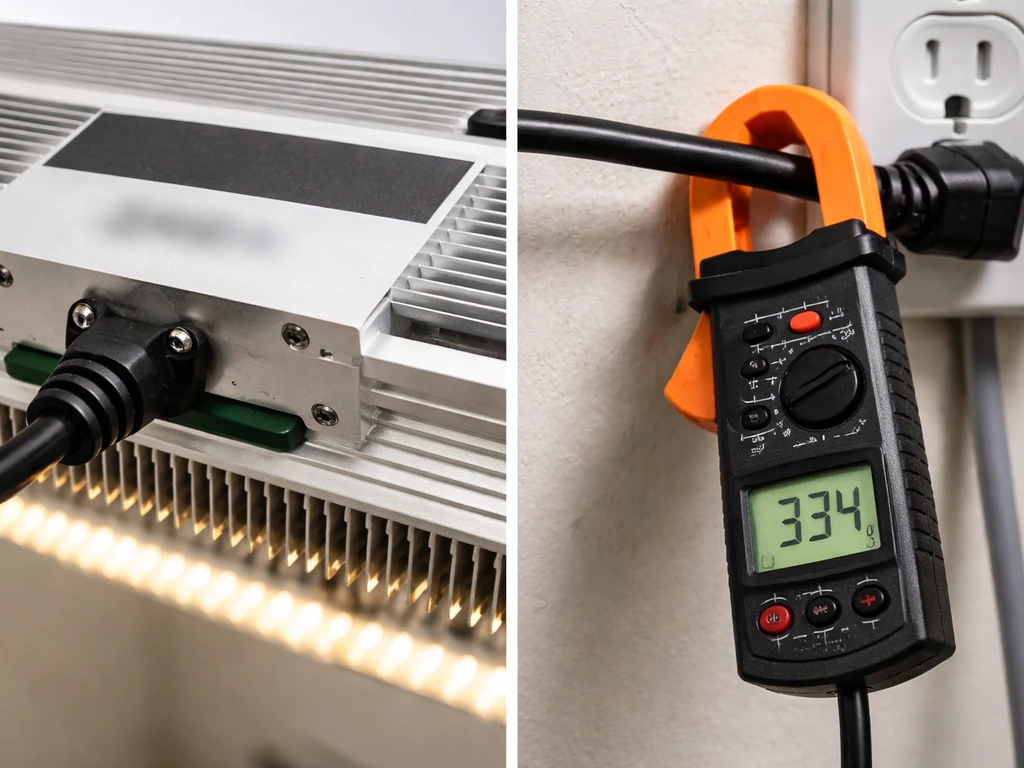
LED manufacturers landed on wattage-equivalent naming because HPS growers were used to thinking in those terms. A 1000W HPS produces roughly 130,000–140,000 lumens, and the first-gen blurple LEDs needed to claim enormous equivalent numbers just to sell. That habit stuck. Today, a product called a "1500W LED grow light" almost always draws 200–400 watts at the wall, depending on the brand and how honest they are about it. Some budget fixtures clock in at 200W actual draw; reputable mid-range fixtures in this class typically run 300–360W; high-end units push toward 400W with better efficiency and better output.
The number you actually care about is the true wall-draw wattage, followed by the PPF (photosynthetic photon flux, measured in µmol/s), and then the blank" rel="noopener noreferrer">PPFD map at your specific canopy distance. PPF tells you the total light output of the fixture. PPFD tells you how much of that light lands on a square meter of canopy. PAR, defined as photosynthetically active radiation in the 400–700 nm range, is the wavelength window that drives plant photosynthesis. If a brand does not publish a PAR map or a PPF number, that alone is a red flag.
If you are comparing options at lower wattage classes, the same logic applies. Whether you are evaluating a best 600 watt led grow light or stepping down to a best 400 watt led grow light, always verify the actual wall draw first before comparing anything else.
Matching the light to your grow space
Coverage is where most buyers go wrong. A fixture marketed as covering a "5x5 flowering footprint" may actually be dialed in for veg intensity, not bloom. Manufacturers often quote maximum coverage at veg-level PPFD (around 400–600 µmol/m²/s) rather than the denser 800–1,200 µmol/m²/s you want in flower. Here is a practical sizing framework for 1500W-class lights (300–380W actual draw):
| Tent Size | Recommended Use | Target PPFD at Canopy | Notes |
|---|---|---|---|
| 3x3 (9 sq ft) | Veg or single-plant flower | 600–900 µmol/m²/s | Overkill for veg; dim down to 50–60% |
| 4x4 (16 sq ft) | Full-cycle, dense canopy | 900–1,100 µmol/m²/s | Sweet spot for this wattage class |
| 4x5 (20 sq ft) | Flower with good uniformity | 800–1,000 µmol/m²/s | Edge falloff becomes a factor |
| 5x5 (25 sq ft) | Veg or light-supplemented flower | 500–700 µmol/m²/s | Needs CO2 or dimming adjustments for flower |
The 4x4 tent is the real home for this class of light. You can push a quality 300–360W fixture hard in a 4x4 during flower and hit the canopy numbers you need. In a 5x5, corners will lose intensity unless you are running CO2-enriched environments where 700 µmol/m²/s is actually sufficient. Plant type matters too: heavy-yielding photoperiod cannabis or tomatoes in flower want the high end of that range; herbs, lettuce, and leafy greens in a perpetual setup are happy at 400–600 µmol/m²/s.
Use-case matchups: veg, flower, full-cycle, and beyond
Vegetative growth
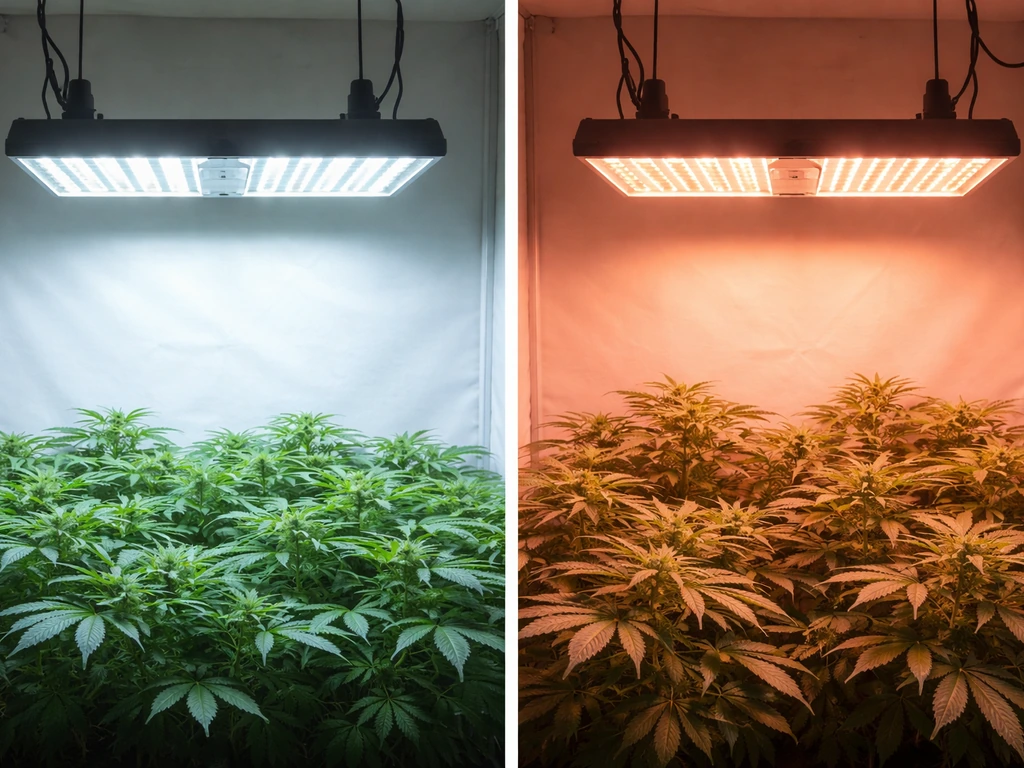
For veg, you want a broad full-spectrum output with a bit more blue (around 5,000–6,500K equivalent color temperature or dedicated blue-channel boost). Blue light keeps internodal spacing tight and builds compact, sturdy plants. At the veg stage, you are targeting roughly 400–600 µmol/m²/s PPFD and an 18/6 photoperiod for most crops. A 1500W-class light dimmed to 50–60% in a 4x4 handles this comfortably. If you are specifically shopping for veg-first environments, it is also worth reading about the best 6500k led grow light options since color temperature plays a real role in vegetative quality.
Flowering and fruiting
Flower wants intensity and red-heavy spectrum. You are targeting 800–1,200 µmol/m²/s PPFD depending on whether you are running ambient CO2 or enriched CO2. Stage-based PPFD targets from cultivation references put early flower around 500–700 µmol/m²/s and peak bloom at 800–1,100+ µmol/m²/s. Spectrum-wise, a red-rich output (660 nm peak) drives flowering and bud density. Most quality full-spectrum quantum boards in this class include far-red (730 nm) which can accelerate flowering initiation and improve canopy penetration. For a 12/12 photoperiod crop, dial your light up gradually after the flip rather than blasting full intensity from day one.
Full-cycle and supplemental setups
Full-cycle lights need to cover both stages well. Quantum board-style fixtures with a balanced white LED spectrum (3,000K plus 5,000K diodes blended) handle this better than single-bin LED arrays. If you are running a greenhouse supplement setup, you are typically targeting a PPFD top-up of 200–400 µmol/m²/s on top of natural light, which this class handles easily even at low dimming. Vertical rack systems are another use case: stacking two smaller fixtures (a best 500 watt led grow light per shelf, for example) often outperforms a single 1500W-class unit because you get shorter hanging distances and better canopy uniformity shelf by shelf.
The specs that actually separate good lights from marketing noise

Beyond wattage, here is what to scrutinize before buying any 1500W-class LED fixture:
- PPF (µmol/s): Total photon output. A 300W fixture at 2.7 µmol/J efficiency should produce around 810 µmol/s. Anything below 700 µmol/s for a 300W unit is weak.
- Efficiency (µmol/J): The ratio of light output to electrical input. Budget fixtures often land at 2.0–2.3 µmol/J. Mid-range hits 2.5–2.7 µmol/J. Top-tier units reach 2.8–3.0+ µmol/J. Higher efficiency means less heat and lower electricity bills over the light's life.
- PPFD uniformity: A PAR map at your target hanging height tells you how evenly light spreads across the canopy. Look for edge-to-center variation under 30% for flower; tighter is better. Hotspots above 1,500 µmol/m²/s in the center with 400 µmol/m²/s at the edges indicate poor optics or a bar-light design that needs careful placement.
- Spectrum: Full-spectrum white LEDs (Samsung LM301B/H or equivalent) combined with 660 nm red and 730 nm far-red diodes is the current standard for general-purpose growing. Blurple (mostly 450 nm blue + 660 nm red with no white) still exists in cheap fixtures and produces lower efficiency and poor canopy color rendering for diagnosing plant problems.
- Dimming range: 0–10V dimming or PWM dimming lets you dial intensity for different growth stages and different canopy heights. As a note from lighting control research, "support for 0–10V dimming" does not automatically guarantee dim-to-off behavior, so check whether the driver supports true dim-to-off if that matters for your photoperiod setup.
- DLI (Daily Light Integral): PPFD times hours of light divided by a constant gives you DLI in mol/m²/day. Leafy greens want 12–17 mol/m²/day; flowering cannabis wants 35–65 mol/m²/day. Knowing your target DLI helps you set photoperiod and dimming level precisely.
Feature checklist: what to look for in the hardware itself
Driver quality
The driver is the component most likely to fail first. Meanwell HLG and ELG series drivers are the benchmark: they are built for continuous duty, have high power factor correction, and carry proper certifications. Some budget lights use unmarked or off-brand drivers with vague IP ratings and no published MTBF data. If the brand does not name the driver, that is a problem. Driver lifespan is usually rated at 50,000+ hours at 25°C case temperature, but temps inside a grow tent push that down unless the driver is externally mounted or the fixture has good passive cooling.
Thermal management
LED longevity is directly tied to junction temperature. Quantum board designs spread the heat across a large aluminum PCB, which helps. Bar-style fixtures use individual heatsink bars. Either approach works if the aluminum is thick enough and the thermal interface between the LEDs and the heatsink is solid. Feel the heat sink after 30 minutes at full power: it should be warm but not hot enough to burn you (under 60°C surface temp is a reasonable comfort zone). If it is scorching, either the thermal design is poor or the LEDs are being over-driven.
Safety certifications
This is worth taking seriously, especially if you are running the light in a commercial or semi-commercial setting with employees present. UL 8750 is the recognized safety standard for LED components and drivers; it is typically used alongside luminaire standards like UL 1598 for full fixture certification.
UL 8800 specifically addresses horticultural lighting equipment and covers ingress protection (IP ratings for humid grow environments) and photobiological safety, which matters when workers are inside rooms under intense grow lighting for extended periods. Not having UL 8800 compliance is not automatically disqualifying for a home tent setup, but if you are running a commercial op, UL 8800 certification is worth requiring. ETL listing (which tests to UL standards) is also acceptable.
The Mars Hydro TSW-2000 is a widely cited example of a fixture in this class that carries CE, ETL, RoHS, and UKCA certifications with a 5-year warranty, so that is a real benchmark for what proper certification coverage looks like. When checking warranty terms, also verify whether the specific model you are buying is a current production line, since some brands discontinue series and limit warranty support and replacement parts for older models.
Build quality signals
- Aluminum heatsink thickness: thicker is better for passive cooling longevity
- IP rating: IP65 is the practical minimum for humid grow environments; IP66 is better
- Cable quality: braided or sleeved power cables indicate better build tolerances
- Daisy-chain connectors: useful for large rooms; verify the max chain length supported
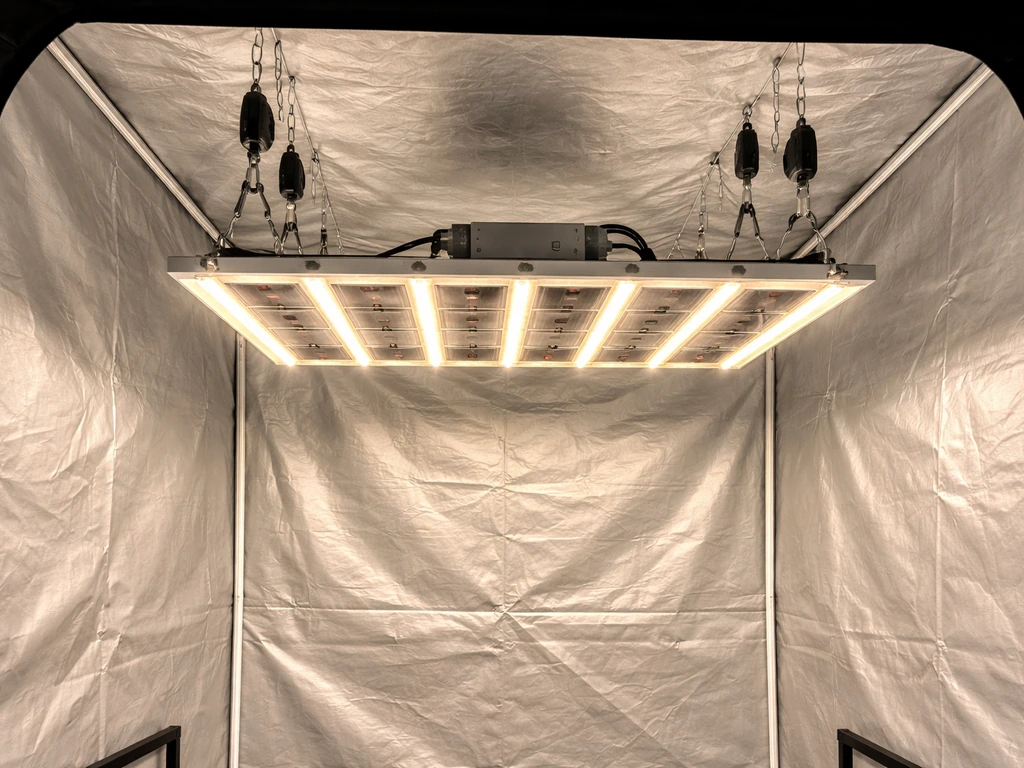
- Hanging hardware: steel ratchet hangers rated to at least 2x the fixture weight
Installation, hanging height, and dialing it in
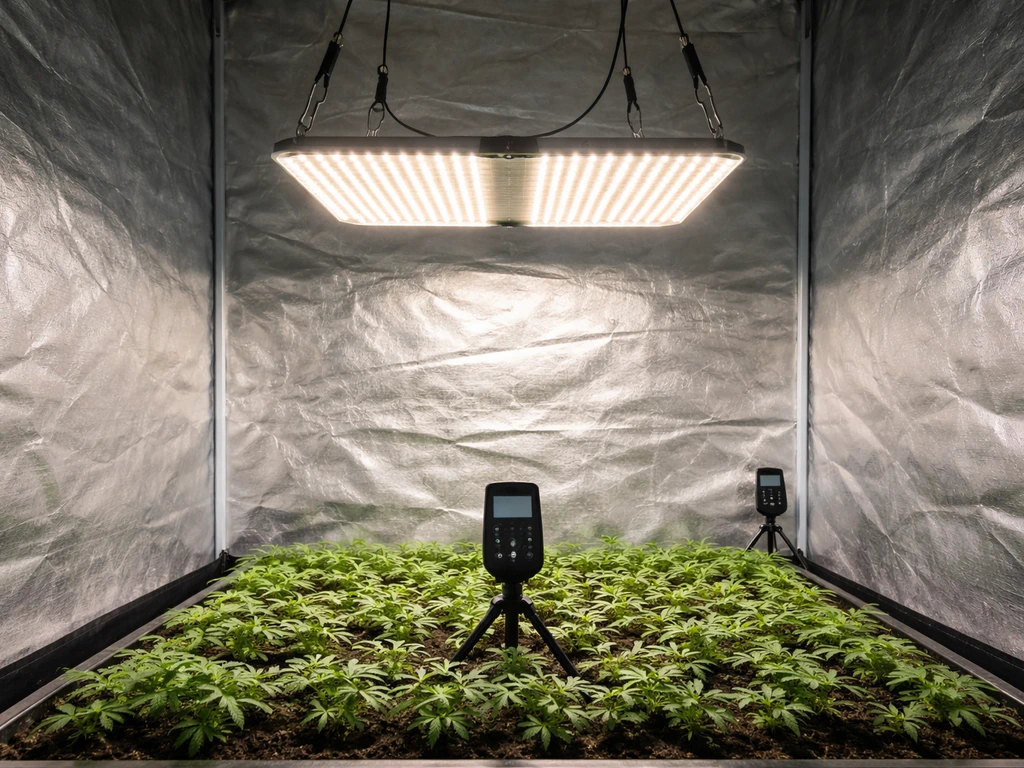
Start with the manufacturer's recommended hanging height, which for most 1500W-class quantum boards lands between 18 and 30 inches above the canopy. During seedling and early veg, hang high (24–30 inches) and dim to 40–50%. As plants develop, lower the light and increase intensity gradually. A common reference point for vegetative canopy planning uses a 24-inch mounting height as a baseline for plotting your PPFD map. From there, adjust based on your actual PAR readings if you have a meter.
Coverage planning is simple math. Take your tent area in square meters (a 4x4 is about 1.5 m²), multiply by your target PPFD, and divide by the fixture's PPF to see if the numbers align. Example: a 1.5 m² canopy at 1,000 µmol/m²/s needs 1,500 µmol/s total. A 300W fixture at 2.7 µmol/J produces 810 µmol/s total. That math says you will not hit 1,000 µmol/m²/s uniformly across a full 4x4 with a 300W unit at 2.7 µmol/J. You will need a 340–380W unit at similar efficiency, or accept that some zones will be under-lit. This is why the 4x4 is better handled by a 350–380W actual-draw fixture in this class.
Photoperiod setup is straightforward: use a programmable timer and set it so the dark period is truly uninterrupted for photoperiod-sensitive crops. If you are running 0–10V dimming through a controller, confirm the dimming behavior at low end, since some drivers hold a minimum output (say 10–15% power) rather than turning fully off when the 0–10V signal drops to zero. GrowFlux notes that even when horticultural lights or drivers support 0, 10V dimming, that does not automatically mean the separate dim-to-off feature is supported 0–10V signal drops to zero.
For multi-light setups, space the fixtures evenly and allow at least 12 inches of overlap zone between adjacent coverage areas to average out the center-heavy intensity pattern that single fixtures produce. Two fixtures in a 4x8 tent will typically produce better canopy uniformity than one large unit because you can position each over its own 4x4 zone.
Budget vs value: how to pick your tier
There are three real tiers in the 1500W-class LED market right now, and the differences are meaningful but not always proportional to price.
| Tier | Price Range (2026) | Actual Draw | Efficiency | Driver | Best For |
|---|---|---|---|---|---|
| Budget | $80–$150 | 200–250W | 1.8–2.2 µmol/J | Unbranded or generic | Single-plant hobby, seedling racks, low-demand crops |
| Mid-Range | $180–$320 | 280–360W | 2.4–2.7 µmol/J | Meanwell ELG or equivalent | 4x4 flower tents, home cannabis growers, serious hobbyists |
| Premium | $350–$600+ | 350–420W | 2.7–3.0+ µmol/J | Meanwell HLG or custom | Commercial-adjacent, maximum yield, long-term ROI |
Budget fixtures in the $80–$150 range will not give you 1500W-equivalent output regardless of what the box says. At 200–250W actual draw with 1.8–2.2 µmol/J efficiency, you are getting 360–550 µmol/s total PPF. That is adequate for seedlings, herbs, and leafy greens in a 3x3, but it will not drive a dense flowering canopy. You also give up certifications, a quality driver, and any real warranty support.
The mid-range tier ($180–$320) is where things get serious. Fixtures from brands like Mars Hydro, Spider Farmer, HLG, and Vivosun's higher-end lines typically land here. You get Samsung or Osram diodes, a Meanwell ELG driver, real certifications, and 2.4–2.7 µmol/J efficiency. This is the tier most home growers should buy in. The extra $100–$150 over budget pays back quickly in electricity savings and avoids the replacement cost cycle of cheap lights that degrade or fail in 18 months.
Premium fixtures ($350+) make sense when you are maximizing yield per square foot, running year-round commercial-adjacent operations, or need long warranty and parts support. The efficiency bump from 2.7 to 3.0 µmol/J may not sound big, but over a 12-hour daily cycle that adds up in power bills. If you are scaling and wondering how this tier compares across different wattage classes, reading comparisons on a best 300w led grow lights roundup or a best 300 watt led grow light guide can help you calibrate whether running multiple smaller fixtures beats one large unit for your specific space.
For UK-based buyers, import costs and voltage compatibility matter. Many US-listed fixtures in this class are dual-voltage (100–240V), but warranty support and return logistics differ significantly. Checking UK-specific roundups like the best 600w led grow light uk guide is a useful cross-reference for understanding UK-market availability, even at a different wattage class.
Maintenance, troubleshooting, and what to expect from results
Day-to-day maintenance
LED fixtures in this class are low maintenance compared to HPS or CMH, but not zero maintenance. Dust accumulates on heatsink fins and reduces thermal performance over time. Wipe the heatsink with a dry cloth every 4–6 weeks, or more often in dusty environments. Check that all hanging hardware is secure at every grow cycle start. If the fixture has a removable driver, inspect the driver housing for moisture ingress if your tent runs high humidity.
Common problems and fixes
- Hotspots at canopy center: raise the hanging height or dim to 70–80% and see if center PPFD comes down while edges improve. Alternatively, add a second smaller fixture offset to fill edges.
- Edge under-lighting: classic sign the fixture is covering a larger area than its output supports. Either reduce tent size, add a side-wall reflector, or supplement with a smaller bar light on the perimeter.
- Stretchy, loose internodes in veg: either light intensity is too low (raise PPFD or lower the fixture), the blue-channel output is weak, or your photoperiod is off. Check that the dark period is truly dark.
- Slow flowering / poor bud development: check PPFD at canopy with a PAR meter, not an estimate. If you are under 700 µmol/m²/s in peak flower, the light is either too far away, too dim, or underpowered for the space.
- Driver getting very hot: check that the driver has adequate ventilation and is not enclosed in a tight space. Some growers mount the driver outside the tent; this also reduces heat load inside the canopy.
- LED diodes flickering or going out: typically a driver failure or a solder joint issue. If within warranty, file a claim immediately. If out of warranty on a budget unit, replacement cost usually justifies upgrading rather than repairing.
Expected results and realistic benchmarks
A quality 1500W-class LED (300–360W actual draw, 2.5+ µmol/J) covering a 4x4 tent in a well-managed grow should deliver 1.5–2.5g per watt of actual draw for cannabis, or very high productivity for tomatoes and peppers on a similar light budget. Leafy greens under this class of light in a 4x4 will produce far more than a typical home grower needs. If you are not hitting those numbers after dialing in your environment (temperature, VPD, nutrients), investigate your PPFD uniformity before blaming the light. Poor results are more often a canopy management or environment problem than an output problem with a properly specified fixture.
Finally, LED depreciation is real. Most quality fixtures publish L90 ratings (the hours to 90% of initial output) around 36,000–50,000 hours. At 18 hours per day, that is 5–7 years before output drops noticeably. Budget fixtures often do not publish L90 data, which tells you something. Plan for a full fixture replacement every 4–5 years on budget gear, and every 6–8 years on mid-to-premium fixtures, factoring that into your total cost calculation from day one.
FAQ
If it’s called a best 1500w led grow light, how can I verify the real power it uses?
Look for “actual draw” (wall wattage) in the specs, then confirm with your own plug-in watt meter for the exact dimmed level you plan to use. A common mistake is comparing published PPF at 100% to your real setting (for example 60% dimming), which makes the effective canopy PPFD lower than expected.
How do I avoid buying a best 1500w led grow light that doesn’t evenly cover my tent?
Start by checking whether the brand provides a PPFD or PAR distribution map at your stated hanging height. If they only list average PPFD or a single central hotspot number, you may end up with under-lit corners even if the average looks right, especially in a 5x5.
What’s the practical way to set the correct hanging height and intensity if I don’t own a PPFD meter?
If you don’t have a meter, you can still reduce risk by choosing a fixture whose published PPFD claims match your target flower range at the height you plan to hang. Then validate after setup by measuring one corner, one center, and one opposite corner, because uniformity problems are usually spatial, not total-output problems.
Can a best 1500w led grow light fail to produce a true dark period with dimming controls?
For dimming drivers, the key detail is the minimum output behavior at 0 to 10V. Some units keep running above zero when the controller signal bottoms out, so your “dark period” might not be truly dark for photoperiod crops. Test the dimming and off behavior before the first flowering cycle.
Are two best 1500w led grow light models with the same “equivalent watt” always comparable?
No, and the article’s wattage-equivalent idea is exactly why. Efficiency differences change the required wattage, but diode mix and driver limits affect usable PPF too. If two fixtures both claim 1,500W equivalent, rely on PPF plus efficiency (µmol/J) and the provided distribution map at your canopy distance.
Does higher CO2 always mean I can run a best 1500w led grow light at lower PPFD?
If you run in a high-CO2 setup, you generally can accept lower PPFD, but you should also raise your guard for uniformity and plant stress. When CO2 is high and light is uneven, you can create localized overfeeding of light-sensitive zones (tip burn, uneven flowering) even if the room average seems acceptable.
What thermal or humidity-related checks should I make on a best 1500w led grow light for long-term reliability?
If the fixture depends on passive cooling and the driver sits inside a sealed housing, humidity and dust can shorten lifespan. Prioritize externally mounted drivers or good venting design, then check for hot spots using an IR thermometer, not just how it feels by touch.
When is it better to use multiple smaller fixtures instead of one best 1500w led grow light?
Yes. Stacking two smaller lights can be better for canopy uniformity because each module can sit closer to its target area. The tradeoff is more cords, more drivers to manage, and more risk of uneven dimming if the controllers aren’t calibrated similarly.
How should I ramp intensity after switching to 12/12 with a best 1500w led grow light?
For photoperiod crops, the most common setup failure is ramping intensity too aggressively right after the flip, which can cause stress and stretch or slow bud initiation. Use gradual increases over several days while monitoring canopy response, and ensure your timer and dimmer actually produce stable output each day.
What details on warranty terms matter most for a best 1500w led grow light?
Check the driver brand and whether the fixture states operating temperature range. Also confirm whether the warranty excludes driver issues from “improper installation” such as reversing polarity, using the wrong dimming signal type, or operating at temperatures beyond the manufacturer’s rating.
How can I tell if my best 1500w led grow light is being run too hot for its design?
Even with a quality fixture, overheating is usually the first sign of a configuration problem. Make sure the intake vents are not blocked, keep tent exhaust airflow sufficient, and clean heatsink fins on schedule. If surface temps consistently approach uncomfortable levels, adjust hanging height or dimming before assuming the LEDs are defective.
How should LED depreciation change my purchasing decision for a best 1500w led grow light?
Plan on reduced output with time. If a fixture only provides an L90 number, use it as a guide for “when performance drops noticeably,” and budget replacement for the life you expect from your operating hours. For dense flowering, you will usually notice production differences when output falls, even if the light still turns on.
Next Articles
Best 300 Watt LED Grow Light: How to Choose and Buy
Buy the best 300 watt LED grow light with coverage, PPFD, spectrum, dimming, heat, and setup checks for your tent.
Best 500 Watt LED Grow Light: Buyer Guide and Setup Tips
Real guide to the best 500W LED grow light: compare PPFD, coverage, spectrum, efficiency, setup height, and safety.

Best 6500K LED Grow Light: How to Choose and Optimize
Choose the best 6500K LED grow light using real PPFD, coverage, spectrum strategy, setup, and claim checks.