Yes, you can get a genuinely capable LED grow light for under $500. In fact, the $300–$500 range is arguably the sweet spot for home growers right now: you get real quantum board or bar-style technology, solid efficiency numbers, and enough output to flower a 4x4 tent without overpaying for a brand name. The trick is knowing which specs actually matter, which product claims are inflated, and which lights match your specific tent size and grow stage. Let's cut straight to it.
Best LED Grow Light Under $500: Buyer’s Guide by Tent Size

Marcus Rutherford
16 Apr 2026
What "Best" Means When You're Spending Under $500
"Best" is completely relative to your tent size and what you're growing. A light that's perfect for a 2x4 veg setup is genuinely underpowered for a 4x4 flower tent. Before you look at a single product, nail down two things: your canopy footprint and your primary grow stage (veg, flower, or both). A 2x2 tent running a single autoflower needs maybe 100–150 actual watts of quality LED.
A 4x4 tent running photoperiod plants through flower needs 400–480 watts of real draw to hit the PPFD levels that push dense, resinous buds. The budget also shapes what features you can expect: under $200, you're mostly looking at smaller panels with moderate efficiency; from $300 to $500, you get into high-efficiency bar lights and quantum boards with dimming, daisy-chain capability, and sometimes Samsung LM301H or equivalent diodes.
For context, if you're outfitting something smaller and want to see what's available at even lower price points, LED grow lights under $100 do exist and can work for seedlings or micro grows, but they hit a hard ceiling for flowering. The $500 cap is where options get genuinely competitive with mid-range commercial fixtures from a few years ago.
The Specs That Actually Matter (And How to Read Them)
PPFD and Coverage Maps
PPFD (photosynthetic photon flux density, measured in µmol/m²/s) is the single most important number on the spec sheet. It tells you how many photons are hitting a square meter of canopy per second. For vegetative growth, you want roughly 400–600 µmol/m²/s at canopy level. For flowering, you're targeting 600–900 µmol/m²/s, and some strains can push past 1,000 with CO2 supplementation.
The problem is that manufacturers almost always report peak PPFD at the center of the coverage area at a very short hanging distance, which flatters the number considerably. Real-world testing from independent sources has repeatedly shown that the edges and corners of a coverage area can drop 30–50% below the center peak, which matters a lot in a 4x4 where your corner plants are just as important as the center ones.
The right way to evaluate PPFD is to look at a full grid map measured at the actual hanging height you'll use, not just a single center-point number. Philips' guidance is clear on this: the mounting height (the free height from fixture to crop top) dramatically changes the output numbers, and the averaging method used across the grid determines whether you're getting a meaningful uniformity picture. A light claiming "800 µmol/m²/s at 18 inches" means almost nothing without a 9-point or 25-point grid map showing how that number distributes across your canopy.
Efficiency (µmol/J)
Photosynthetic photon efficacy (PPE), measured in µmol/J, tells you how efficiently the fixture converts electricity into usable plant light. A PPE of 1. 9 µmol/J is considered a solid minimum for a quality modern LED. Many budget options sit around 2.
0–2. 3 µmol/J, while top-tier fixtures push 2. 7–3. 0 µmol/J.
Higher efficiency means lower electricity costs over a grow cycle, which matters a lot over a year of running lights 18 hours per day. The DLC qualification program uses PPE thresholds (at or above 1. 9 µmol/J) as part of its performance criteria, so a blank" rel="noopener noreferrer">DLC-listed fixture gives you some assurance the efficiency claim has been independently tested.
It's worth noting the difference between certifications: DLC is primarily about performance and efficacy reporting, while UL 8800 is the horticultural-specific safety standard covering photobiological safety and electrical safety for grow environments. Both matter, but for different reasons.
Spectrum
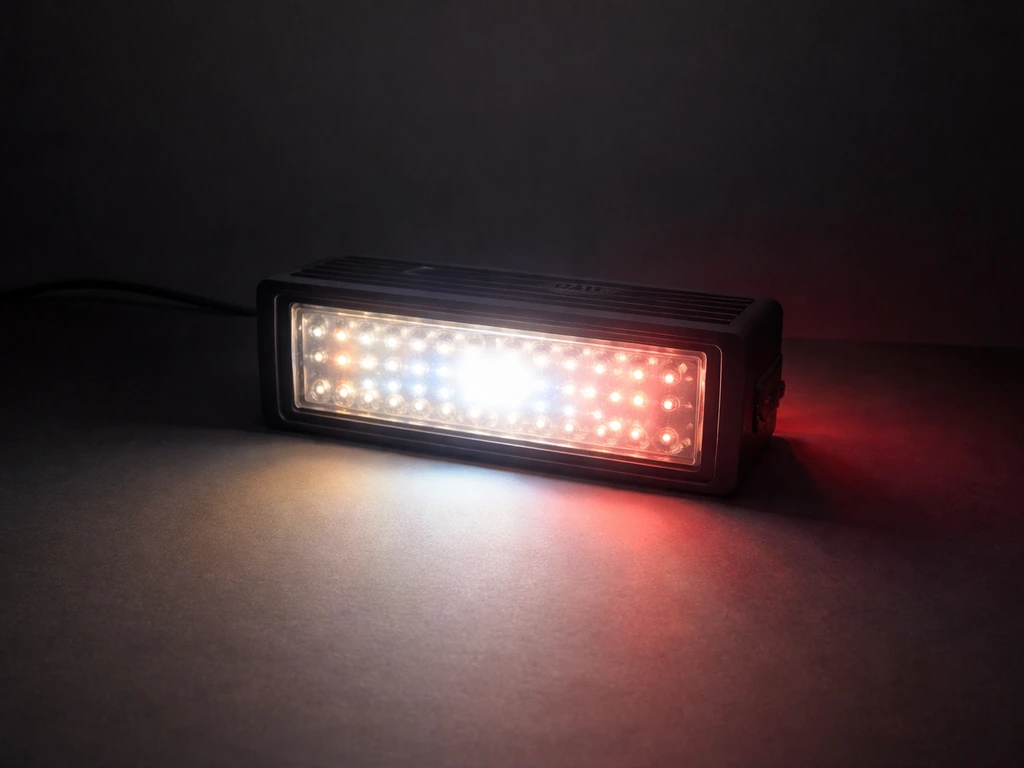
Most quality LEDs under $500 now run a full-spectrum white light (typically 3000K or 3500K blended with some 5000K or 6500K diodes), sometimes supplemented with 660nm red and far-red for bloom promotion. This is a genuinely good approach for most growers since you run the same light from seedling to harvest without swapping fixtures. Some lights add UV (280–400nm) and far-red (720–750nm) channels, which have real science behind them for terpene production and flowering triggers, respectively. That said, don't overpay for UV/IR if your budget is tight: the white full-spectrum alone will grow excellent plants.
Dimming, Drivers, and Warranty
A dimmer is not a luxury. It lets you run the light at lower intensity during seedling and early veg stages (which protects plants from light stress), dial in intensity without changing hanging height, and reduce heat output in a warm tent. Look for 0–100% dimming, not just a few fixed settings. The driver brand matters too: Meanwell drivers are the gold standard for reliability and are commonly found in reputable budget fixtures. A 3-year warranty is the minimum you should accept; 5 years is better and increasingly common in this price range.
Top Picks Under $500 by Use Case
Small Tents: 2x2 and 2x4
For a 2x2, you want 100–150 true watts. The Spider Farmer SF-1000 (100W actual draw, around $100–$130) and the Mars Hydro TS-1000 (150W, around $120–$150) are reliable workhorses at this scale. Both use Samsung LM301B diodes and Meanwell or equivalent drivers.
Independent field testing of the Spider Farmer SF-2000 at a 2x4 footprint found that while center PPFD numbers look great, regions at each end of a 60x120cm space can fall below 500 µmol/m²/s, which underscores why coverage uniformity matters more than the headline peak number when you're choosing a panel for a longer footprint like 2x4. For a 2x4 (a very common tent for two to four plants), a 200–250W bar-style light is the right call.
If you want a deeper dive into that wattage class, our best 200 watt LED grow light guide covers the top options in detail.
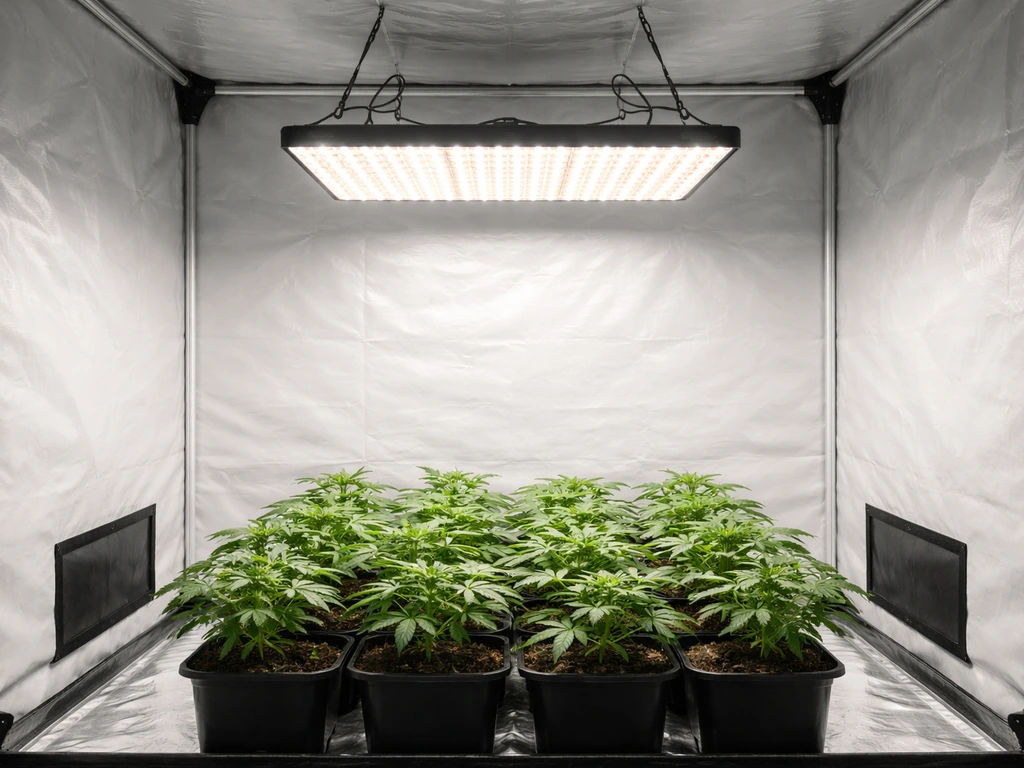
The Sweet Spot: 4x4 Tents
The 4x4 is where the $300–$500 budget really shines. You're looking at 400–480W of actual draw to flower a full canopy properly. Three fixtures dominate this category right now:
- Mars Hydro FC-E4800 (~$400–$450, 480W actual draw): Bar-style light with Samsung LM301H diodes, roughly 2.6–2.8 µmol/J efficiency. Independent PPFD mapping shows most values landing in the 600–700 µmol/m²/s range across a 4x4 canopy at a standard hanging height, which is solid for flower. Comes with a Meanwell driver and 5-year warranty.
- Spider Farmer SE-5000 (~$450–$500, 480W): Similar bar-array design, Samsung LM301H + 660nm red, claimed 2.9 µmol/J. Good uniformity across the 4x4 footprint, dimmable to 1%, daisy-chain capable.
- Vivosun VS4300 (~$300–$350, 430W): More budget-friendly entry with Samsung diodes, PPE around 2.5 µmol/J. Slightly less efficient but still capable for a 4x4 flower run and a good option if you want to save $100–$150.
Larger Footprints and Multi-Light Setups
For 5x5 or 4x8 spaces, a single light under $500 won't cut it for flowering. You're better off running two of the 4x4 options above side by side. That said, if you're filling a 5x5 veg tent or a vegetative mother plant room where PPFD targets are lower (400–600 µmol/m²/s), a single 480W bar light can stretch to cover the area adequately. One category worth exploring in multi-light setups is supplemental lighting: under canopy LED grow lights can fill the lower canopy in dense scrog setups, adding PPFD to bud sites that the main overhead light can't reach effectively.
Veg-Only and Low-Power Builds
If you're running a dedicated veg or propagation space and don't need flower-level intensity, you can spend less and use electricity more efficiently. A 100–150W quality LED is plenty for veg, clones, and seedlings. Our coverage of the best low watt LED grow lights is a good starting point if that's your situation, since you can put real budget into a separate, high-output flower light rather than overbuilding both spaces.
Comparing the Top 4x4 Options Side by Side
| Light | Actual Draw | Efficiency (µmol/J) | Diodes | Dimming | Warranty | Approx. Price |
|---|---|---|---|---|---|---|
| Mars Hydro FC-E4800 | 480W | 2.6–2.8 | Samsung LM301H | 0–100% | 5 years | $400–$450 |
| Spider Farmer SE-5000 | 480W | ~2.9 | Samsung LM301H + 660nm | 0–100% (1% steps) | 5 years | $450–$500 |
| Vivosun VS4300 | 430W | ~2.5 | Samsung LM301B | 0–100% | 3 years | $300–$350 |
| Mars Hydro TS-3000 | 450W | ~2.5 | Samsung LM301B + 660nm | 0–100% | 3 years | $350–$400 |
The Spider Farmer SE-5000 edges out the pack on efficiency but costs the most. The FC-E4800 is the best balance of proven real-world performance and price for most 4x4 growers. If $400 is still too much, the Vivosun VS4300 gets you into the same tent size at a meaningful discount, with a small efficiency penalty you'll notice on your electricity bill over time. For growers who are price-sensitive but still need the $300 range, the best LED grow lights around $300 guide narrows that field down further.
Full-Spectrum vs. Bloom-Focused: What to Choose on a Budget
If you're running one light through veg and flower (which is most home growers), full-spectrum white light is the right choice. Modern quantum board LEDs built around 3000K or 3500K white diodes deliver a broad spectrum that supports all growth stages. The 3000K bias provides more red-wavelength energy that plants use heavily in flower, while higher color-temperature diodes mixed in cover the blue range for healthy veg growth and compact internodal spacing.
Bloom-focused lights, which heavily weight 630–660nm red diodes, made more sense in the older blurple LED era. Today, most quality full-spectrum fixtures already include supplemental 660nm deep red diodes, so you're not giving anything up. Where a dedicated bloom spectrum still makes sense on a budget is if you have a separate veg room with its own light and want to maximize red-heavy photons in your flower room without spending on the full-spectrum premium. In that case, a light heavy in 3000K or even a dual-channel fixture with a dedicated bloom channel is worth considering. But for most growers reading this, a good full-spectrum bar light is the practical answer.
Setup: Mounting Height, Spacing, and Dialing In Veg vs. Flower
Mounting height is where a lot of first-time LED users go wrong. Bar-style and quantum board lights spread light differently than blurple panels, and hanging them too low creates hotspots with plants directly underneath the center getting scorched while corners stay dim. Too high and you lose PPFD across the whole canopy. Here are practical starting points for the fixtures in this guide:
| Grow Stage | Recommended Hanging Height | Target PPFD (µmol/m²/s) | Dimmer Setting |
|---|---|---|---|
| Seedling / Early Veg | 24–30 inches above canopy | 200–400 | 40–60% |
| Late Veg | 18–24 inches above canopy | 400–600 | 60–80% |
| Early Flower | 16–20 inches above canopy | 600–750 | 80–90% |
| Peak Flower | 14–18 inches above canopy | 750–900 | 90–100% |
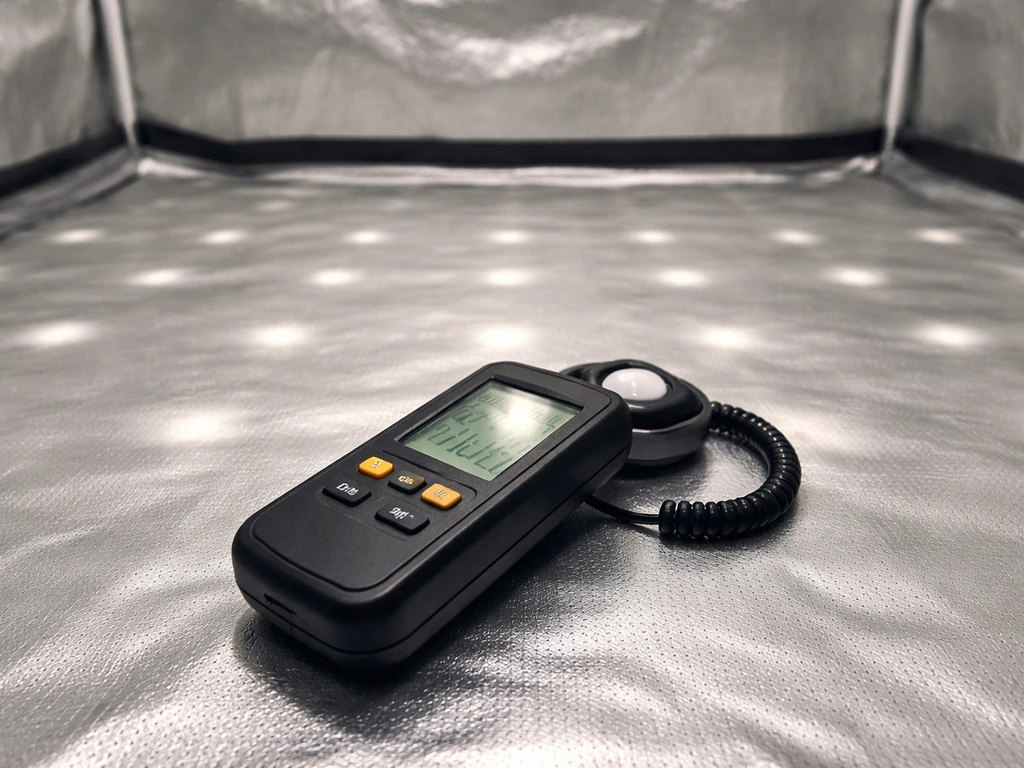
Always dial in with a PAR meter if you can. If you don't own one, you can rent them from some hydro shops or find inexpensive apogee-compatible phone attachments. Use a grid approach: take readings at 9 points across your canopy (corners, edge midpoints, and center) and average them. That average is your real working PPFD, not the center peak.
P. L. Light Systems' guidance on uniformity is useful here: the min/max ratio across your grid tells you how uneven the coverage is. A ratio below 0.
7 (where the worst spot is less than 70% of the best spot) means your plants are experiencing meaningfully different light levels, and you may need to adjust height, add a reflective liner to your tent walls, or train plants to even out the canopy.
For spacing in multi-plant setups: in a 4x4 with four plants, give each plant roughly a 2x2 area and train them (LST, topping, or scrog) to fill that space horizontally. Keeping the canopy as flat as possible is the most direct way to maximize PPFD uniformity from a single overhead light.
Budget Mistakes That Cost You More Than You Save
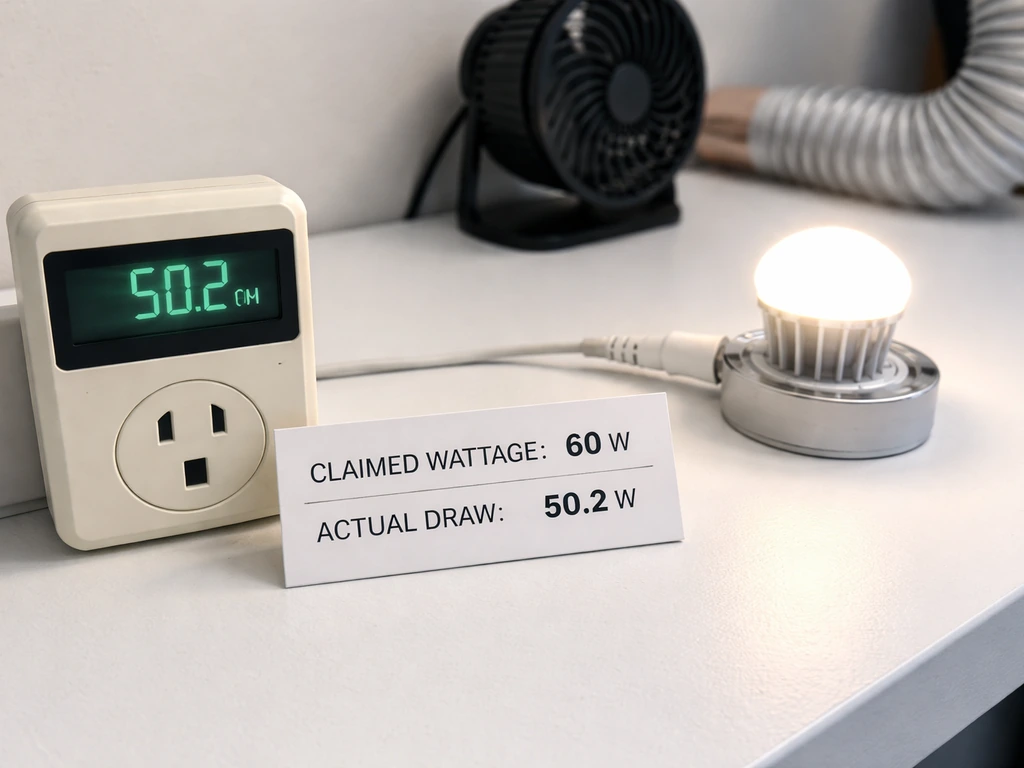
Trusting Claimed Wattage Over Actual Draw
"Equivalent wattage" is marketing language that has no agreed definition. A light marketed as "1000W LED" might draw 100W from the wall. Always look for actual power draw (watts at the wall), not equivalent or maximum wattage. The fixture's spec sheet should list wall draw clearly; if it doesn't, that's a red flag.
Buying Too Little Light for the Tent
This is the most common mistake. A 200W light in a 4x4 tent will grow plants, but it won't flower them at full potential. You'll get airy buds, stretched internodes, and disappointed harvests. Use a simple rule of thumb to sanity-check: for flowering, you need at least 25–30 actual watts per square foot from a quality LED. A 4x4 (16 sq ft) needs 400–480W minimum.
Ignoring Heat and Ventilation
LEDs run cooler than HPS, but a 480W bar light still produces significant heat in a sealed tent, especially in summer. Budget lights with lower efficiency produce more heat per watt of light delivered. Make sure your tent has adequate airflow (an inline fan rated for at least the tent volume, plus a carbon filter if you need odor control). Monitor canopy temperature, not just ambient: if your leaves are hitting 85°F or above, heat stress will limit yields regardless of how good your light is.
Skipping Dimming Capability
Running a 480W light at full power from seedling day one is a fast way to stress or bleach young plants. Dimming is essential, not optional. If a fixture in your budget doesn't have a dimmer, keep looking. Manufacturers sometimes omit it on entry-level models to hit a lower price point, but you'll regret it the first time you put seedlings under a full-power quantum board.
Dismissing Certifications and Warranty Terms
Electrical safety certification (UL 8800 specifically, or ETL listing to equivalent standards) matters for horticultural lighting because grow environments combine electricity, water, and extended run times. UL 8800 was developed specifically to address photobiological safety and electrical safety for equipment used in grow facilities, and fixtures certified to it have been tested against those conditions. A light without any recognized certification is a calculated risk in a wet environment running 12–18 hours a day.
On the performance side, look for DLC listing as a secondary signal that efficiency claims have been independently tested rather than self-reported. And read the warranty terms carefully: some manufacturers offer 3 or 5 years in headline marketing but bury exclusions that cover only the driver, not the diodes or housing.
Your Next Steps Before Buying
Measure your tent, decide on your primary grow stage, and set a realistic wattage target using the 25–30W/sq ft rule for flower. Then filter your shortlist by PPE (look for 2.0 µmol/J or higher), check for a full grid PPFD map (not just a center-peak number) from the manufacturer or an independent review, confirm dimming capability and Meanwell or equivalent driver, and verify at least a 3-year warranty with clear terms. If you find a fixture that checks all those boxes for your footprint, you've found a genuinely good light regardless of whether the brand name is one you recognize.
The under-$500 LED market in 2026 is genuinely competitive. The brands that were cutting corners a few years ago have mostly been pushed out by Chinese manufacturers using the same Samsung diodes as premium brands at substantially lower prices. You don't have to spend $800 to grow excellent plants. You do have to spend five minutes verifying specs rather than trusting the Amazon headline. Do that homework, match the light to your actual footprint and stage, and you'll get results that would have cost twice as much just four years ago.
FAQ
What should I do if the manufacturer only shows a single PPFD number, not a full grid map?
If your light has no PPFD distribution data, you can still sanity-check it, but you will be guessing. Look for a real-world min/max uniformity ratio, or at least an independent grid test. If only a single center reading is provided, treat the corner performance as unknown and plan to raise reflectivity (reflective tent liner) and keep the canopy flat so the light concentrates where your plants sit.
How can I improve light uniformity in a 4x4 if my corners look dim?
For most home tents, reflective liner plus good canopy leveling matters more than chasing extreme PPFD at the center. If your min/max ratio is high (for example, worst spot is much lower than the best), first raise the light slightly to reduce hotspots, then adjust plant training to flatten the canopy. A PAR meter grid is the fastest way to confirm you fixed uniformity rather than just lowering everything.
Can I run two smaller lights instead of one big 4x4 light under $500, and will it perform better?
Yes, but not by guessing wattage alone. When you add a second light, split coverage so each fixture handles a defined section, and re-check uniformity with a PAR meter if possible. Two lower-watt fixtures can outperform one high-watt fixture when their overlap creates a flatter PPFD field, but spacing and hanging height become critical.
How should I use dimming when starting seeds or clones under a high-watt LED?
Even with a dimmer, start seedlings and clones at a reduced output and increase gradually over several days. A common approach is to keep the canopy at a moderate working PPFD target and avoid sudden full-power changes that can bleach leaves, stunt growth, or trigger stress. Dimming is your control knob, hanging height is your second control knob.
If two lights have similar diode specs, why might one still perform worse after a few months?
No. The diodes determine peak spectrum coverage, but the driver and thermal design determine how stable output stays over time. A cheap driver can maintain brightness briefly then sag under heat. This is why driver brand, warranty length, and the fixture’s temperature behavior matter, especially for 18-hour daily runs.
What temperature should I watch for, and where exactly should I measure it in the tent?
Aim for a balance between delivered light and heat removal. If leaves hit around 85°F (29°C) at the canopy, you are already in a zone where yield and bud quality suffer. Measure canopy temperature with a probe at leaf level, then adjust fan speed, ducting, and whether you need to raise or dim the light.
Is step dimming (a few power settings) as good as true 0–100% dimming?
Dimming that is limited to a few fixed steps can still help, but it is less precise for PPFD targeting across growth stages. Full 0 to 100% dimming lets you maintain a consistent canopy light level without changing hanging height, which reduces hotspots and improves consistency plant to plant.
How much can electricity costs drop if I dim correctly instead of running full power all the time?
Yes, and it can be a major cost saver. If you can keep your canopy at an appropriate PPFD with dimming and correct hanging height, you can run lower intensity for veg and reduce electricity draw during long stretches. The key is not to use the lowest setting that still “grows,” but to match your target stage, then fine-tune with measurements.
When does supplemental under-canopy lighting actually make sense, and when is it unnecessary?
You can, but you should be careful about placement and goals. Under-canopy lights help when the main overhead light cannot reach lower sites, like in dense scrog or tall plants. They do not replace the need for adequate overhead coverage. Plan for overlap, and keep the canopy training to prevent shadowing so the under-canopy light actually reaches bud sites.
How do I judge safety when a listing does not clearly show electrical or horticultural certification details?
If you have no certification or only vague claims, treat it as a higher-risk purchase for a wet, high-humidity, long-run environment. Even if it works initially, you want at least recognized horticulture safety electrical testing and clear warranty terms. If you cannot find the listing or the warranty exclusions are unclear, it is usually not worth the savings.
How can I tell if “equivalent 1000W” claims are just marketing?
Equivalent wattage is basically marketing and can be misleading. The practical decision metric is actual wall draw under your dimmer settings, plus measured or credible PPFD performance. If the wattage isn’t clearly stated as wall input on the spec sheet, consider it a red flag and move on.
For four plants in a 4x4, what matters more, spacing or keeping the canopy flat?
In a 4x4, four plants in a roughly 2x2 area each can work well, but the real requirement is that the canopy ends up level at the height you tuned for. If plants vary in height, the tallest portion grabs PPFD while lower portions get less, which makes even the best light look uneven. Use topping, LST, or scrog to keep a consistent canopy plane.
Next Articles
Best LED Grow Light for $300: Top Picks and Buyer Guide
Top LED grow lights under $300 with specs to check PPF, coverage, dimming, efficiency and buying tips for 2x2 to 4x4.
Best 200 Watt LED Grow Light: How to Choose and Compare
Choose the best 200W LED grow light by real draw, PPFD, coverage maps, spectrum, dimming, and tent size fit.
Best Low Watt LED Grow Light Guide: Pick, Match, Install
Choose the best low watt LED grow light by coverage, spectrum, efficiency, dimming, and safe setup for 2x2 to 4x4.