A low-watt LED grow light is worth buying if it actually hits the PPFD your plants need over the area you're growing in. That sounds obvious, but most people shopping in the low-watt category underbuy because they focus on the watt number rather than what that wattage delivers at canopy level. The short answer: for a single plant or a 2x2 tent, a well-built 50–100W fixture from a reputable brand will do real work. For a 4x4, you're looking at 200–400W of quality LED, and anything labeled "low watt" that promises 4x4 coverage is almost certainly lying to you.
Best Low Watt LED Grow Light Guide: Pick, Match, Install

Marcus Rutherford
14 Apr 2026
What a low-watt LED grow light actually needs to do
Before buying anything, get clear on two numbers: coverage area and PPFD (photosynthetic photon flux density, measured in µmol/m²/s). Wattage is just the electricity going into the fixture. PPFD is what your plants actually use. A cheap 100W blurple panel might pull 100W from the wall but deliver 150 µmol/m²/s at 18 inches, barely enough for seedlings. A quality 100W bar-style LED with Samsung LM301H diodes and a Meanwell driver can push 400–600 µmol/m²/s at the same height, which is genuinely useful for vegetative growth.
Here are the PPFD targets to keep in mind as you shop. Seedlings and cuttings need just 100–300 µmol/m²/s. Vegetative plants want 400–600 µmol/m²/s. Flowering plants need 700–900 µmol/m²/s, and if you're running CO2 supplementation, you can push to 1,000–1,500 µmol/m²/s before you hit diminishing returns. Low-watt fixtures are genuinely appropriate for seedling and veg stages, and in small enough footprints, they can drive flowering too.
Coverage works like this: a 50W fixture in the 2.0–2.5 µmol/J efficiency range will realistically cover about 1–1.5 square feet of canopy at flowering intensity, and up to 2–3 square feet for vegetative growth. A 100W fixture roughly doubles that. Any manufacturer claiming a single 45W panel covers a 3x3 at "full growth" intensity is using numbers measured at the dead center of the footprint, not the average across the whole area. Don't be fooled.
How to pick the right light: spectrum, efficiency, drivers, and heat
Spectrum
Full-spectrum white LEDs (typically peaking around 3000K–4000K with added red diodes) are the right call for almost everyone reading this. They deliver a balanced PAR spectrum that works across all growth stages without the guesswork of mixing red and blue channels. Targeted red/blue "blurple" lights still exist and still get marketed aggressively at the low-watt price point, but modern full-spectrum fixtures have surpassed them in both efficiency and canopy penetration. The one exception: if you're running a dedicated seedling rack and just need gentle, even light for germination, a simple T5 or low-power red/blue strip can work fine.
LED bins and efficiency
Efficiency is measured in µmol/J (micromoles of PAR photons per joule of electricity). Samsung’s horticulture technical brochure includes tables for LM301H-related LED modules that report PPF/W (µmol/J) values for linear configurations efficiency is measured in µmol/J. Budget fixtures using older diodes often land at 1.5–1.8 µmol/J. Quality fixtures using Samsung LM301B or LM301H diodes, Epistar, or Osram bins hit 2.0–2.9 µmol/J. That difference matters a lot at low wattages, a 2.7 µmol/J fixture at 60W delivers meaningfully more usable light than a 1.6 µmol/J fixture at 60W while running cooler and cheaper. Check the spec sheet before you buy. If a brand doesn't publish a PPF (total photon output in µmol/s) or efficiency figure, that's a red flag.
Drivers
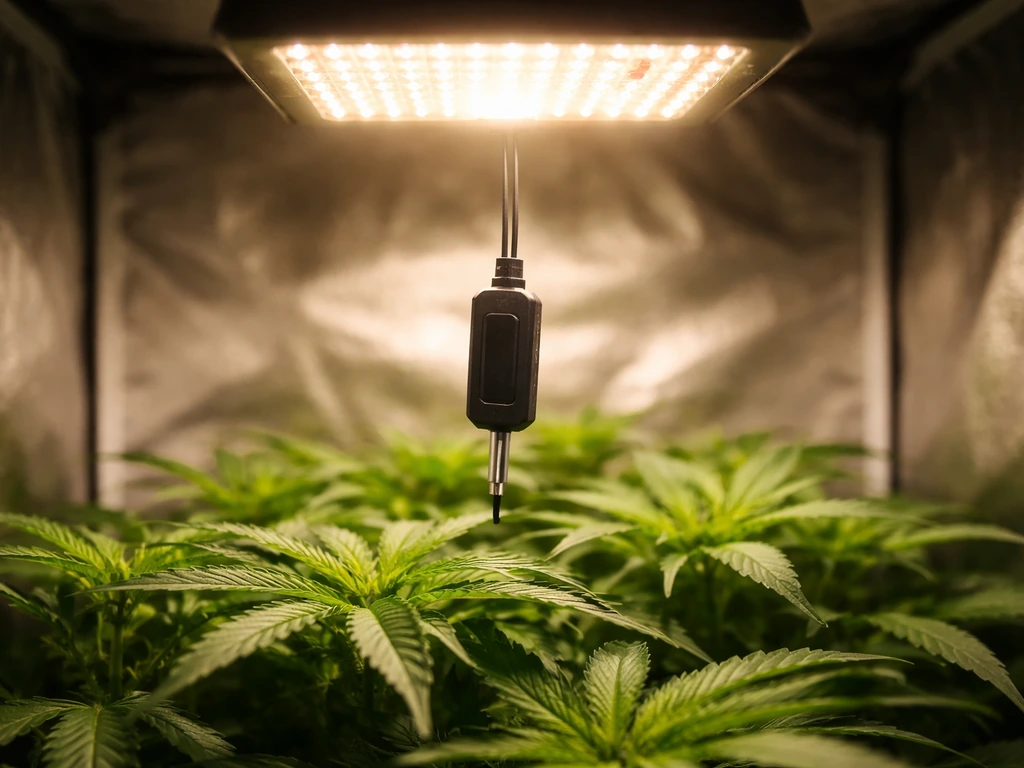
The driver is the component that converts AC power to the DC voltage your LEDs need, and it's one of the biggest differentiators between a $40 fixture and a $120 one. Meanwell drivers (HLG series or similar) are the industry benchmark, they're efficient, run cool, and last 50,000+ hours. Budget lights often use unnamed Chinese drivers that run hotter, reduce LED lifespan, and sometimes fluctuate in output. If a fixture has a built-in driver tucked against the heatsink with no airflow, expect heat-related degradation faster than the spec sheet suggests. Dimmable drivers (0–10V or potentiometer) are worth prioritizing so you can dial back intensity for seedlings without hanging the light 36 inches in the air.
Heat output
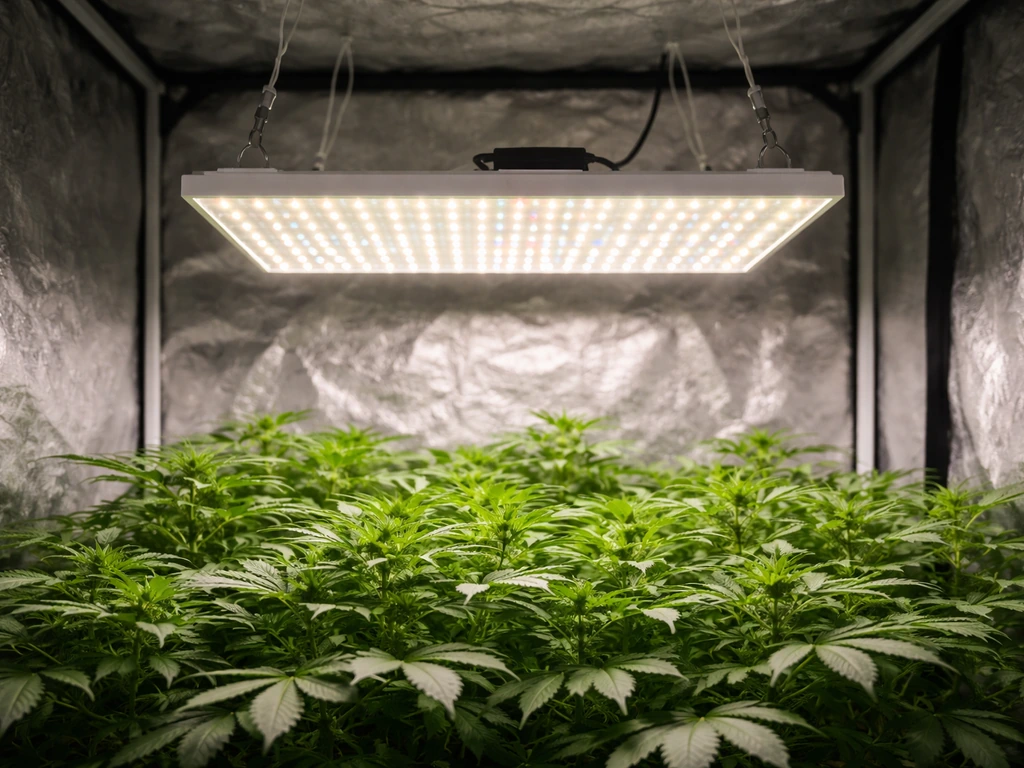
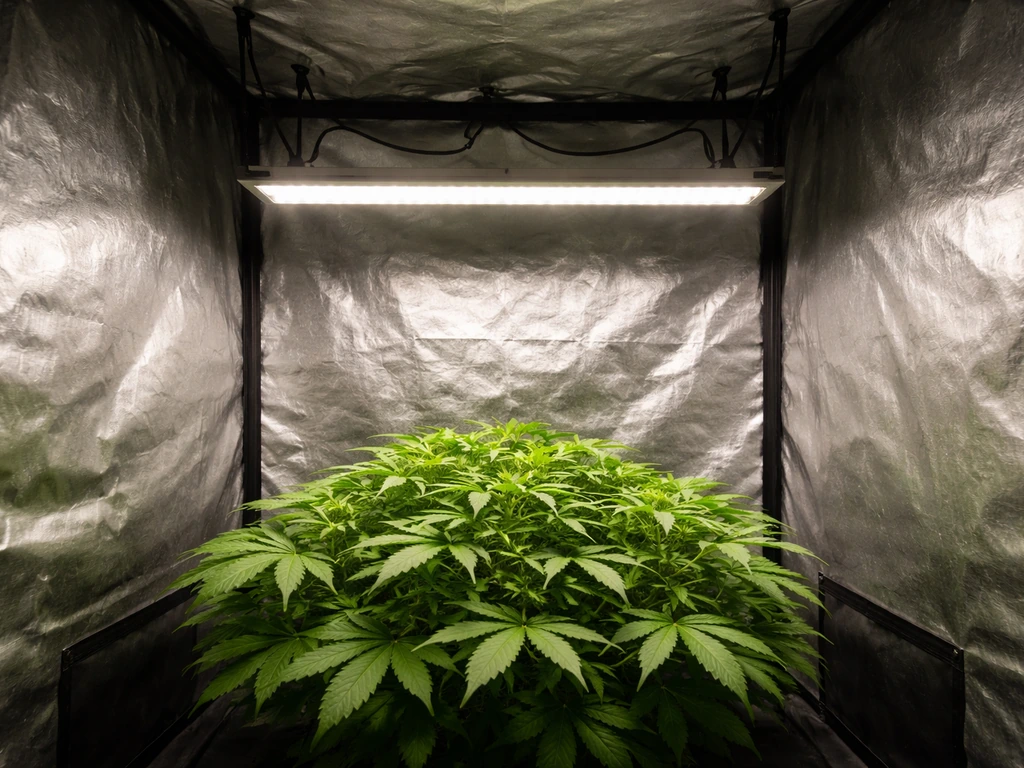
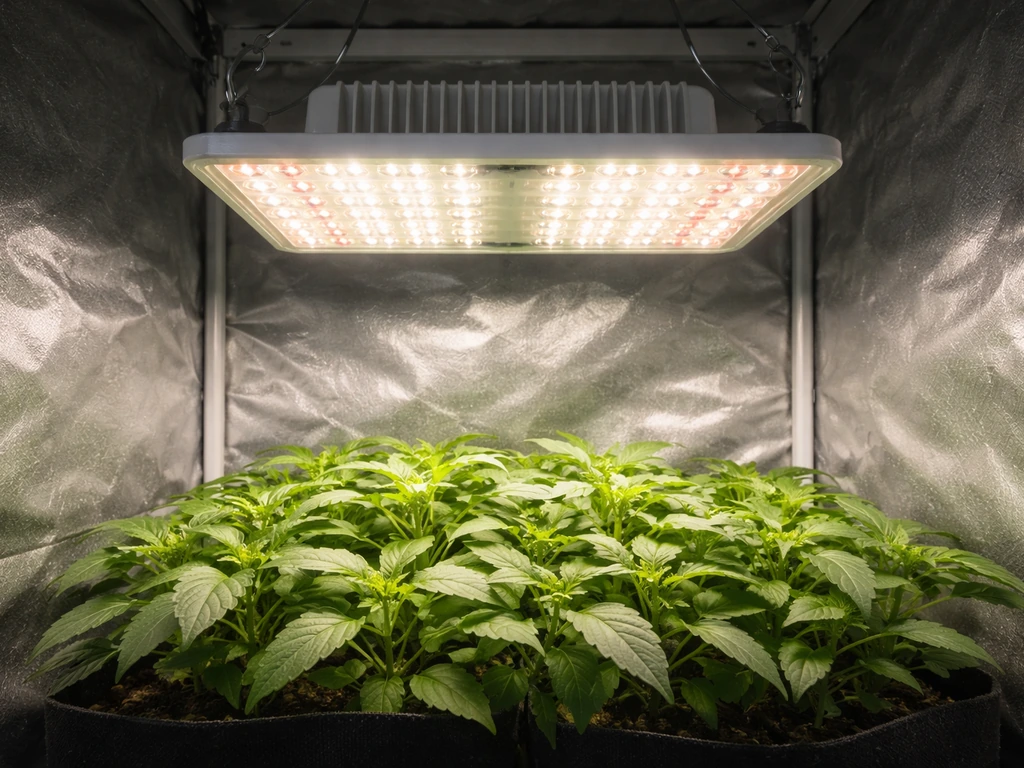
Low-watt LEDs produce less heat than high-watt fixtures by definition, but heat management still matters in small enclosed spaces. A 60W fixture in a 2x2 tent will raise ambient temperature noticeably. Look for passive heatsink designs with exposed aluminum fins rather than enclosed plastic housings. Bar-style fixtures dissipate heat better than puck or panel designs because the diodes are spread over more surface area. If your grow space has limited airflow, a passively cooled bar light will serve you better than a compact panel that concentrates heat in one spot.
Best low-watt setups by grow space
Single plant or 1x1 to 1x2 footprint
This is where low-watt LEDs genuinely shine. A single 40–65W quality bar or quantum board fixture is enough to take one plant through a full cycle in a 1x2 space. Look for fixtures with actual PPF numbers published and efficiency above 2.2 µmol/J. Spider Farmer SE3000, Mars Hydro TS600, and similar compact quantum boards all perform well here. You don't need to spend more than $80–120 for a single-plant setup if you buy the right fixture.
2x2 tent
A 2x2 (4 square feet) needs about 120–200W of quality LED to hit flowering intensity across the full canopy. One well-built 150W quantum board works well here. If you're growing vegetables, herbs, or keeping plants in the vegetative stage only, you can get away with 80–120W. For anyone budgeting in this range, the options covered in a guide to the best LED grow light under 100 dollars will show you what's actually achievable at the lower end of the price range.
Shelving and vertical racks
Shelving setups favor low-profile bar lights or T5-style LED strips because vertical space is limited and you need even light distribution across a flat plane. Strip lights running at 20–40W per shelf are common and effective. Mounting distance is often fixed at 6–12 inches because the shelf above acts as a ceiling, which means you need lights that perform well at close range without burning foliage, look for fixtures with wide beam angles (120 degrees or more) and the ability to dim down to 30–50% output.
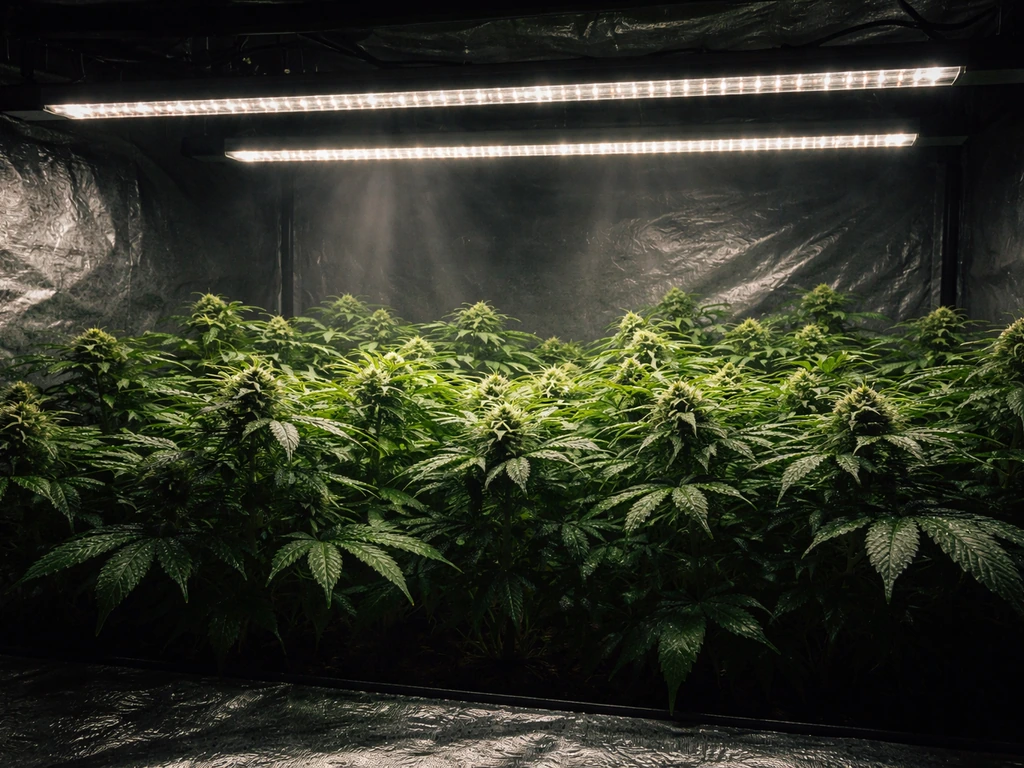
4x4 tent
A 4x4 (16 square feet) technically falls outside "low watt" territory for flowering, you need 400–600W of quality LED to hit 700+ µmol/m²/s across that footprint. If you're in a 4x4 doing vegetative work or growing lower-light plants (lettuce, herbs, some tropicals), 200–300W can get you there. For anyone stepping up from a small tent and wondering what 200W can actually deliver, reviewing what a best 200 watt LED grow light looks like in practice gives a useful ceiling for what low-watt territory tops out at before you need to scale up.
Matching the light to your plant stage
Seedlings and clones
Seedlings and freshly rooted clones need gentle light: 100–300 µmol/m²/s is the target, with the lower end preferred for the first week after germination or cutting. At this stage, a 30–50W fixture hung at 24–30 inches is plenty. If your main grow light is 100W+, just dim it to 20–30% rather than hanging it near the ceiling. Seedlings are more sensitive to light stress than heat stress, so err on the side of less intensity and watch for upward leaf curl or bleaching as signs you're overdoing it.
Vegetative growth
Vegetative plants want 400–600 µmol/m²/s for strong, compact growth. This is the sweet spot where low-watt LEDs in the 60–150W range genuinely earn their keep. Run your light at 18–24 inches above the canopy and adjust up or down based on how the plant responds. Upward-cupping leaves often indicate too much intensity; pale, stretched internode spacing means not enough. An 18/6 or 20/4 light schedule works well for most plants at this stage.
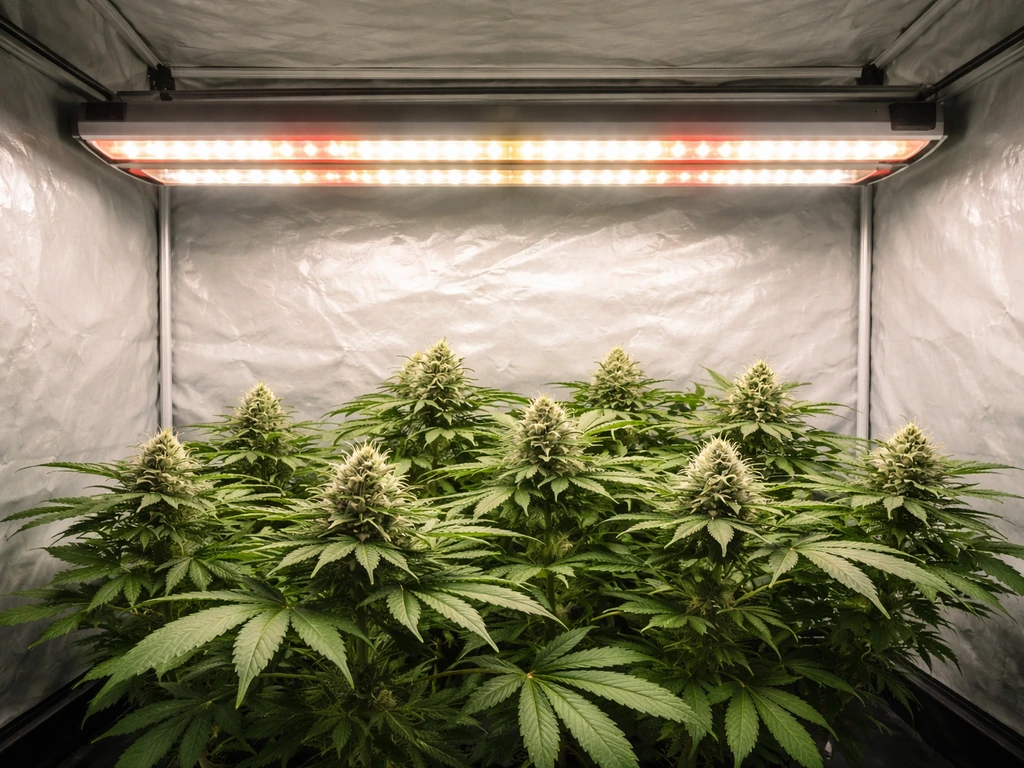
Flowering and fruiting
Flowering plants need 700–900 µmol/m²/s, which demands either a higher-watt fixture or a smaller footprint. A 100W quality LED covering a 1x2 area can hit flowering intensity. The same 100W fixture trying to cover a 2x4 will fall short. Be realistic about this: a low-watt light can flower plants successfully, but only over the area it can actually illuminate at sufficient intensity. If you're finding that your current fixture isn't delivering enough intensity for flower development, that's the clearest upgrade signal you'll get.
Placement, mounting height, and eliminating hotspots
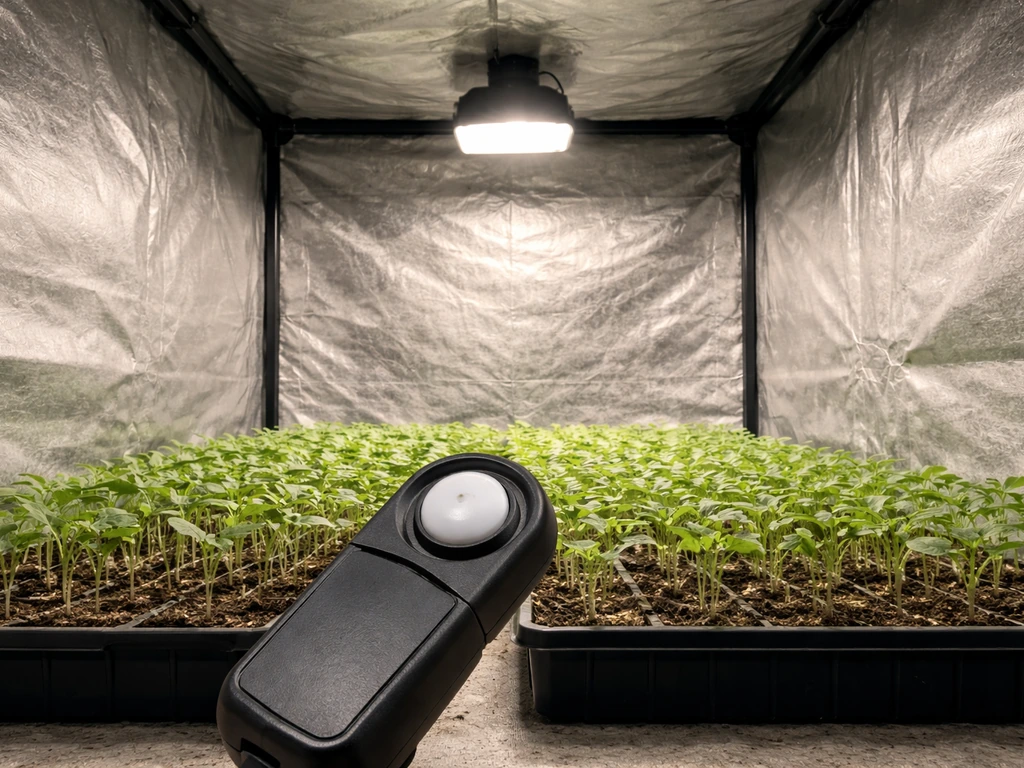
Mounting height is one of the most controllable variables in a low-watt grow setup and one of the most commonly mishandled. As a starting point: seedlings at 24–36 inches, vegetative plants at 18–24 inches, and flowering plants at 12–18 inches from the top of the canopy. These are starting points, what actually matters is measuring PPFD at canopy level with an inexpensive quantum sensor or using a phone app like Photone as a cross-check.
Hotspots happen when a fixture has a narrow beam angle or concentrates output at the center. Quantum board-style fixtures with a flat array of diodes and no secondary optics spread light evenly, making them forgiving in small tents. COB (chip-on-board) fixtures and single-lens designs focus light more narrowly, useful for penetrating a deep canopy but prone to hotspots if mounted too close. For shelving and low-ceiling setups, bar lights with 120-degree beam angles are almost always the better choice.
If you're using multiple small fixtures (common in shelf setups), overlap their footprints slightly so you don't get dark edges. A useful rule: if you hold your hand flat at canopy level and see a sharp shadow, your spacing is too wide. Soft, diffused shadows mean adequate coverage overlap. Rotate plants every few days if your fixture isn't perfectly centered or if you notice uneven growth between the sides of the canopy.
Under-canopy supplementation: a niche but useful option
One application where very low-watt LEDs (10–30W strip lights) punch above their weight is supplemental under-canopy lighting. Dense plants in flower block light from reaching lower bud sites, and a few strips running along the bottom of the canopy can improve lower-branch development without adding significant heat or power draw. If you're running a primary fixture and want to maximize yield in a tight space, best under canopy LED grow lights gives you the full breakdown on how to integrate supplemental lighting effectively.
Budget vs performance: what low watts actually gets you
Let's be direct about the tradeoffs at different price and wattage points.
| Wattage Range | Realistic Coverage (Flower) | Realistic Coverage (Veg) | Typical Price Range | Best For |
|---|---|---|---|---|
| 20–40W | 0.5–1 sq ft | 1–2 sq ft | $20–50 | Seedlings, clones, single small plants |
| 50–80W | 1–2 sq ft | 2–4 sq ft | $50–100 | Single plant full cycle, small shelves |
| 100–150W | 2–4 sq ft | 4–6 sq ft | $80–150 | 2x2 tent, 2–3 plants veg, herb racks |
| 150–200W | 4–6 sq ft | 6–9 sq ft | $120–200 | 2x2 flowering, 2x4 veg, serious hobbyist |
At the budget end (under $60), you'll find functional fixtures but with weaker drivers, lower efficiency diodes, and less consistent output across the coverage area. They work, but you're accepting a 20–30% efficiency penalty compared to mid-range gear. For a propagation shelf or herb rack where intensity isn't critical, that's a reasonable trade. For flowering cannabis or fruiting tomatoes, it'll frustrate you.
Mid-range gear ($80–200) using Samsung or Osram diodes with Meanwell drivers is genuinely excellent value right now. The price gap between budget and mid-range has narrowed significantly since 2023, and a $120 quantum board from a reputable brand will out-perform a $60 blurple panel in every measurable category. For anyone spending around $300, there's a tier of fixtures that covers 3x3 to 4x4 spaces seriously well, the guide to the best LED grow light for $300 walks through exactly what's available at that inflection point where performance gets genuinely impressive.
The upgrade trigger is simple: if your plants are stretching toward the light even at minimum hanging height, or if flowering sites are taking longer than expected to develop density, your fixture is either underpowered for your footprint or the efficiency is too low. Don't add CO2 or nutrients to compensate for insufficient light, fix the light first. When you're ready to step up meaningfully, the options in the best LED grow light under $500 range represent the point where you stop compromising on coverage or intensity in most residential grow setups.
Installation and safety: what actually matters for low-watt setups
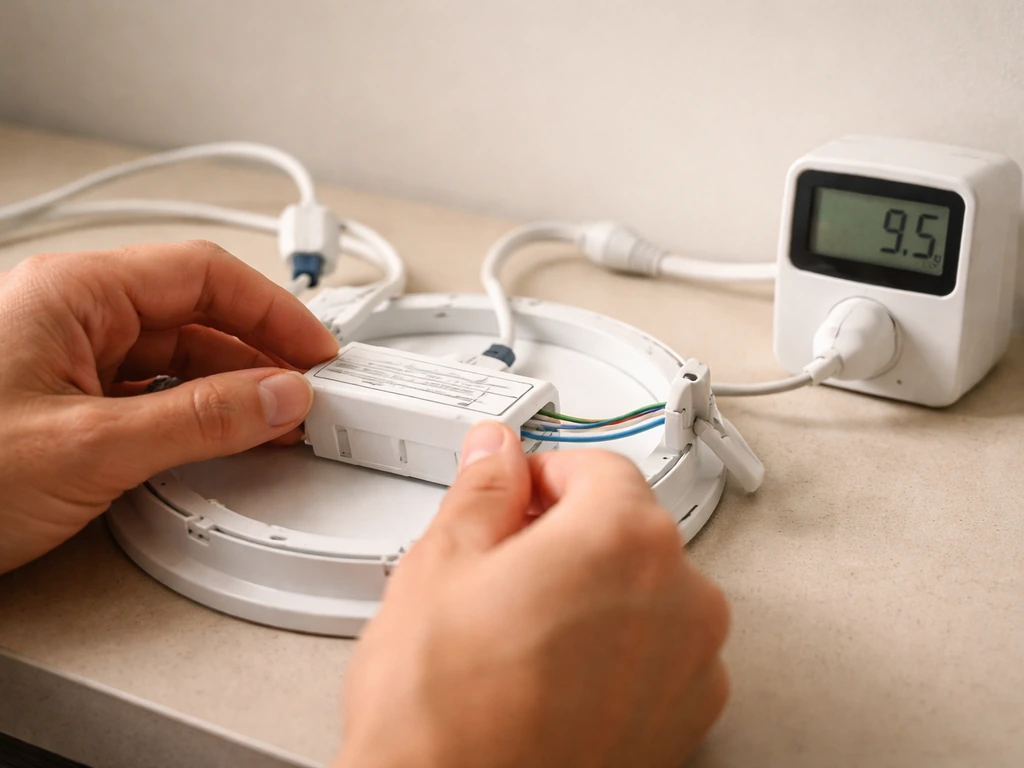
Verify actual power draw
The wattage printed on a box is often the LED chip rating, not the actual wall draw. A fixture labeled "100W" might pull 65W or 95W from the wall depending on driver efficiency and dimmer setting. Use a plug-in power meter (a Kill-A-Watt or similar, under $20) to confirm actual draw, especially if you're running multiple fixtures on one circuit. A standard 15-amp residential circuit handles about 1,440W safely, but it's your total load, including fans, pumps, and timers, that matters. Stay under 80% of circuit capacity (1,152W on a 15A circuit) as a safe working load.
Ventilation and heat management
Even a 60W LED will raise a 2x2 tent's temperature by 5–10°F above ambient if the tent isn't actively ventilated. At minimum, run a small inline fan exhausting through a carbon filter and a passive intake near the bottom of the tent. Target 70–85°F canopy temperature with 40–60% relative humidity during veg, and 65–80°F during flower. Low-watt fixtures are forgiving here, but "low watt" doesn't mean "no heat", the driver and diodes both produce thermal output, and in tight spaces it accumulates.
Waterproofing and electrical safety in grow environments
Grow tents and indoor gardens combine water and electricity, which demands basic caution. Look for fixtures with an IP rating: IP54 (dust and splash resistant) is the minimum for a tent environment, and IP65 (fully dust-tight, water jet resistant) is better for anything near irrigation. Keep all power connections above the waterline, use grounded (3-prong) outlets, and never run extension cords under water or through wet areas. If you're in a basement or garage with humidity issues, a GFCI-protected outlet is non-negotiable, it will trip before a fault causes a fire or shock.
Mounting
Most grow tents use adjustable rope ratchets to hang fixtures from the top crossbars. For low-watt lights under 5 lbs, this is straightforward. Always use both hanging points on the fixture (not just one), and check the tent's rated load capacity, budget tents often have crossbars rated at 20–30 lbs total. For shelving setups, strip-mount fixtures with adhesive or magnetic backs are convenient but rely on the surface staying clean and dry; use screw mounts for anything permanent.
FAQ
Can a best low watt LED grow light actually flower plants, or is it only for seedlings and veg?
Yes, as long as you treat watts as a floor and verify PPFD. For flowering, confirm the fixture’s published PPF and efficiency (µmol/J) and then estimate PPFD at your planned hanging height. If the manufacturer only mentions “3x3 coverage” without center-averaged PPFD or PPF, assume the edge of the footprint will be under target and plan on a smaller area (often about 1x2 to 2x2 per 100W-class quality light).
What’s the safest way to adjust a low-watt LED when my seedlings look stressed?
If the light is dimmable, start by lowering intensity rather than hanging it higher. A common mistake is raising a low-watt fixture too far away, which can spread light out but drop PPFD everywhere, slowing growth. For seedlings, begin with the light at the recommended height and set dimming around 30–60% for the first week, then adjust based on bleaching or leaf-curl response.
How do I avoid getting fooled by “coverage size” claims on low-watt LED boxes?
Buy for the measurement your plants need: PPFD at canopy level across the whole target area. Wattage marketing is often LED chip rating, driver limits, or a dimmer setting, and “coverage” is usually reported at the center only. The most reliable approach is to ensure the fixture publishes PPF and efficiency, then (if possible) measure PPFD with a quantum sensor at your canopy height and confirm you are near your target range (100–300 for germination and early rooting, 400–600 for veg).
If I choose full-spectrum instead of blurple, will my yield or flowering timing be worse with a low-watt setup?
Mainly watch the driver, dimming range, and published output rather than the color spectrum alone. Full-spectrum white bars are typically easiest for consistent development, but you still need enough photons to hit PPFD targets. If your main goal is flowering density, prioritize higher efficiency and proper PPF, and choose a fixture with reliable dimming so you can ramp intensity as plants transition.
What should I check about heat management if I’m using a low-watt LED in a small grow tent?
In most cases, you should not assume low-watt LED drivers will run cooler and therefore be maintenance-free. Drivers still dissipate heat, especially if they are enclosed against the heatsink with limited airflow. If your tent or shelf is already warm, prefer designs with exposed fins and check that the driver has ventilation. A practical warning sign is noticeable fanless heat buildup or a fixture that feels unusually hot near the driver after 30–60 minutes.
My shelf forces a short mounting distance. Are there specific beam angles or fixture types I should pick?
Yes, but you need to validate your ceiling. If you plan to place lights very close for tight shelving, choose fixtures designed for near-canopy use, typically those with wider beam angles (around 120 degrees or more) and good dimming. If you use a narrow-beam COB style light close to plants, you can create hotspots and bleach even at moderate PPFD averages.
How should I space multiple low-watt grow lights so I do not end up with dark edges?
Yes, overlapping is a real coverage fix, especially with multiple small fixtures. Use partial overlap so the “shadow line” disappears between units. A quick check is to look for diffused shadows on the plant canopy when the lights are on, and then adjust fixture spacing based on measured PPFD or by observing uniformity of internode spacing across the canopy.
Is it worth measuring actual wall power for low-watt LEDs, and what else should I account for?
Power meters help, because fixture labels can differ from wall draw. Also check total circuit load when running fans, pumps, dehumidifiers, and any heaters. As a rule of thumb from typical residential limits, keep the full setup load below 80% of the circuit rating, and verify you are not exceeding the circuit once everything is running simultaneously.
When do under-canopy strip lights actually help, and when are they just extra power use?
It’s usually acceptable to supplement with strips when the lower canopy is under-lit, but don’t use the strips to “fix” a main-light that is fundamentally underpowered. A common error is adding under-canopy strips without measuring PPFD, so you end up with uneven or excessive top intensity. If you do add strips, place them to cover the lower foliage and dim them so they improve lower PPFD without pushing tops into bleaching conditions.
If I’m choosing one “best low watt LED grow light” for a small tent, which design shape is least likely to cause problems?
Yes, and the right choice depends on your layout and stage. Bars and quantum-board style fixtures tend to be forgiving in small spaces because diodes are spread out for more even coverage. Puck or tightly focused styles can be harder to dial in and may require more precise centering or higher mounting height to avoid hotspots.
How do I know whether my growth problem is light intensity or heat buildup with a low-watt LED?
Even for low-watt systems, aim for a realistic target canopy temperature and humidity, because seedlings and veg growth can be sensitive to both light intensity and heat. In a sealed or poorly ventilated tent, temperature can rise enough to make you think the light is the only issue. Use an inline exhaust and a passive intake, then adjust intensity using dimming before you change everything else like nutrients or CO2.
What’s the most reliable way to set hanging height for a low-watt LED grow light without a lot of trial and error?
Don’t guess with height, measure if you can. If you have no sensor, use behavior cues as a fallback, but they are slower than measurement. For a more accurate approach, check PPFD at canopy level with a quantum sensor when you first install, then note the hanging height that achieves your target range. After that, make small height changes (a few inches) rather than large swings.
Are adhesive or magnetic mounts safe for low-watt grow lights on shelves?
Yes. For low-watt fixtures under rack shelves, adhesives or magnets can fail when surfaces get dusty, humid, or oily over time. If you want something permanent and you can mount securely, use screw mounting or a stable mechanical bracket. Also ensure the mounting method can handle the fixture weight plus any vibration from fans.
Next Articles
Best Under Canopy LED Grow Lights: Buyer’s Guide and Picks
Buyer guide and picks for under-canopy LED grow lights, with coverage math, PPFD targets, and layout tips.
Best Full Spectrum 1000W LED Grow Lights: Buyer Guide
Buy the best full spectrum 1000W LED grow light with spec-to-decision tips on PPFD, coverage, wattage, and tent fit.
Best 100W LED Grow Light: How to Choose the Right One
Choose the best 100W LED grow light with PPFD coverage, spectrum, efficiency, dimming, heat, and setup tips.