If you searched "best led grow lights rollitup," you're probably looking for the same thing forum veterans are trading tips about: real PPFD numbers, honest spectrum breakdowns, and fixture picks that actually hold up over a full grow cycle. This guide translates that forum wisdom into a clean, practical framework you can use today, without having to wade through 47 pages of thread drama to find the one post with the actual spec comparison.
Best LED Grow Lights Rollitup: Buy Guide by Tent Size

Marcus Rutherford
15 Apr 2026

What "Rollitup" really means when you're evaluating LED grow lights
Rollitup is one of the oldest and most active cannabis and indoor growing forums on the internet. When growers reference "Rollitup recommendations," they're shorthand for the collective, experience-tested criteria that serious hobbyists and small commercial operators have converged on over years of real grows. That means PPFD maps over wattage claims, photometer-verified results, and a healthy distrust of manufacturer marketing.
The core Rollitup-style evaluation framework comes down to two things: (1) Does the fixture have a credible, detailed PPFD map for your specific tent size? (2) Are you trying to light the entire footprint evenly, or intensify a smaller sub-area within a larger space? Those two questions filter out most of the noise. A light that looks good on paper but has no verified PPFD map gets treated with serious skepticism in those communities, and for good reason.
One important warning that comes out of those forums constantly: PPFD readings vary depending on measurement method, hang height, room reflectivity, and even the PAR meter being used. Forum members have documented real discrepancies between manufacturer-claimed efficacy and measured PPFD at canopy. So when a brand publishes a PPFD map, treat it as a starting point, not gospel. The only way to know what your plants are actually getting is to measure it yourself with a PAR meter and adjust via hang height and dimming.
The benchmark discussions on Rollitup-style forums often feature specific models with particularly strong PPFD map coverage, like the GrandMaster LED Tarantula Explorer, which gets cited for its "incredible PPFD map" and tunable spectrum. Whether or not that specific fixture fits your budget, the point is: that's the standard being applied. Use it to evaluate any light you're considering, regardless of brand.
Match the light to your tent, not the other way around
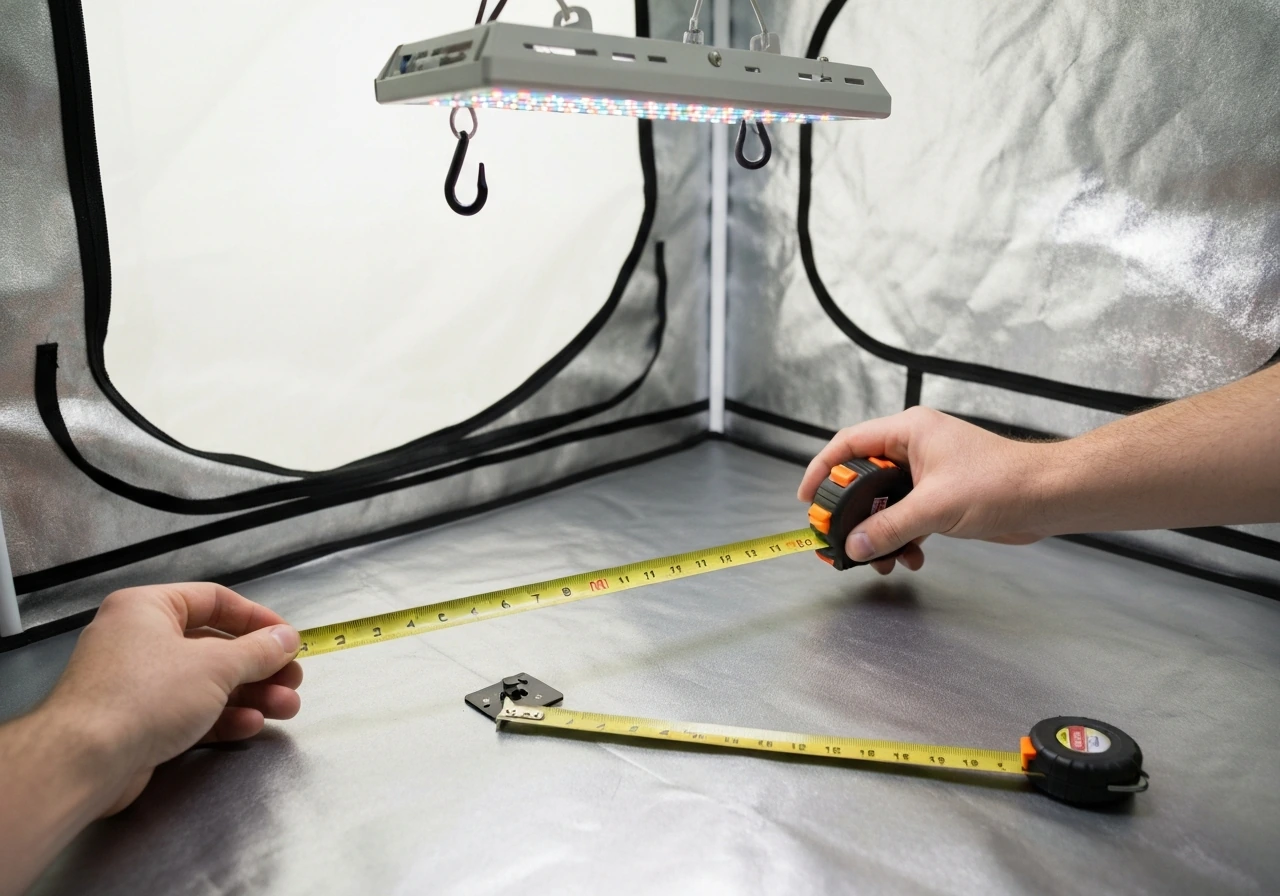
The single most common mistake beginners make is buying a light, then figuring out where to put it. It should work the other way. Start with your tent dimensions, your ceiling height, and the minimum hanging distance the fixture requires, then find a light that covers that footprint at the PPFD levels your plants need.
Coverage numbers from manufacturers are almost always stated at a specific hanging height and intensity setting. For example, the Viparspectra P600 manual publishes a PPFD map specifically for a 2x2 ft grow tent at multiple hanging heights and intensity levels, showing exactly how PPFD changes as you raise or lower the fixture. That kind of map is what you want to see from any fixture you're considering. If a brand won't publish a real PPFD map for a defined tent size, that's a red flag.
Here's a practical sizing guide based on the most common tent footprints:
| Tent Size | Target PPFD (flowering) | Approx. True Watt Draw | Recommended Fixture Style |
|---|---|---|---|
| 2x2 ft | 600–900 umol/m²/s | 100–150W | Single bar or QB board |
| 2x4 ft | 600–900 umol/m²/s | 200–250W | Dual bar or mid-range QB |
| 4x4 ft | 800–1,000 umol/m²/s | 400–550W | Full QB board or 4-bar array |
| 5x5 ft | 800–1,000 umol/m²/s | 600–700W | 6-bar array or large QB |
| 4x8 ft / larger | 900–1,200 umol/m²/s | 800–1,200W | Multiple fixtures or commercial bar array |
Ceiling height matters more than most people expect. If your tent is only 5 feet tall and the fixture needs 18 inches of hang clearance above the canopy, you're working with a tighter margin than you might think, especially during late flower when plants stretch. Always check minimum hanging distance before you buy, not after.
Wattage is a starting point, not the answer
"How many watts do I need?" is the wrong first question. Wattage tells you how much electricity a fixture draws, not how much usable light it actually delivers to your plants. The metric that matters is PPFD (Photosynthetic Photon Flux Density), measured in micromoles per square meter per second (umol/m²/s), and the efficiency metric that tells you how well the fixture converts electricity into plant-usable light is called efficacy, measured in umol/J. MDPI describes the standard DLI unit as mol·m−2·d−1 and explains how to calculate it from PPFD using photoperiod and unit conversion factors measured in micromoles per square meter per second (umol/m²/s).
A well-designed modern LED fixture should hit somewhere between 2.6 and 3.2 umol/J. Some high-end commercial units push past 3.0 umol/J, while budget options often land in the 2.2–2.5 range. That efficiency gap compounds over a full season, both in electricity costs and in how hard your HVAC has to work to remove the extra heat from a less efficient fixture. For reference, the Hydrogrow GLED lineup lists efficacy figures in the 2.6–3.2 umol/J range depending on the specific model, with Samsung or OSRAM LED sources and a 5-year warranty.
Driver quality is the other half of the wattage conversation. Mean Well drivers are the Rollitup community standard because they're reliable, run cooler, and their dimming behavior is predictable. Cheaper drivers from unknown brands can drift in output over time or fail early, especially in the humid environment of a grow tent. When you're reading specs, look for a named driver brand. If it just says "high-quality LED driver," push for more detail or walk away.
The best way to compare two fixtures honestly is to look at their measured PPF output (total photons per second, listed in umol/s) and then divide by wattage to get efficacy. The Growers Choice ROI-E720, for example, outputs around 1,870 umol/s in standard mode and roughly 2,050 umol/s in BOOST mode, with a published 5-year warranty. That's the kind of concrete number you can actually compare across brands. Don't accept "equivalent to 1000W HPS" as a spec. That's marketing, not measurement.
Spectrum: what "full spectrum" actually means
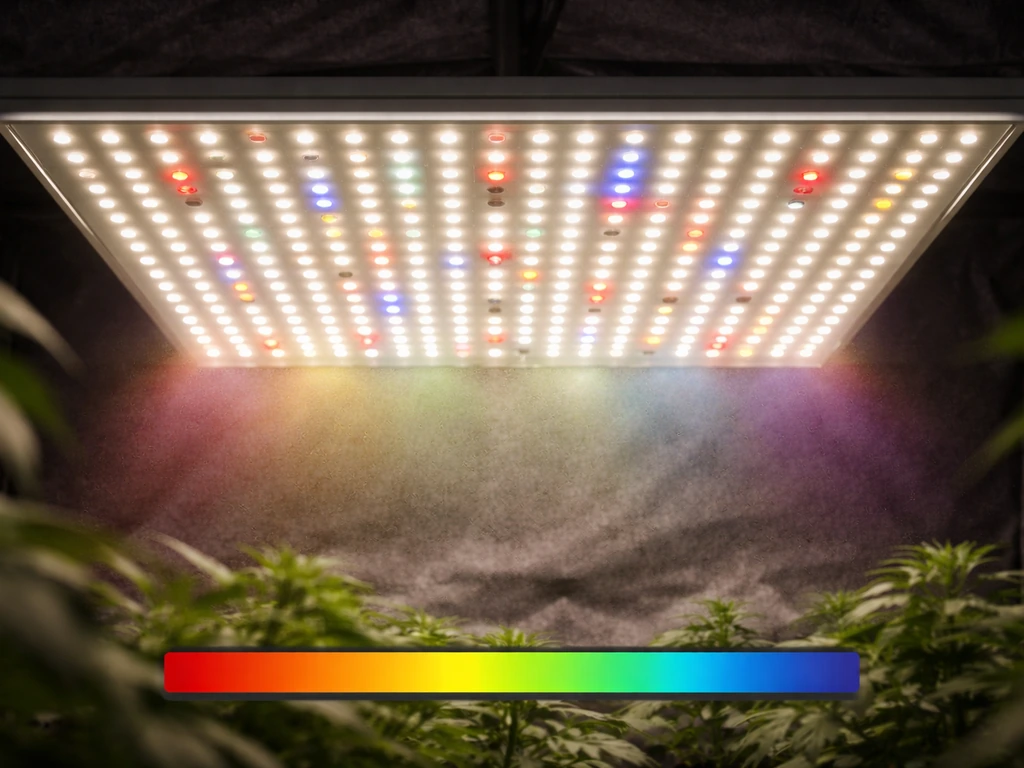
Every LED grow light sold today claims to be "full spectrum." In practice, that phrase covers a wide range of actual spectral outputs, from a basic red/blue combination with a white phosphor coating, to a genuinely broad continuous spectrum covering 400–780 nm with dedicated far-red supplementation. The difference matters at specific points in the grow cycle.
For vegetative growth, plants aren't particularly demanding about spectrum. A broad white spectrum with adequate blue (400–500 nm) content is enough to drive compact, healthy veg. Where spectrum starts to matter more is in late veg through flower, and specifically around far-red wavelengths near 730 nm. Far-red photons in that range interact with other wavelengths to meaningfully increase gross photosynthesis, and research on lettuce has documented that adding far-red to a white/red spectrum can accelerate growth in measurable ways. The mechanism is the Emerson Enhancement Effect: red and far-red photons together trigger more photosynthetic activity than either does alone.
OSRAM's horticultural application notes confirm that far-red around 730 nm has documented plant responses beyond photosynthesis alone, including effects on flowering timing and stem elongation. This is why tunable-spectrum lights, which let you dial in far-red independently from white channels, are so popular in advanced Rollitup-style discussions. You get the flexibility to run a tighter veg spectrum and open up far-red as plants transition to flower.
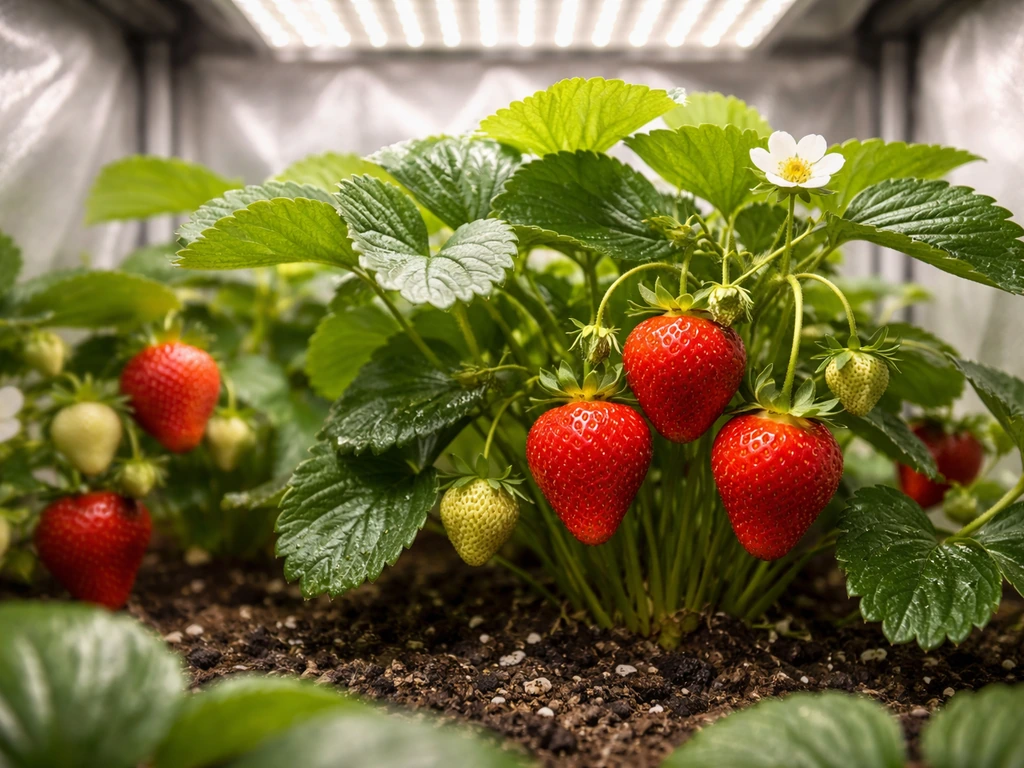
If you're just getting started and want an honest answer: a quality white-spectrum LED covering 400–700 nm continuously with some red emphasis will cover 90% of what most home growers need. If you're chasing maximum yield or running multiple plant stages simultaneously, a fixture with a tunable spectrum or dedicated far-red supplementation is worth the upgrade. For growers focused on specific crops, thinking through the best LED grow lights for strawberries is a good example of how spectrum considerations shift depending on the crop you're running.
One spec worth checking: look for a fixture that lists its spectrum as a continuous range (e.g., 400–780 nm) rather than just listing peak wavelengths. A continuous spectrum, the kind white LED grow lights are designed to produce by mimicking natural sunlight, delivers a more balanced profile than a narrow-band red/blue fixture. Some higher-end spec sheets now include photometric reports following ANSI/IES LM-79-19 measurement standards, which is an institutionally validated method for measuring system efficacy and intensity distribution. That kind of third-party verified data is worth more than any manufacturer claim.
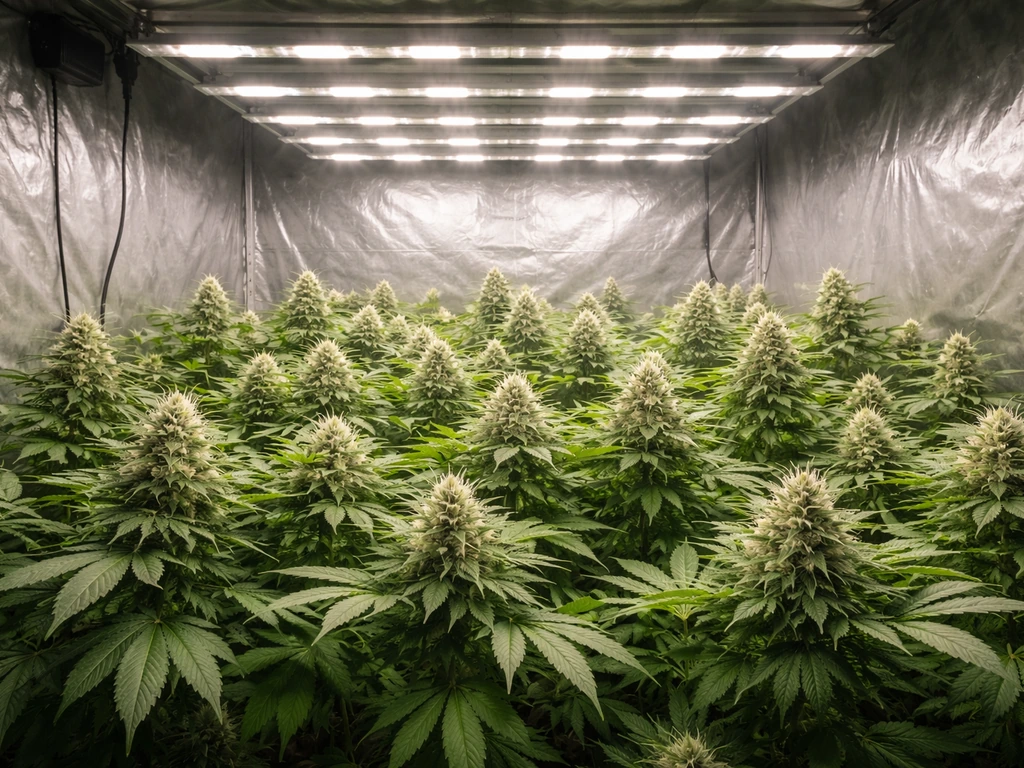
Bar lights, QB boards, and strip arrays: which form factor is right for you
The three main LED grow light form factors each have real trade-offs, and Rollitup forums argue about them constantly. Here's the practical breakdown:
Quantum board (QB) style
QB-style fixtures pack a large number of LEDs onto a single flat board or a small cluster of boards. They tend to produce excellent uniformity across a defined footprint, and the large surface area helps with heat dissipation. The trade-off is that they can create a hot center and fall off at the edges, which is why checking the full PPFD map (not just the center reading) is critical. QB-style lights dominate the 4x4 and 5x5 tent market for hobbyists because they're relatively compact and easy to mount.
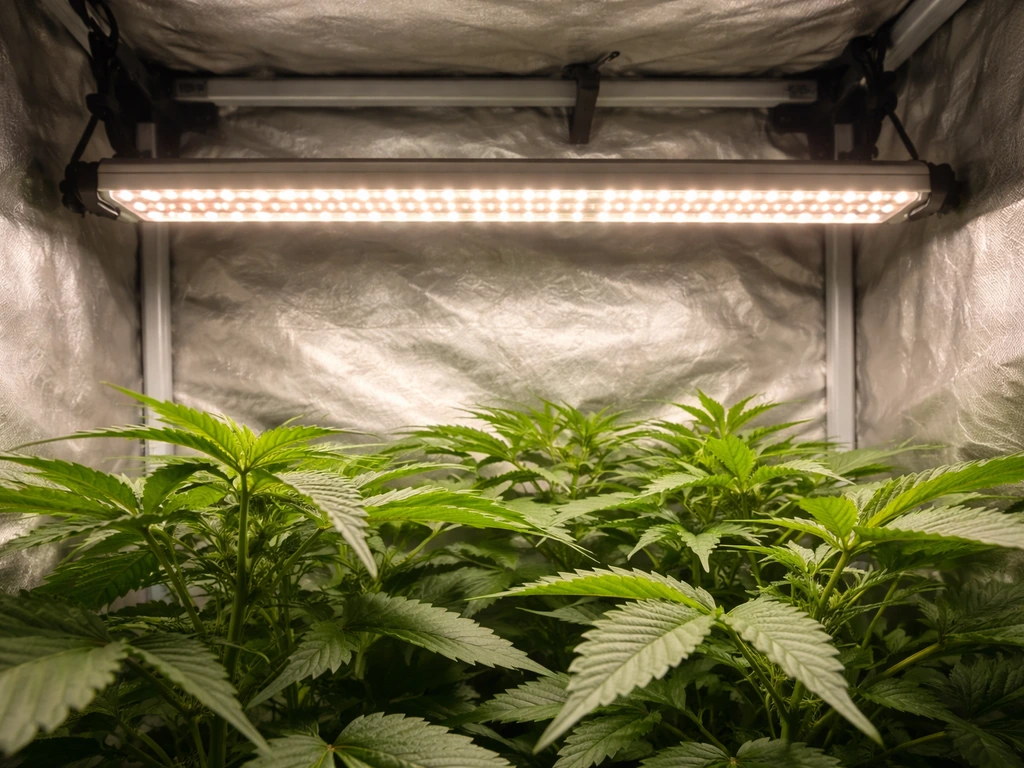
Bar-style arrays
Bar lights spread LEDs across multiple long, narrow bars arranged in a grid pattern. This design inherently produces more uniform PPFD across the entire footprint because the light sources are physically distributed across the canopy rather than concentrated in a central point. They also run cooler per LED because the thermal load is spread out, and the lower profile means shorter minimum hang distance, which is a real advantage in shorter tents.
Spider Farmer's G8600, for example, is marketed specifically for 4x4 tent use with a defined light-to-tent gap specification. Bar arrays are increasingly the format of choice in Rollitup discussions for serious growers. If you want to push the best LED grow lights for high yield, bar arrays at high PPFD are usually the direction that conversation goes.
Strip-style lights
LED strip lights are the most flexible form factor for unconventional spaces: vertical walls, supplemental side lighting, or narrow grow areas where a board or bar array won't fit. They're lower output per fixture by design, so they're usually used as supplemental lighting alongside a primary fixture rather than as a standalone canopy driver. If you're building out a space where strips make sense, the best LED grow light strips are worth evaluating separately from your primary fixture choice.
Form factor comparison
| Form Factor | Uniformity | Heat Management | Best For | Minimum Hang Distance |
|---|---|---|---|---|
| Quantum Board | Good (center bias) | Moderate (passive heatsink) | 4x4 and 5x5 tents | 12–18 inches typical |
| Bar Array | Excellent | Very good (distributed) | All tent sizes, high PPFD goals | 8–14 inches typical |
| Strip Light | Variable | Excellent (low load) | Supplemental / narrow spaces | 4–8 inches typical |
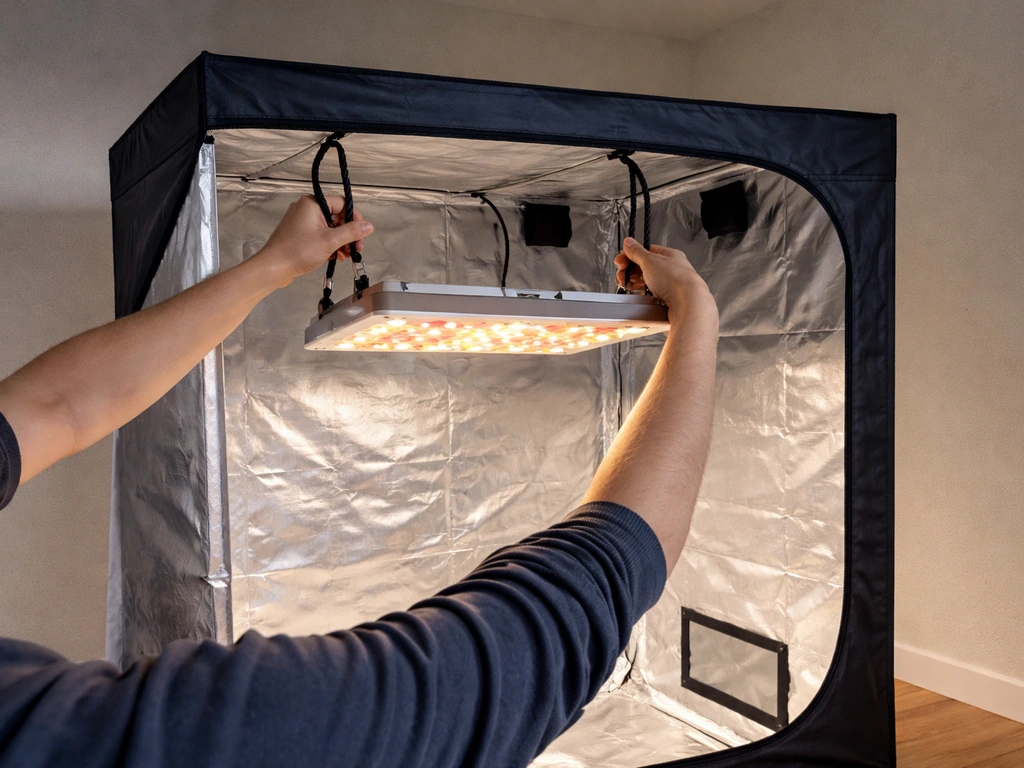
Mounting matters regardless of form factor. Most fixtures come with adjustable rope ratchets or hanging brackets rated to the fixture's weight. For heavier fixtures above 10 lbs, verify that your tent's crossbars are rated for the load, especially if you're also hanging a carbon filter and ducting from the same frame. Some commercial-grade bar arrays designed for open-rack mounting need to be suspended from the ceiling or a dedicated rail system rather than a tent frame.
Heat, noise, and how long the thing will actually last
Modern LED fixtures marketed as passively cooled (no fans) can genuinely run without active cooling if they're efficient enough and not being driven at 100% in a hot ambient environment. But some QB-style boards and most high-output bar arrays benefit from or require active cooling via integrated fans. Fan noise is real, especially in a bedroom grow room at night. If noise is a concern, specifically look for passive-cooled fixtures or check the dB rating of any integrated fans.
LED lifespan claims of 50,000 to 100,000 hours are common in marketing materials. A more useful benchmark is L70 lifetime, meaning the hours until output drops to 70% of original. Well-designed fixtures using quality LEDs (Samsung LM301 series, OSRAM Oslon) and proper thermal management realistically hit 50,000+ hours at L70. Some spec sheets, like those following the Green Sunshine Company spec template for aquaponics facility lighting, explicitly list 70,000+ hour expected lifetimes alongside continuous 400–780 nm spectrum and 0–10V control interfaces. That's the level of documentation worth asking for.
Warranty is the practical proxy for manufacturer confidence. In Rollitup-style discussions, 5 years is considered the baseline for a quality fixture. The PROGROW 2400 from Grow Light Science lists a 5-year warranty. The Growers Choice ROI-E720 states a 5-year manufacturer's warranty. Grow Light Science's published warranty policy covers LED arrays, drivers, and integral control devices for 3 to 5 years from shipment depending on the product line. If a fixture comes with a 1-year or 2-year warranty, that's a signal about either the build quality or the manufacturer's confidence in it. Budget options can be acceptable for low-stakes grows, but don't expect them to last through 4 or 5 seasons.
One reliability check that doesn't get talked about enough: UL or ETL certification for horticultural environments. Horticultural lighting operates in high-humidity, high-temperature conditions that standard indoor lighting isn't rated for. Fixtures certified for horticultural environments have been evaluated for those photobiological and safety factors. It doesn't guarantee performance, but it does mean someone beyond the manufacturer has looked at the product. A relevant concern that applies to any form factor, especially if you're wondering are LED grow lights good for long-term use, is whether the fixture will hold up through multiple full cycles without driver failure or diode degradation.
Dimming, control, and why it matters more than most people think
Dimming isn't just a convenience feature. It's a core tool for managing your plants through different growth stages and for dialing in PPFD without changing hang height constantly. The most useful dimming implementation for serious growers is 0–10V analog control, which gives you smooth, continuous dimming across the full range rather than stepped percentage settings.
The PROGROW 2400 is explicitly compatible with 0–10V room control systems, which means you can connect it to an environmental controller and automate your PPFD ramp across the grow cycle. The VOLTGROW FL-1 and VL-1 both list built-in 0-10V dimming with published PPFD maps tied to specific dimming percentages at defined heights. That kind of integrated spec bundle, spectrum plus PPFD map plus control interface, is exactly what you should be looking for in any fixture above the entry-level tier.
Dynamic PPFD charts, which show average PPFD output at each dimming percentage for a defined room size and hang height, are published by some manufacturers. If you have access to one of those for a fixture you're considering, you can essentially pre-plan your entire grow schedule before the light even arrives. For growers who want the most flexibility in managing intensity across their entire grow space, the best dimmable LED grow lights offer the kind of control range that makes PPFD dialing genuinely practical.
Recommendations by budget and grow scenario
Here's how I'd approach this if I were buying today. I'm not going to tell you "buy Brand X" without context, because the right fixture depends entirely on your tent size, your budget, and how serious you are about dialing in performance. Instead, here's a framework organized by the most common scenarios.
2x2 to 2x4 tent, beginner to intermediate
For a 2x2 or 2x4, you want a single-fixture solution that puts out a verified 600–900 umol/m²/s at canopy at a reasonable hang height. Look for an efficacy of at least 2.5 umol/J, a named LED source (Samsung LM301B/H or OSRAM), and a minimum 3-year warranty. Budget: $100–$250. Viparspectra's P600 and similar-class QB-style lights fit this tier. Verify the published PPFD map against your actual tent dimensions before buying.
4x4 tent, hobbyist serious about yield
A 4x4 is the sweet spot for most home growers and also the most competitive market segment. You need 400–600W of true draw with efficacy above 2.7 umol/J to hit 800–1,000 umol/m²/s at flowering height. Bar-array fixtures at this footprint outperform single QB boards on uniformity. The Growers Choice ROI-E720 with its ~1,870 umol/s output and 5-year warranty is a credible choice. Spider Farmer's G8600 targets this footprint specifically and publishes tent-specific guidance. Budget: $400–$700.
5x5 or larger, maximizing canopy density
At 5x5 and above, you're either running a single high-output fixture (600–800W true draw) or tiling multiple mid-range fixtures for better uniformity. Tiling two 4x2 bar arrays gives you more control over PPFD distribution than a single large QB. At this level, 0–10V dimming and compatibility with an environmental controller become genuinely important features rather than nice-to-haves. The PROGROW 2400 class of fixtures, targeting 1,500 umol/m²/s in array configurations, is appropriate here. Budget: $700–$1,500+.
Supplemental lighting, side lighting, or multi-stage setups
If you're running a mother plant area alongside a flower room, or adding side lighting to an existing setup, dedicated supplemental fixtures are a better answer than oversizing your primary light. Far-red bars or strip supplementals let you target specific spectral additions without rebuilding your whole lighting plan. If this is the direction you're heading, the best supplemental LED grow light options are a separate evaluation from your main canopy fixture.
Setup checklist before you hit buy
Run through this before finalizing any purchase. It takes 10 minutes and will save you from the most common mistakes.
- Measure your actual grow space dimensions (length x width) and your usable ceiling height minus the fixture hang distance and a few inches for the ratchets.
- Identify your target PPFD range for your primary growth stage (veg: 400–600 umol/m²/s, flower: 800–1,000 umol/m²/s, seedling: 200–400 umol/m²/s).
- Find the fixture's published PPFD map for a tent size closest to yours. Check uniformity across the map, not just the center peak reading.
- Confirm the fixture's true watt draw (not "equivalent" wattage) and calculate your circuit capacity. A 20-amp, 120V circuit safely handles about 2,400W; don't stack fixtures beyond 80% of that.
- Check the driver brand and dimming interface. Prefer named drivers (Mean Well, Inventronics) and 0–10V control if you plan to use an environmental controller.
- Verify the spectrum: continuous white-based spectrum covering at least 400–700 nm, with far-red content (around 730 nm) if you want to maximize flowering performance.
- Confirm warranty length. Five years is the benchmark. Three years is acceptable for budget fixtures. Less than that, think carefully about total cost of ownership.
- Check for safety certifications (UL, ETL, DLC QPL listing). DLC-listed fixtures have met standardized ANSI/IES LM-79 photometric testing, which is a meaningful baseline for performance verification.
- Plan your ventilation. Even efficient LEDs add heat load. Budget for an inline fan sized to your tent volume plus 20% for heat from lights.
- Order a PAR meter or budget for a rental after installation. You cannot dial in your grow properly without measuring actual PPFD at canopy level.
The Rollitup standard, translated into plain terms, is this: don't trust wattage, verify PPFD, check the map for your specific space, demand a real warranty, and measure what's actually hitting your canopy. Every fixture recommendation you'll see in serious grow forums is being evaluated against those same criteria. Now you're using the same filter.
FAQ
If a light has a great PPFD map, does that mean I can rely on the numbers without measuring at canopy?
A safe rule is to compare the fixture’s published PPFD map to your exact tent dimensions and hang height, then assume real canopy PPFD can be lower if your room is darker or if the fixture sits closer to the manufacturer’s minimum spacing limits. If you plan to skip a PAR meter, choose a model with third-party style validation (for example LM-79 type reporting) and oversize slightly rather than relying on the brightest center reading.
How can I tell if the dimming will actually let me hit my target PPFD, not just adjust brightness?
Look for two separate things: whether the driver is dimmable and whether the PPFD map includes dimming percentages tied to your hang height. Many fixtures advertise dimming but only provide stepped control or use an imprecise brightness curve, so your “BOOST” or late-flower settings may not produce the intensity you expect.
Can I automate a Rollitup-style PPFD schedule with an environmental controller, and what compatibility details matter?
Yes, but only if the controller setup matches the fixture’s control interface. If the light supports 0–10V, confirm the controller outputs a true 0–10V analog signal (not a relay on/off) and that the fixture’s dimming range is specified for that control method. Otherwise you may get limited range or non-linear intensity changes across your ramp schedule.
When is it better to buy one larger light versus using multiple smaller fixtures for uniformity?
For a 2x2 or 2x4, a single strong fixture can work, but uniformity still depends on optics and layout. If your PPFD map shows a steep drop-off near the tent edges, consider raising canopy slightly, lowering intensity (via dimming), or choosing a bar-style layout that naturally spreads diodes across the footprint.
What spectrum details should I look for if I care about far-red and not just veg performance?
If your only spectrum spec is a couple of peak wavelengths or a generic “full spectrum” line, it’s harder to know far-red coverage around the ~730 nm region. Prefer a spectrum chart or stated continuous range, and if far-red matters to your cycle, look for explicit far-red supplementation or tunable channels rather than assuming every “white” light includes meaningful deep-red content.
Is it worth paying more for higher efficacy, or should I buy the cheapest fixture that covers the footprint?
Plan your budget around the fixture plus the real operating needs: cooling (if needed), electricity, and warranty support. If you expect multiple cycles per year, a higher-efficacy model can reduce electricity and HVAC load enough to matter, especially in warm climates or in tents with poor exhaust. A cheap fixture with lower umol/J can cost more over time even if the purchase price is lower.
How do I avoid the common mistake of buying a light that ends up too short once late-flower stretch happens?
Verify hang clearance twice: first against the fixture’s minimum hang requirement when at maximum output, then against how much vertical growth you’ll have in late flower. Also account for practical constraints, like keeping room for ducting, carbon filter placement, and leveling the tent frame if you’re using heavy bar arrays.
Why do my PAR meter readings differ from published PPFD maps, and how can I measure more consistently?
Expect variability from the PAR meter type, sensor calibration, cosine response, and where you measure (center vs corners, leaf height vs light-referenced plane). Use consistent measurement points and repeat measurements after any hang height or dimming change. If you do not have a meter, use the published map as a ceiling estimate, not a guarantee.
What warranty wording should I scrutinize so I’m protected if the driver or control components fail?
Insist on a warranty term that covers both the LEDs/array and the driver, not just the diodes. Also check what “from shipment” means (not install date), what conditions void coverage (like water exposure), and whether dimming/control components are included. A longer warranty is a good sign, but only if the scope matches the failure modes you’re worried about.
How can I reduce fan noise concerns with high-output LED fixtures?
Night noise can matter for bedrooms and day-night schedules. If the fixture is fan-cooled, look for specified fan noise (or user-reported dB levels) and consider whether the fan speed ramps with dimming, which can create audible changes during a PPFD schedule.
Next Articles
Best LED Grow Lights for High Yield: Buyer Guide
Buyer guide to the highest-yield LED grow lights, with PPFD coverage, spectrum, sizing, and setup tips for real harvest
Best Supplemental LED Grow Light: How to Choose the Right One
Choose the best supplemental LED grow light with coverage, PPFD targets, spectrum, efficiency, mounting and a shopping c
Best LED Grow Lights for Strawberries: Buy Guide
Choose the best LED grow lights for strawberries with coverage, intensity, spectrum, spacing, and setup tips to boost fr